The Vital Link between Aspect ratio and Impact Screen Size
Posted in Golf Impact Screens, Projectors
Your projector’s aspect ratio and your impact screen size are inseparable partners in creating a great golf simulator — get the pairing wrong and, trust me, it will bug you every single session.
In a Nutshell
Aspect ratio describes the proportional relationship between image width and height — 16:9 is wider and more cinematic, 4:3 is taller and more square. The rule of this whole article fits in one sentence: match your projector’s native ratio to your screen’s proportions, or pay for the mismatch in black bars, wasted screen, or a distorted image. Get it right and the image fills the screen edge to edge.
What’s new for 2026: the community has actually solved the hard parts — there’s now a corroborated buffer rule for sizing, a reliable GPU fix for mismatched ratios, and a much broader screen market to shop from.
In this guide: In a nutshell · Aspect ratio explained · Choosing your ratio · Size examples · Match the projector · Screen shopping 2026 · Screen sizing & safety · Retractables · FAQ
On mygolfsimulator.com you’ll find articles on all aspects of building a golf simulator. Some links may be affiliate links, meaning I earn a small commission at no extra cost to you — it genuinely helps the site. Thanks! — Alex @ MyGolfSimulator
Jargon, once: impact screen is the screen you hit into, which doubles as your projector’s canvas; native ratio is the shape your projector’s chip actually outputs; throw ratio is how far back your projector sits per foot of image width; keystone is digital geometry correction (convenient, costs sharpness).
| Ratio | Typical min size | Best for | Room requirement | Pros | Cons |
|---|---|---|---|---|---|
| 16:9 | 10′ × 5’8″ | 4K visuals, movie/gaming dual use | Wide rooms (14’+) | Matches modern projectors; most cinematic | Needs the most width |
| 16:10 | 10′ × 6’3″ | The sim-world middle ground | Medium-width rooms | Extra image height for flight; huge sim-screen availability | Slightly less standard for movies |
| 4:3 | 8′ × 6′ | Narrow rooms, tall image | Fits most home spaces | Best height-per-width; iPad-native | “Boxed in” for widescreen content |
| 1:1 | 8′ × 8′ | Compact/square bays | Small rooms | Maximum height | Rare; limited projector support |
The buffer rule (new, and corroborated): plan roughly 6 inches of clearance each side and 12 inches up top between the screen and your enclosure or ceiling — partly to shift the screen as needed, and partly so a topped wedge — a thin mishit that rockets up instead of forward — doesn’t meet bare ceiling.
👉 Bottom line — size DOWN the chain, in this order: total room space → inside the enclosure → impact screen area → projected image. It’s easy to shrink your image with projector settings, but very difficult to cut down a too-large impact screen after purchase.
What Is Aspect Ratio?
The relationship between width and height, nothing more. A square image is 1:1. A rectangle twice as wide as tall is 2:1 — which could be 16ft × 8ft or 14ft × 7ft; ratios scale. The four you’ll meet in simulator building are 16:9, 16:10, 4:3, and 1:1, and your room’s shape usually picks for you: height-limited rooms drift toward wide rectangles, width-limited rooms toward taller, squarer screens.
Choosing Your Ratio
16:9 is the modern default — it’s what 4K content, consoles, and most projectors natively speak. The catch is width: a full-size 16:9 screen at 16ft × 9ft gives you the cinematic feel, but 16ft of width is more than most garages or basements can comfortably provide. Shrink the screen and keep the ratio, or accept unused screen above and below the image — and it’ll bug you for as long as you have your simulator.
16:10 is the sim-world’s practical middle ground — and a ratio the screen market genuinely supports: Carl’s Place and SIGPRO both cut 16:10 in as many sizes as 16:9. It gives you a wider horizon and meaningful extra image height for ball flight, without 4:3’s boxed-in feel.
4:3 is the narrow-room champion: the most image height per foot of width, and the native shape of every iPad. Some golfers do find widescreen-era software like GSPro (one of the most popular golf-course simulation platforms) looks a little “boxed in” on 4:3 — a view plenty of golfers still hold.
1:1 maximizes height in genuinely square spaces — niche, but still catalogued (Carl’s and SIGPRO cut it in six sizes each). (It’s off the title of this guide only because few projectors support it natively.)
Dual-use rooms: if the simulator doubles as a movie or gaming room, 16:9 is the answer. It’s the standard for Full HD and 4K content, so films and games fill the screen with no stretching and no bars, and your space transforms from practice bay to movie theater or gaming den.
Size Examples by Ratio
The math, worked once so you can scale it (width × height):
| 16:9 | 16:10 | 4:3 | 1:1 |
|---|---|---|---|
| 10′ × 5’8″ | 10′ × 6’3″ | 8′ × 6′ | 8′ × 8′ |
| 12′ × 6’9″ | 12′ × 7’6″ | 10′ × 7’6″ | 9′ × 9′ |
| 14′ × 7’11” | 13′ × 8’2″ | 12′ × 9′ | 10′ × 10′ |
| 16′ × 9′ | 15.5′ × 9’8″ | 13′ × 9’9″ | — |
Divide width by the ratio (16÷9 = 1.78; 16÷10 = 1.6; 4÷3 = 1.33) to get height for any width your room allows.
Match the Projector — the Fixes That Actually Work
The core rule and the core fix. The sharpest image always comes from your projector’s native aspect ratio. So what do you do with, say, a native-16:9 projector and a 4:3 screen? Here’s the community’s now-standard fix:
- Physically position the projector so the 16:9 image fills your screen’s full height (image spilling off the sides is fine at this stage).
- Then define a custom GPU resolution matching your screen’s exact ratio — for a 1080p projector on a true 4:3 screen that’s 1440×1080; on 4K it’s 2880×2160. Your graphics card letterboxes the signal perfectly instead of the projector stretching it.
- The free tool most people use for step 2 is CRU (Custom Resolution Utility); NVIDIA/AMD control panels can also define custom resolutions.
The result: every pixel lands on screen, nothing stretches, and you’ve spent $0.
Other fixes, quickly:
- Keystone fills left-to-right fast and leaves space above and below — a real fix for fit, but not for quality: it’s a digital correction, so it can soften the image. Use it to rescue a setup that’s otherwise unworkable, not as your first choice.
- Use a real throw calculator, not AI guidance. One builder learned this the hard way: following AI-generated throw-distance guidance for a 4:3 screen led to overshoot and dead space. ProjectorCentral’s calculator remains the right tool for this.
- iPads are 4:3. Connect an iPad-driven launch-monitor setup (SkyTrak-class, R10, MLM2PRO) to a projector and the shapes matter: set the projector to 4:3 and the image matches exactly; leave it at 16:9 and everything stretches wide. Keep your projector and device on the same aspect ratio whenever possible — it avoids black bars and stretched images.
Stop — consider your projector throw ratio too! You can’t plan the perfect screen and forget where the projector lives. How far back will it sit? What throw ratio does that demand? Floor enclosure or ceiling mount? Answer those before buying the screen — a mistake here risks a screen that’s too big, or worse, too small for the image you can actually project. 4K Golf Simulator Projectors – Complete 2025 Guide
Screen Shopping in 2026 — the Product Matrix
The market is far broader than one vendor now. Sizes and specs below are from current manufacturer materials (blank = not published); prices are dated sightings, not quotes.
| Brand / line | Ratios & sizes | Notable spec | Price sighting (Aug 2026) |
|---|---|---|---|
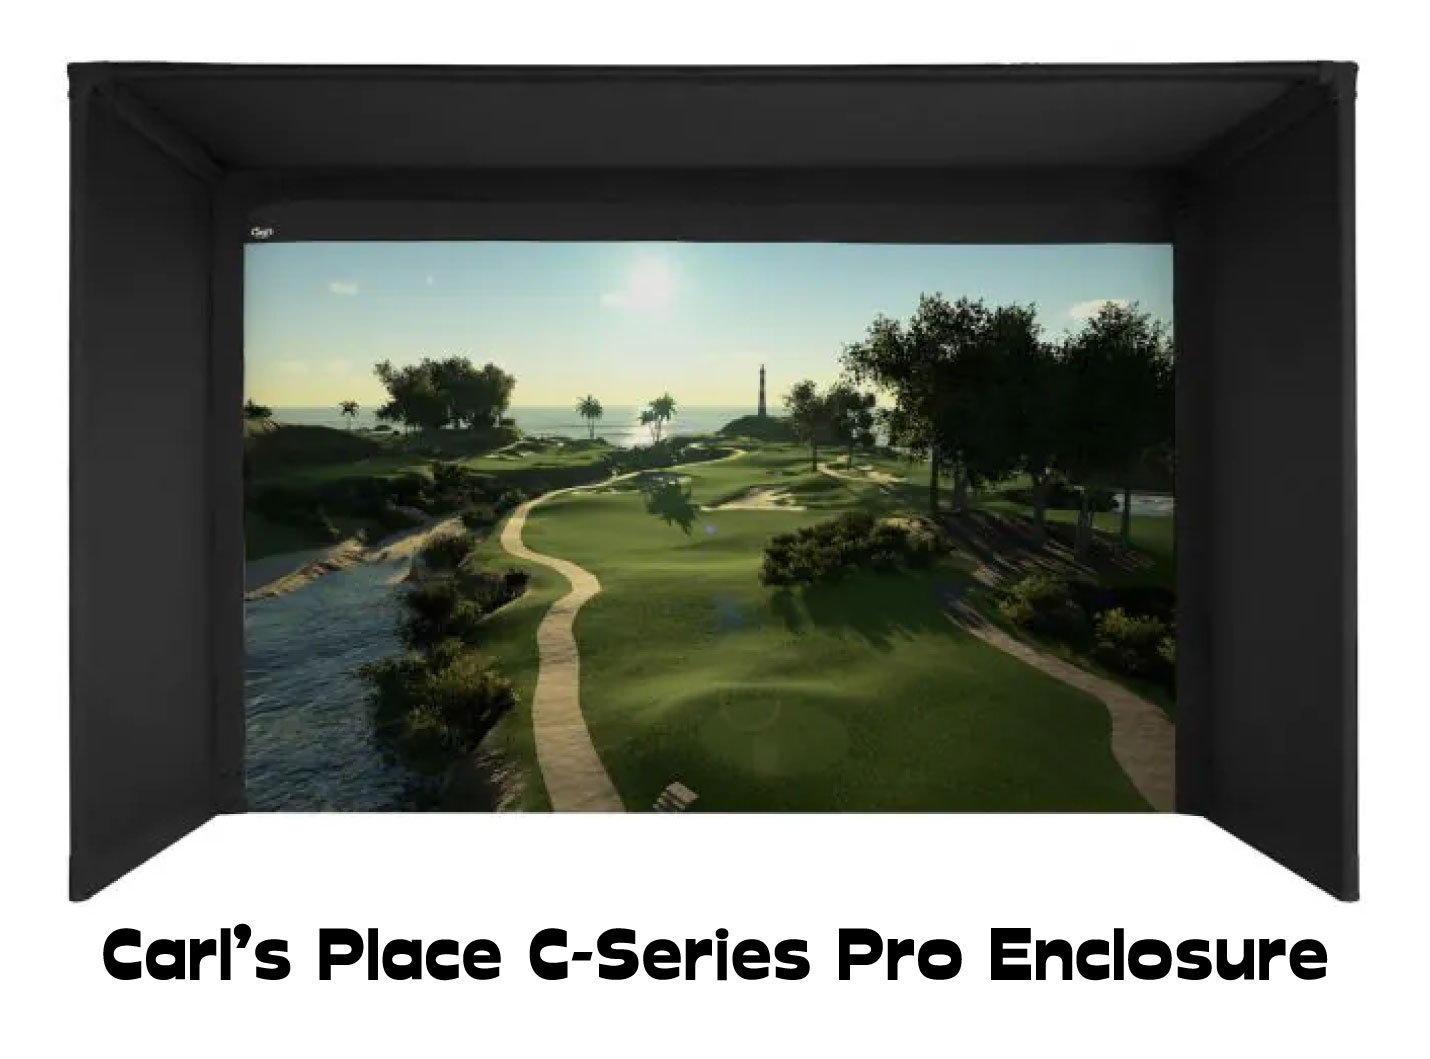
| Carl’s Place (Standard / Preferred / Premium / Gray) | 1:1, 4:3, 16:10, 16:9 — six sizes each, plus five non-standard sizes; heights 7’8″–10′, widths to 17’7″ | Same size chart across all four; Standard/Preferred/Premium differ by construction — Gray is Premium’s fabric dyed, not a separate tier | Premium 16×9 ~$900; 10×10 $250; 7.5×13 clearance $200 |
| SIGPRO Premium | Same four ratio families, six sizes each (24 options), 7’7″×7’7″ to 10’×17’6″ | Edge-to-edge finished measurements | — |
| ProScreens | HD: one size (10’×8′); Premium: four sizes 8×9 to 9×14 | No central catalog — listings-based | — |
| Cimarron | 10’×10′ only | Single fixed size | — |
| SportScreen Vanish (retractable) | Five fixed models: 1:1, 4:3 ×2, 16:9 ×2; custom to 16′ wide | Motorized or hand-crank retractable; per-model room requirements published | — |
| HomeCourse Pro (retractable) | 8’×8′ single size | Ceiling/wall-mounted retractable (portable rack sold separately) | — |
| Raw screen material | Cut-to-size | DIY route | 120″×144″ poly-spacer $297 |
Carl’s ordering flow is still the clearest in the business: pick a ratio, and it shows total and viewable dimensions per size — hard to beat for clarity with these measurements. One flag for balance: an August claim that these screens “all come from the same factory in China” and differ only in finishing came from a commenter who sells enclosures — a commercial interest, and unverified. The published material specs and the finishing quality you can see outweigh that theory.
Screen Sizing Meets Safety
👉 The buffer rule above is also your safety margin. The space around the screen is where mishits go, so containment matters as much as fit. Distance compounds it: hitting from very short tee-to-screen range accelerates screen wear (one owner’s screen wore clean through within two years at very short range) and shrinks your margin at driver speeds. The full distance treatment lives in Tee to Screen Distance in a Golf Simulator – 2025 Update!; screen care — tensioning, wrinkles, cleaning — deserves its own guide rather than a paragraph here.
Retractable Screens
Retractable impact screens have matured into a real category, running from a sub-$100 fully-manual DIY (a 2×4 roller and a bungee — “I’ve been using it for years and it works great,” per one builder) to ~$1,600 motorized systems (a Metech-style roller paired with a Carl’s screen panel; both figures Aug 2026 sightings). Owners of big retractables keep reporting a welcome bonus: near-zero bounce-back — “there is no bounce back the screen just eats it,” corroborated across threads. For garage bays where the car still parks, this category pairs naturally with everything in my garage guide. Garage Golf Simulator – 13 Key Challenges + Tips & Tricks
FAQ
(Marked ✦ where the question comes straight from owner discussions; the rest are the questions this page exists to answer.)
✦ What size screen should I buy for my room?
Work the chain: room → enclosure → screen → image, with the 6″/12″ buffer. Then pick the largest ratio-correct size that fits — the tables above scale the math.
Best ratio for a narrow room?
4:3 (or 1:1 in a truly square bay) — maximum image height per foot of width, and the offset-hitting tricks in my space guide pair well with it.
✦ My projector is 16:9 and my screen is 4:3 — now what?
The custom-resolution fix: fill the screen height physically, then set 1440×1080 (1080p) or 2880×2160 (4K) on the GPU. It’s the community’s go-to fix, and it costs nothing.
✦ How far from the screen should I hit?
Roughly 7–10ft is the balanced norm — it’s the range owners land on again and again. Shorter works with ball-side launch monitors, but it accelerates screen wear and trims your safety margin.
✦ Can a ball sneak through the gap on a retractable screen?
It’s the question owners ask most about retractables. Fixed-frame screens with side netting contain best; retractable owners solve edges with side barriers and sensible aim — and the big-screen “eats it” bounce-back behavior helps more than you’d guess.
Do black bars actually hurt anything?
No — unused screen is wasted immersion, not damage. But since the custom-resolution fix eliminates most mismatches for free, there’s rarely a reason to live with them.
Are expensive screens worth it?
The grades buy material layers (quieter impact, less bleed-through, longer life) — and the used/clearance market ($200–250 sightings above) makes premium panels reachable. Match the grade to your ball speed and volume.
Final Thoughts
To recap, ask yourself:
- What’s the maximum usable space — width, height, and depth?
- What type of setup are you building — simple net, or full projector immersion?
- Will the room double for movies or gaming, where ratio matters even more?
- Do you want the image to completely fill the screen, or can you live with some unused space?
Answer those, size down the chain, run the throw calculator, and buy the buffer. Even mid-build, these principles retrofit fine — the custom-resolution fix alone rescues most “wrong projector” purchases.
Both Carl’s Place and SIGPRO let you buy by aspect ratio, which is exactly how this article hopes you’ll now think.
Thanks for reading — and may your image fill your screen, edge to edge.
Mevo Gen 2 Space Requirements
Gray Impact Screens – Pros and Cons
ABOUT THE AUTHOR
Hello! My name is Alex and it is my mission to bring you all the information you need to build your own home golf simulator! I hope mygolfsimulator.com helps you on your journey to better golf at home!
LEGAL INFORMATION
On this site, you'll find articles on all aspects of building a golf simulator. I will also link to other sites where you can buy some of the simulator components. Some of these links may be affiliate links, which means if you click them I gain a small commission at no extra cost to you. This really helps out me and my site so thank you in advance! mygolfsimulator.com and all related social media accounts are property of Awonline LTD.