How to Build a DIY Golf Simulator Enclosure – Steps, Tools, Costs + Materials
SHARE
Posted in Room Setup, Enclosures, Your Swing Studio
Golf simulator enclosures are the framework within which a golf simulator is built. They provide protection and structure to your simulator build. They have to look good and ideally won’t cost a fortune either. Many golfers choose to build a DIY golf simulator enclosure at home. This article will explain all you need to know about building a DIY golf simulator enclosure at home.
A DIY golf simulator enclosure can be made at home by most golfers, using materials including metal piping, netting or blackout fabric, and corner fixings. Costs can be minimized to as little as $400 if all parts are locally bought. Tools including a metal saw and safety equipment may be required.
If you’d like the best value ready-to-build enclosure package on the market (avoiding the need to cut down any metal piping) you can’t go wrong with the DIY Golf Enclosure from Carl’s Place.
This is an in-depth article will explain the tools and materials needed to build a home golf simulator enclosure, with key considerations, planning tips, and pitfalls to avoid. Use the Table of Contents to jump to sections that interest you.
DIY Golf Simulator Enclosure – Materials and Estimated Costs
What materials and equipment do I need to build a DIY golf simulator enclosure?
To make a fully DIY golf simulator enclosure at home, you will need the following materials and equipment:
- Lengths of metal pipe to act as the frame of your enclosure (see below for how to measure your enclosure frame lengths)
- 6 corner connectors
- Choose either netting or blackout fabric for the sides of your enclosure. You could use both for added protection against balls flying through the enclosure and causing damage to your room. I prefer blackout fabric. You could use neither, opting for a open enclosure setup with foam panels to protect your walls and ceiling as we talk about below.
- Tools as listed below
- Impact Screen and appropriate attachments or fixings (for example bungees).
What tools do I need to build a DIY golf simulator enclosure at home?
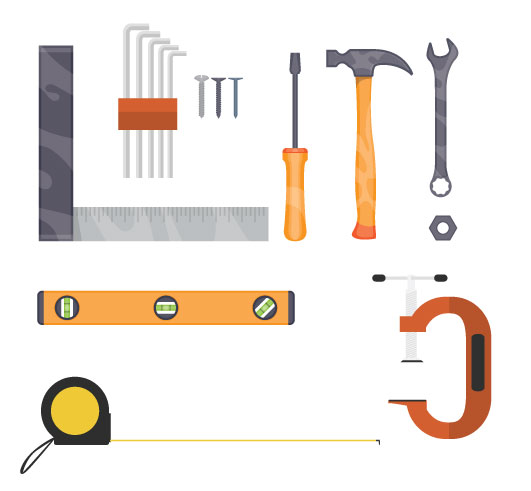
You will need to use the following tools in order to build your golf simulator enclosure (not all of these tools are needed in every enclosure build, this depends on where you buy your materials):
- Pencil, tape measure and paper
- You will usually use a rigid frame built from lengths of metal piping. This may be aluminium or similar lightweight metal. Sometimes, electric conduit piping is used. Some vendors sell (and ship) the metal piping with an enclosure package, some will require you to source the metal pipes yourself (we’ll come on to this later).
- An electric saw capable of cutting metal. You will only require a saw if using a metal frame and if you need to alter the lengths of metal piping after delivery – sometimes the piping will be shipped ready to build in a pre-defined size – which is great!
- Also note that you may be able to avoid using a metal saw, by using a handheld tool called a pipe-cutter. It can be hard to achieve a clean cut using this method though.
- A tool for tightening joints in your frame, this could be a spanner or wrench, or a drill or screwdriver, and you may need appropriate screws.
- You may use a straight edge, set square or spirit level to check everything is nice and geometric.
- Bungees or zip ties for attaching your impact screen to your enclosure
- You may need staples or other fixings when working with netting or fabric for your enclosure sides.
- Safety equipment – I really recommend being stringent with safety procedures when building a golf simulator enclosure. You simply must use eye protection when operating a metal saw, and I recommend ear protection too. You should have a fixed-position bench with clamps in order to hold your materials in place when using tools.


How are the metal pipes in a golf simulator enclosure actually put together?
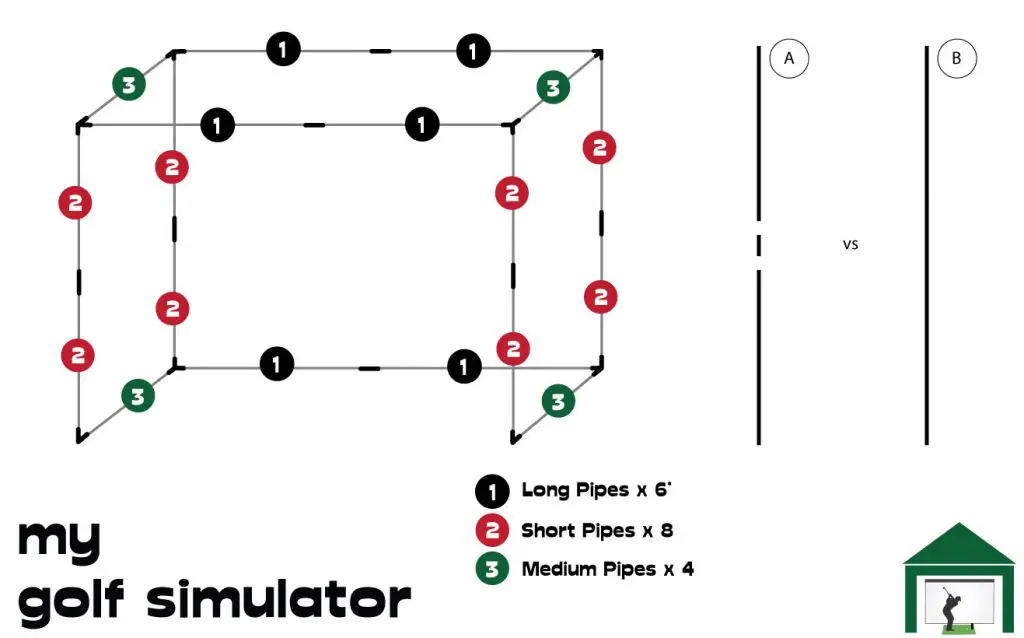
Your golf enclosure frame is usually constructed in a setup similar to the diagram above. There is a rectangular frame with a pre-defined width (represented by the long pipes #1), height (short pipes #2), and depth (medium pipes #3).
Most of the time, ready-to-build golf simulator packages will be shipped with shorter pipes that need to be joined in the middle of each side with a coupler (example A above). This allows much easier shipping because posting two 7ft lengths of pipe is a lot cheaper and easier than shipping one length of 14ft (example B).
If you buy your metal pipe locally, for example from an electric supplies company as I did, you may buy longer lengths of pipe that you can use for the width of the frame (pipes #1 above).
What about the bottom-front and top-front metal pipes?
Your enclosure will often have a missing bottom-front pipe to allow your golf mat and hitting area to sit beneath the front of the frame. Occasionally, you may choose not to use the above-front pipe pieces to allow for more height within which to swing the club. It’s always important to consider the height of your enclosure within the ceiling height considerations in the room in general.
I would expect the frame would continue to have adequate structural integrity without the front pipe pieces attached, but if you find removing them makes your frame a bit flimsy, you could consider fixing the whole frame to the floor, wall, or ceiling for added peace of mind.
What about the Walls and Ceiling of my Golf Simulator Enclosure? – Netting, Fabric or Foam Panels?
You have a decision to make on which material to feature as the walls and ceiling of your golf simulator enclosure. To decide, consider the aesthetics and which you think looks best, the total space available, and the level of protection you require for people and objects in the golf simulator room.
Do you even need an enclosure in your golf simulator?
An enclosure constructed with a metal frame is not a necessity in a golf simulator, you could opt for a more open setup with adequate wall and ceiling protection.
Many golf simulators feature a large impact screen and walls constructed with foam panels that absorb any stray shots, without the need for a metal frame. These setups can really maximize the available space in your golf simulator room, and if planned effectively, can look amazing!
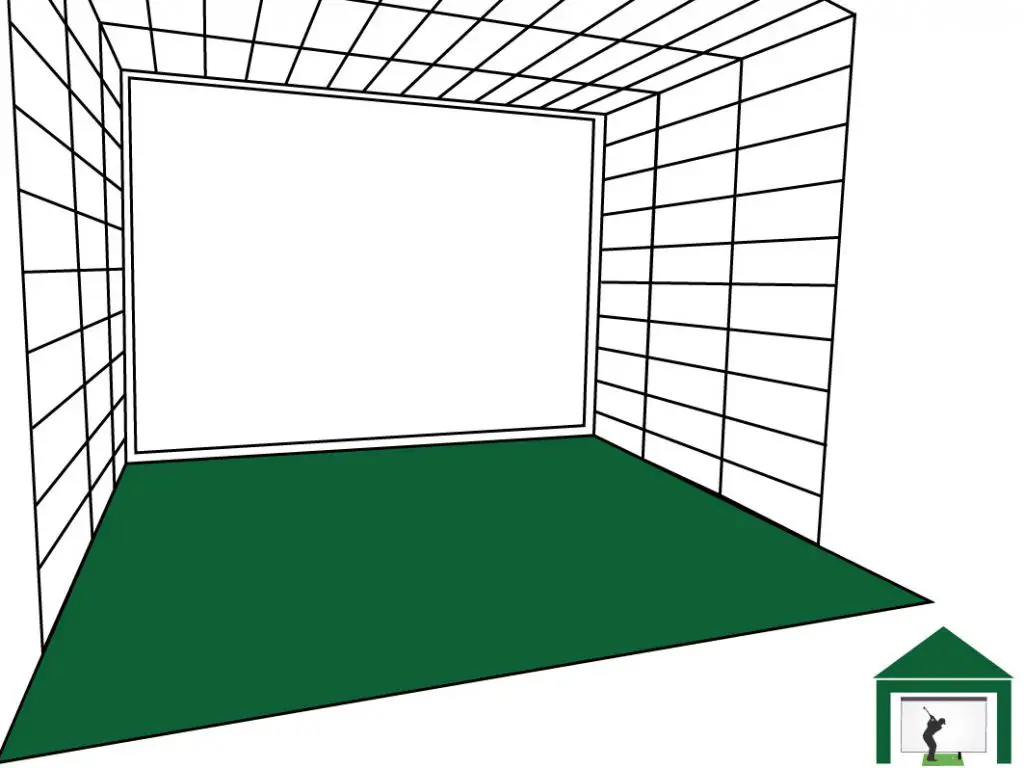
It’s important from a safety perspective to ensure that there are no other room features or activities going on between the golfer and the screen in a setup like this. We talk more about this type of setup in the section on costs of enclosures, option 2.
How much DIY skill do I need to build a golf simulator enclosure?
I think the vast majority of golfers will be able to have a good go at building their own golf simulator enclosure, allowing for any physical difficulties. The hardest and most intimidating step will be using the metal saw to cut your frame pipes to size.
You need to plan your enclosure in detail before buying the materials, including precise measurements. This involves spending time with a tape measure, pencil and paper before plunging in. Some golfers may be less inclined for detailed planning than others, but taking this time to nail down your measurements is important.
If you’re not confident using the tools required or getting the measurements right, you may have a close friend or family member who can help you, maybe with the promise of simulator time privileges and drinks once the build is finished!
6 Steps to Build a DIY Golf Simulator Enclosure
Step 1 – Measure your Room and Plan your Simulator
Planning a golf simulator room requires time, research, and quite a bit of thought. There are so many things to think about. Your golf simulator enclosure needs to fit the available space, be aesthetically pleasing, be safe to use and it needs to match the needs of the golfer and the technical specifications of the launch monitor and projector choices.
Before you set out buying enclosures and metal pipes, ensure you’ve decided firm answers to the following questions:
- How much space do I have? Will you use the entire space for the simulator enclosure or do you have to house other objects in the room?
- Do I want a closed-frame enclosure, or an open setup with wall and ceiling protection?
- What is the rough budget for the enclosure materials?
- What’s my DIY skill? Do I want a ready-to-build enclosure package at perhaps higher cost, or a cheaper DIY solution with locally sourced and cut down lengths of metal pipe for the frame?
- Where is my hitting position? – I always recommend working this out early as it has implications for all the other elements in your simulator.
- Which launch monitor do I intend to use? Will my space and my potential enclosure choice match the space requirements of the launch monitor?
- Which projector will I use and where do I intend to mount it? This could be a ceiling mounted projector, floor mount or even hung down from the enclosure frame. It’s worth thinking about when considering your enclosure choice.
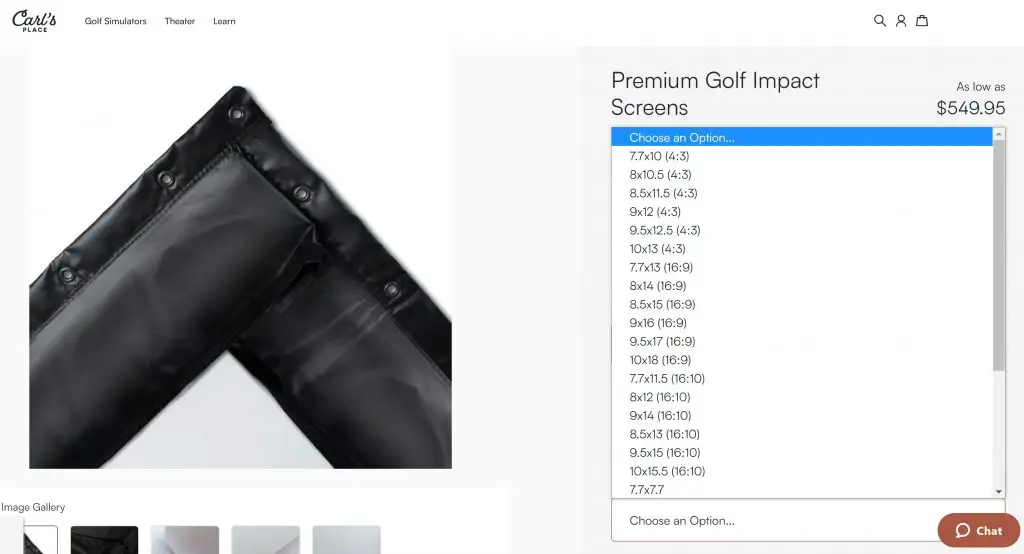
- Choose your impact screen. You’ll need a screen that matches the sizing and aspect ratio of your screen. I recommend buying your impact screen and enclosure together as one purchase, as you have the highest chance of getting the sizes a perfect match this way.
- Carl’s Place allows you to add an impact screen to an enclosure package with very clear sizing instructions and detailed sizing information (including total viewing area, impact screen border and other measurements).
Once you’ve thought about and answered these questions, you should be able to make a much more informed decision about the enclosure you need to build.
Check out my detailed articles about the sizing considerations when planning a golf simulator. This includes how much space you need for a golf simulator, as well as golf simulator room ceiling height and tee-to-screen distance.
You will also find articles on the site about the space requirements for a wide range of launch monitors and the relationship with aspect ratio, size, and your impact screen.
Consider also, the space in which you’re planning your simulator. There may be specific heating, lighting, audio, and electrical considerations, and this depends on whether it’s a space within the home, garage, basement, or outside in a shed.
Step 2 – Buy your materials and then cut your frame to size
So, now you’ll need to buy either a ready-to-build enclosure package such as the Carl’s Place DIY Enclosure or make plans to buy your equipment from different sources.
I built my first ever golf simulator enclosure in a very DIY manner, sourcing metal electrical conduit pipe from a local electrical supplies business. I then bought a large roll of black fabric from Amazon and a roll of bird netting. Bungees and zip ties were sources on Ebay.
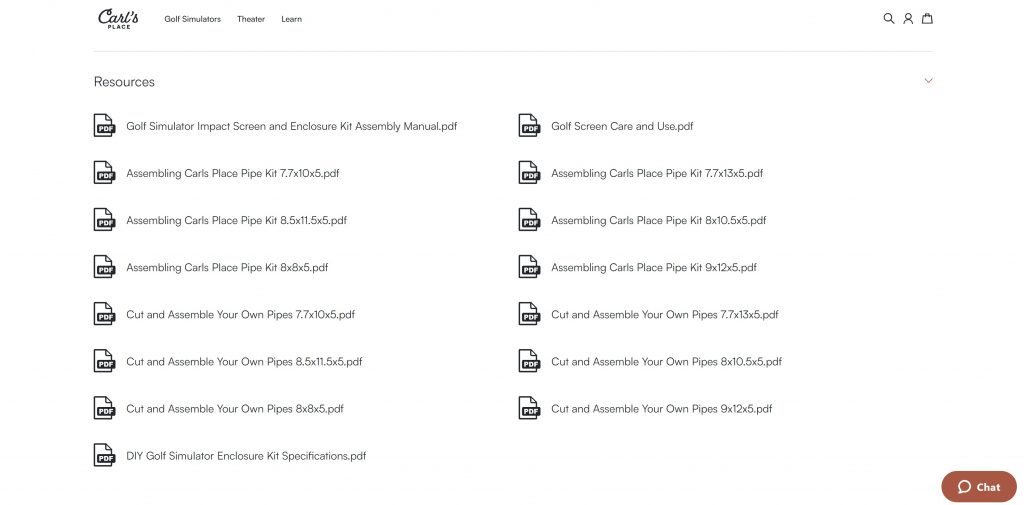
Carl’s Place gives you the option to purchase a pipe framing kit with your enclosure, or to source your own. They also give you instructions on how to assemble the enclosure frame with either their metal frame or by cutting down your own pipes. This is super helpful!
You’ll need to cut your pipes down to sizes relating to the numbered diagram above. You’ll need lengths split into the three groups 1, 2 and 3, which represent the width, length, and depth of the enclosure.
Consider whether your corner and mid-length connectors will have any gaps between the joined lengths of pipe, as this will add a little bit of length to that side of the enclosure. This has been accounted for in the majority of pre-designed enclosures.
…
Step 3 – Lay out your equipment and then build your outer frame
I would recommend laying out all your equipment before starting your build. You’ll be able to see and plan out each stage of the construction and check whether anything is missing.
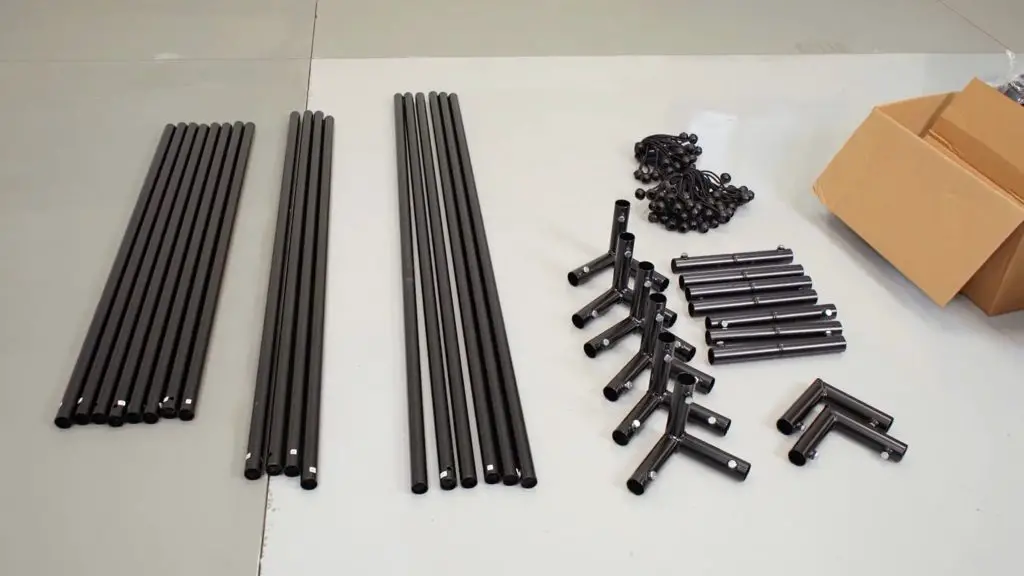
Place each length of pipe into the corresponding corner connector or mid-length connector and tighten the nut, be careful not to tighten it over-tight. Some enclosure packages will require screws rather than nuts and bolts, some will just fit into the connectors rather than being fixed or screwed in.
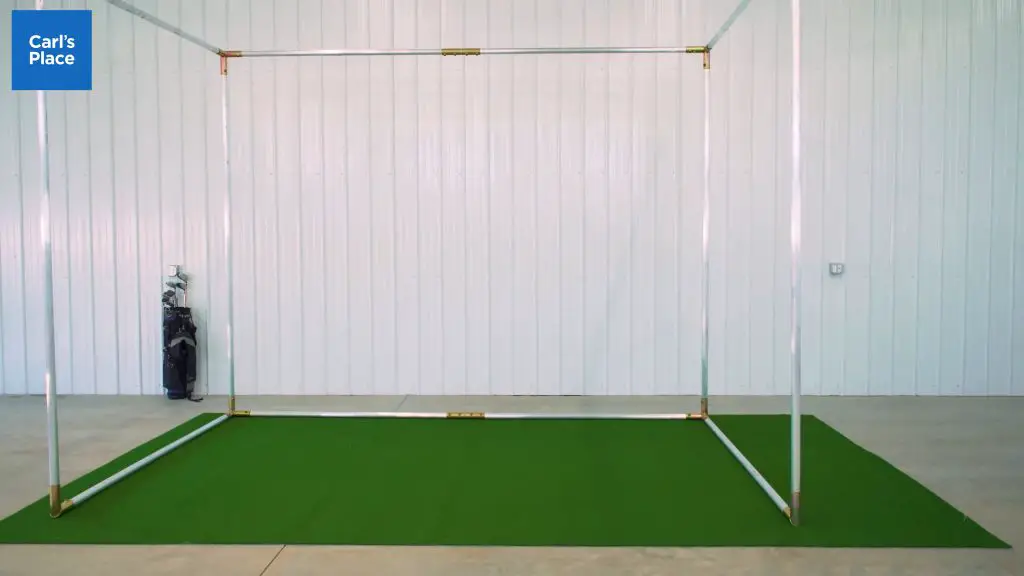
Make sure you measure your total enclosure frame once it’s built to see if it matches what you are expecting. If it does not then the lengths of pipe may have been out, or there’s a mismatch caused by using couplers and connectors.
Step 4 – Attach your Impact Screen to your Frame
Now it’s time to attach your impact screen to your frame.
If you have purchased your impact screen alongside your enclosure, you shouldn’t run into any problems with mismatched sizes or aspect ratios (see the section in Tips and Considerations below).
The ideal scenario is you have an impact screen that is hung with balanced tension on each side of the screen.
You should avoid hanging your screen too lightly, which maximizes bounceback protection but leads to puckering or folds in the screen which hampers image quality. Similarly, you should avoid attaching the screen to the frame with too much tension, where you will find less puckering and more bounceback issues.
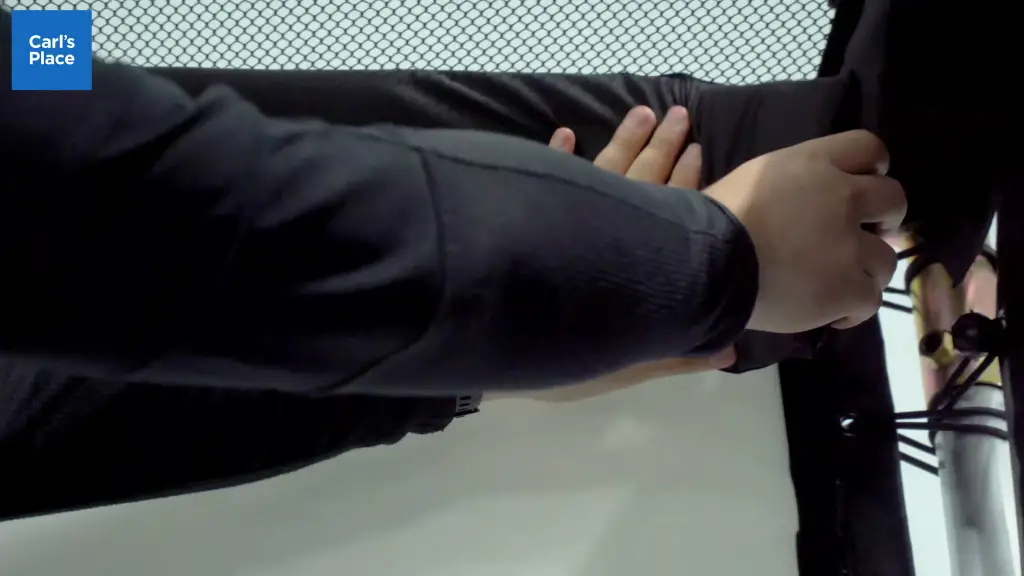
The best way to get this right is to use adjustable fixings, so if you over-tighten one of the fixings you can just alter the tension without having to cut and discard it. This is where bungees come in, which you can see in the above and below images from Carl’s enclosure.
Of course, your screen will require eyelets in order to accommodate these and most other fixing options. You can buy impact screens with only raw material and no eyelets but I don’t recommend doing this.
Check out my in-depth posts on Minimizing Bounceback and Hanging an Impact Screen here.
Step 5 – Add your Netting, Blackout Fabric or Foam Panels
Staples can be used to neatly attach various types of fabric, such as curtain fabric, nylon, or polyester around your frame. You are always best off going for a thick black fabric that blocks large amounts of ambient light bathing your screen and washing out your projected image.
Blackout fabric used in golf enclosure packages like Carl’s DIY enclosure are usually secured using velcro or sometimes clips and bungees. Packages such as these will come with just the right amount of fabric, which is measured for the frame size. Watch the video below of how to build the Carl’s DIY enclosure to see this in detail.
DIY Options for thick black fabric include photographer’s cloth, mesh tarps, curtain fabric or other cloth bought from a textile firm. It’s harder to attach these types of cloth as they don’t come with eyelets for attaching clips or bungees. You could sew on your own velcro strips or use staples.
Carl’s Place has launched a range of golf simulator curtains! Available at differing lengths depending on your room height, these curtains will be perfect for any retractable or semi-permanent as well as permanent setup.
Many golfers who opt to make their enclosure frames at home opt for fabric sides hung on curtain rails. This gives the option of moving the enclosure sides back towards the impact screen and opening up the space when the simulator is not in use. Depending on how much fabric is used, there would be various levels of puckering in the curtains.
Be careful with fabrics that could present a fire hazard if hit with a spark.
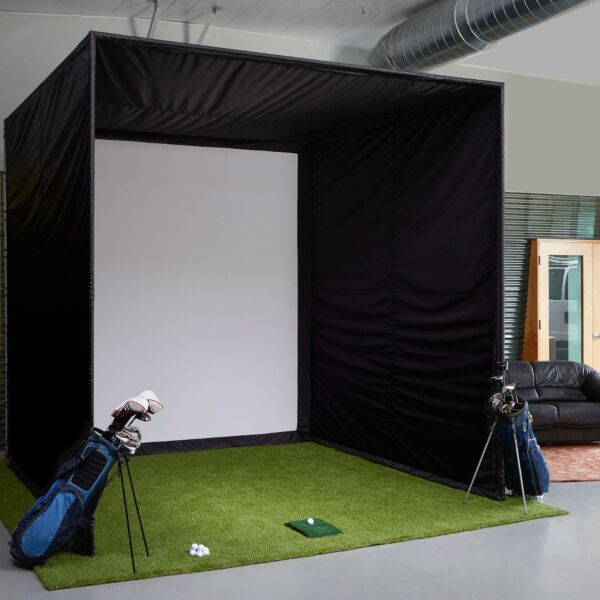
Try and attach your fabric (or netting) with an equal amount of tension on all sides. Similar to the process when hanging an impact screen, too little tension and the fabric will be loose and pucker and look sub-par. Too much tension and you increase the chances of the ball going through the fabric on a stray shot.
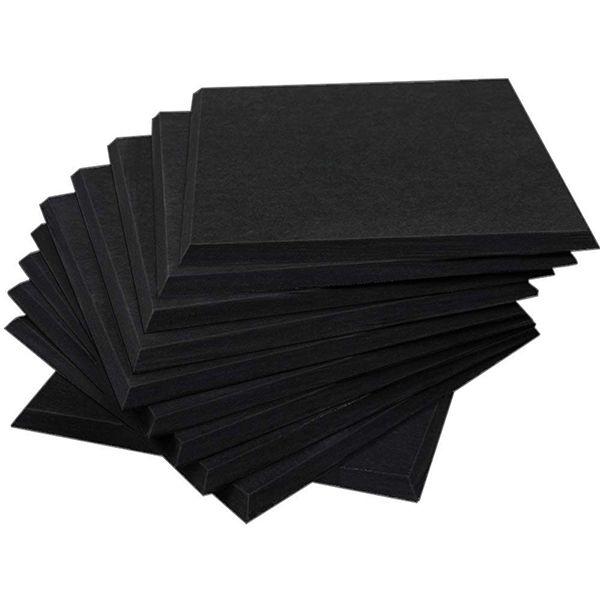
Foam Panels would be attached to walls and ceilings with an adhesive, which doesn’t have to damage the underlying surface. The acoustic foam panels supplied by Rain or Shine Golf come with double-sided tape which keeps the panels in place.
Step 6 – Add your Finishing Touches
Now your golf simulator enclosure is built and ready to go. It’s time to add any finishing touches such as foam inserts to protect the enclosure frame around the edge of the screen, safety baffles, or perhaps some subtle LED lighting.
You can get on with adding the final decoration pieces to your golf simulator room too, who doesn’t want a big Masters mural in their golf room?
Once you’re set up and using your golf simulator, if something isn’t working with your enclosure, it can always be revisited and revised.
Watch a Golf Simulator Enclosure being Built
This is a Carl’s Place DIY Golf Enclosure being constructed, if you buy this enclosure from Carl’s, you can follow along during your own build.
10 Tips and Key Considerations when building a Golf Simulator Enclosure
Size of Simulator Space & Impact Screen
Decide early whether you’re going to use your space solely for a golf simulator or whether you need to house other items. This may be the case if you use your garage or tool shed.
This decision will be important when considering whether you ever need to disassemble and rebuild your simulator enclosure, and thinking about safety in your space as well as things like heating, lighting, power, and security.
When using a metal frame, you will almost always require more room space than the listed height and width of the enclosure frame itself. At some stage you’ll need to get behind the enclosure and you won’t want to take it apart to do so.
I recommend opting for the largest impact screen that your space will allow. You want to minimize any wasted space (but allow the ability to get behind the structure) by matching the aspect ratio of your impact screen, golf enclosure, and projected image.
Aspect Ratio applies just as much to Enclosure Frames as it does to Impact Screens
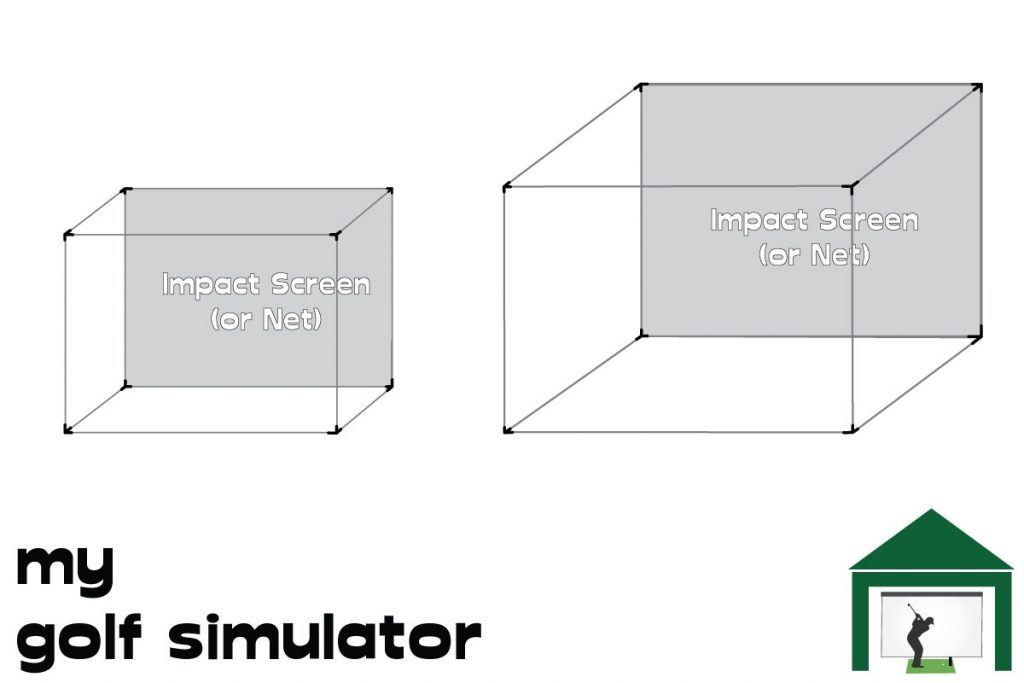
It is vital to match the aspect ratio of your impact screen and projected image with the width and height of your golf simulator enclosure. All three must be in sync.
For example, you should order an enclosure that is just larger than the screen and has the same aspect ratio. This may be 16:9 for wider rooms or perhaps 4:3 for those with narrow spaces.
I recommend aiming for an enclosure that is 6 inches taller and wider than your screen, giving you 3 inches on each side to allow for fixing the screen and any foam inserts to be applied.
You should strive for an even border between enclosure and screen all the way around and allow maximum room for the viewable area of your screen. Bigger projected images allow for a more realistic golf simulator experience.
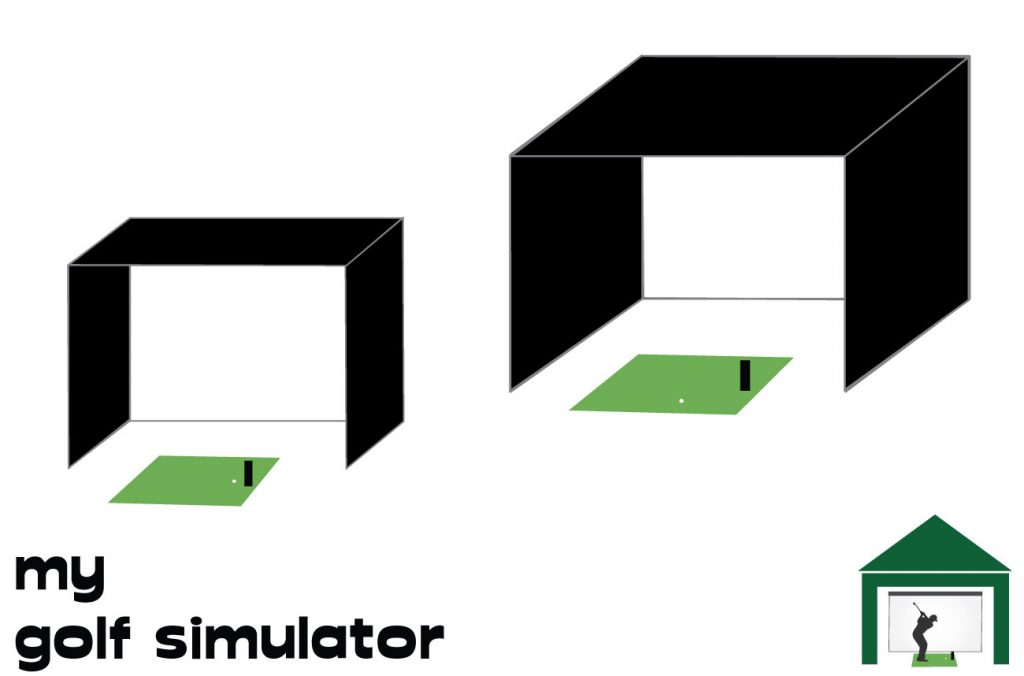
A mismatched aspect ratio could mean that you’re struggling to attach the impact screen to the enclosure frame on one side, like in the diagram below and right.
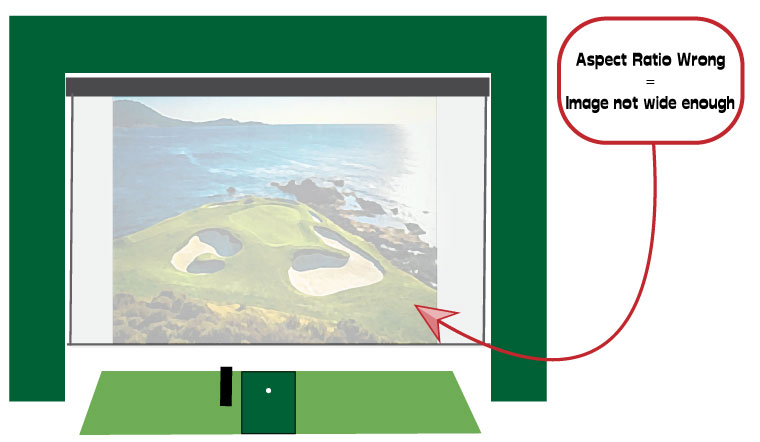
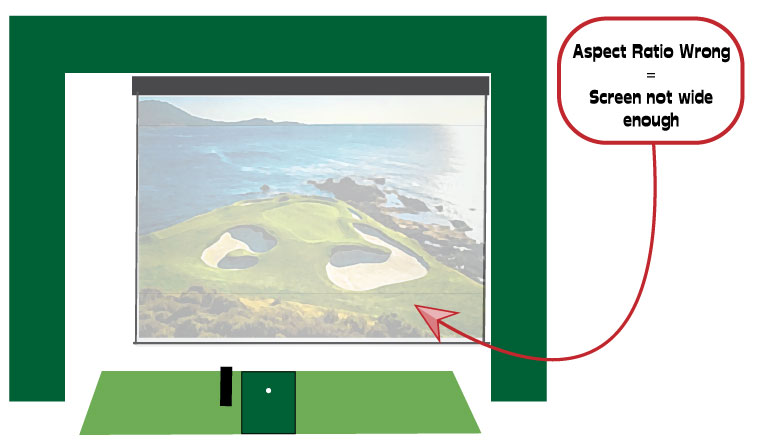
Check out my in-depth guide to aspect ratios and impact screen size here.
Carl’s Place is super helpful for golfers planning out their golf simulator enclosure and screen setup. You can order each screen and enclosure size based upon pre-defined aspect ratios.
Carl’s also lets you check the exact measurements of the total screen area, the border with eyelets for fixing the screen, and the viewable impact screen itself.
Golf Simulator Enclosure Depth
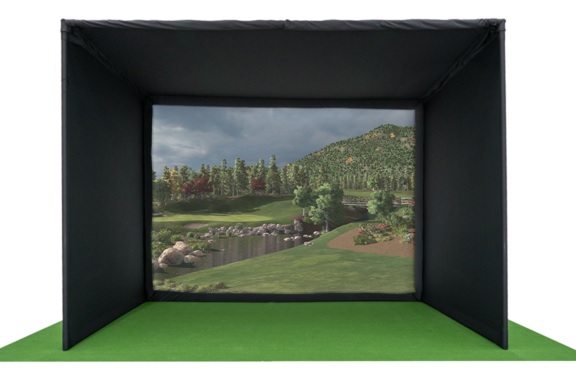
Enclosure depth is a matter of personal preference. Deeper enclosures will require longer pipes, more side material and hence will be more expensive. They will also, of course, require more space.
You would expect a deeper enclosure to be safer than a shallow build, with less chance of shanked shots firing out sideways away from the safety of your net, fabric, or foam walls.
Consider whether you want to push for maximum immersion in your golf simulator, with optimum lighting and brightness from your projector. Deep enclosures tend to lend themselves to more immersive setups I find.
Carl’s Pro Enclosure features options for much deeper enclosures to be built. Take a look here.
How frequently do you need to assemble and disassemble your golf simulator enclosure?
Do you ever envisage having to disassemble your golf simulator? You may occasionally need the space for an extra car in the garage, or other large items to be stored in your space. If this is the case, try and consider how regularly an occurrence this will be.
Alternatively, you might be constructing a golf simulator build that will exist in the same place for many years and not be taken down.
If you don’t plan on removing your simulator for any reason, then you could well go for a DIY setup with little care taken to potential disassembly and storage of parts. Those planning to take down their simulator enclosure should consider a ready-to-build frame which can then be stored away.
You can see in the Carl’s Assembly Video above that it only takes a short time to assemble the frame. Learning the methods of putting up and taking down your enclosure frame quickly can help a lot.
If you need to share your space with vehicles or other things and disassemble your simulator enclosure very frequently you could consider a retractable screen setup, though I find they’re often quite expensive and you would still need some netting or other means of protecting your walls and ceiling.
Where you’ll mount your projector and why this matters for your enclosure
Anyone aiming to feature a projected image in their golf simulator will encounter the headache of where to mount the projector in relation to the screen and the hitting area. You need to avoid shadows being projected on the screen but also avoid striking the projector with your swing or golf club.
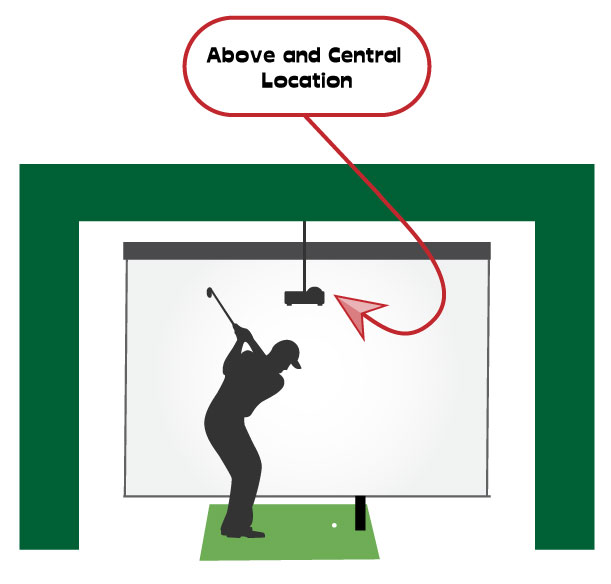
You will need to match the throw ratio of the projector, with the distance from the screen, and the aspect ratio of the projected image. Most premium short-throw projectors used in golf simulators can project in the common aspect ratios of 16:9 and 4:3 (changeable in the projector settings).
Your projector position choice should be considered alongside your golf enclosure, because you may choose to mount the projector to the enclosure itself. Alternatively, you’ll have to think about the position of the enclosure frame if you mount the projector on the room ceiling.
Check out my in-depth articles on where to mount your golf simulator projector, floor-mounted projectors, and projector throw ratios here.
Do you need mounts hung from the top of your enclosure?
You may choose to mount your projector or launch monitor (if going for Uneekor or GC Hawk) from your enclosure frame. If this is the case, you can buy specific mounts for the launch monitors or universal projector mounts that should fit the majority of models.
You may need to buy a component that allows fixation to a metal cylinder (the pipes are usually 1 inch in diameter – check the width of your pipes if you’re doing this) rather than a flat surface.
If mounting a launch monitor from your golf simulator enclosure, you’ll still need to satisfy the height requirement of the system (eg 9-10ft for Uneekor Eye XO).
Bounceback and Ricochet Protection from the Enclosure Frame
I always recommend opting for extra protection against violent ricochet or bounceback from the golf simulator enclosure itself. If your golf ball strikes the metal frame of your enclosure it could fire back in any direction at high speed (there is no cushioning effect when striking metal, compared with impacting a fabric screen).
This is not only dangerous for the golfer but any friends or family members, including children, in the room at the time. It’s also dangerous for your expensive simulator equipment too.
You could wrap the enclosure frame in foam pipe insulation. This is inexpensive but can look cheap if you’re not careful. A black color can look better than most.
I like the foam panel inserts available as an add-on with Carl’s Place enclosures, they look great because they frame the impact screen beautifully and hide the untidy bits of the enclosure. They also cushion the ball and provide lots of bounceback protection.
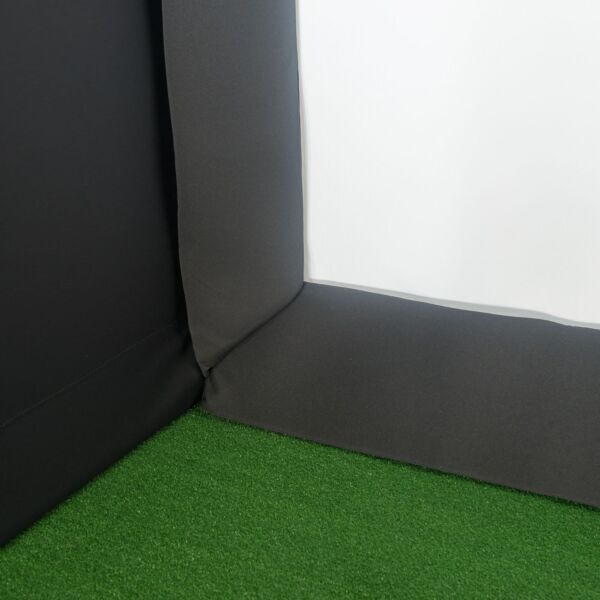
You should also aim to match the tension in the bungees or other attachments used between your enclosure and screen, and think about your flooring choice in order to reduce bounceback. Check out my in-depth guide on minimizing bounceback in a golf simulator here.
What about the bottom of the screen?
I’ve had some golfers ask me about the bottom of their impact screen, the enclosure and how to ensure the projected image meets the ground.
I’ve never felt it’s imperative to have the picture meet the ground but some golfers do. If you would rather have a setup like this then you wont want any foam panels along the bottom of your screen.
This will, however, mean you have less protection against ricochet off the bottom enclosure pipe. You should wrap this piece of enclosure in particular in foam padding to negate as much ricochet risk as you can.
Ceiling, Walls and Floor Protection
If you use a solid golf enclosure frame then there will be a ‘roof’ to the enclosure which will catch any particularly high wedge shots or skyed drivers.
You need whichever material you choose (netting or fabric) to provide enough protection against a fast-moving golf ball to prevent the ball breaking through and striking the actual ceiling (leaving marks and causing further bounceback dangers).
Golfers who opt for an open setup without a solid enclosure frame should think about mounting foam panels to the ceiling as well as the walls.
All golfers will have to decide what to do with their simulator floor. If you can add the ability to putt into your floor it’s a big bonus.
Most will either base their hitting mat and enclosure on a solid floor made of wood or concrete. Occasionally some golfers will make a floor out of a wooden frame into which a hitting mat can be sunk, this requires lots of ceiling height though.
I recommend using a putting turf that is nice and spongy, so it provides bounceback protection, adds a nice green color to the build, and allows a good putting roll. I sourced mine from a local artificial grass company for about $300. You can then cut shallow but regulation-diameter golf holes into it.
Golf Simulator Enclosure Looks and Aesthetics
To embark on building a Pinterest-worthy golf simulator is a challenge. Golfers will have a range of needs when it comes to a golf simulator. You should decide how much you want to concentrate on the looks and aesthetics of your build.
Do you just want to get something set up that works, quickly? Or do you want to spend more time, and potentially more money on a perfectly symmetrical setup with optimal lighting and lots of extra features? Both approaches are totally fine and you can upgrade your simulator incrementally each year too.
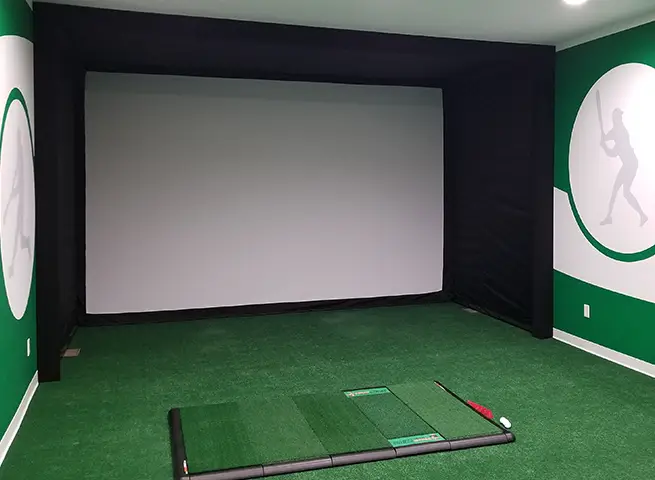
I recommend spending the time at the start to plan how you’ll combine your enclosure and impact screen, and how you’ll position your projector in the space. All golf simulators that look great tend to have nailed this. You want a symmetrical build with no wasted space or screen within your golf simulator enclosure.
How much does a Golf Simulator Enclosure Cost – 7 Options
Here are 7 options for a Ready-to-Build golf simulator enclosure.
Some enclosure package deals will have several sizing options, and some will be a fixed size listed in the product description. Make sure you know which one you’re buying and whether it’ll fit and suit your space.
Option 1 – Totally DIY Setup with Locally Sourced Pipes for the Enclosure Frame
This is one of the cheapest options, though you’ll have to spend a bit of time sourcing your own kit. Your costs will be very variable
Make a list of components and see which bargains you can get on Ebay or Amazon, or maybe Lowes or Home Depot, for items like fabric, netting, and foam panels. Then contact local hardware or electrical companies and see if you can have 1-inch diameter EMT pipe (electrical metal tubing) delivered to your area.
In most cases you’ll be buying longer lengths of pipe which you’ll then cut to size at home, occasionally some suppliers will cut the pipes for you but you’ll have to have planned your sizing in advance.
Here’s a list of components with costs similar to that which I paid for my very first golf simulator enclosure, though note that these costs are very variable and dependant on what’s available in your area.
- 1 inch diameter metal pipe (Electrical EMT/conduit pipe)
- For an enclosure measuring 14ft wide by 10ft high by 5ft deep, you will need approximately 116ft of pipe. It’s worth buying a little bit more in case you make any cutting errors. You may be able to choose between aluminium, steel or other metals, any is fine. You may have to pay a bit for delivery.
- Cost ~$200 plus delivery fees
- Corner Pieces, Connectors and Couplers
- These will allow you to fit the pieces of pipe into a frame structure. The connectors you buy will depend on where you source your pipes as the same company may sell connectors. Couplers are small pieces that allow you to connect two lengths of pipe in the same plane.
- Cost ~$40
- Side Material (Netting, Fabric or Foam Panels)
- This cost will be variable depending on your choice for the sides and ceiling of your enclosure.
- Netting – You could buy netting on a budget from Ebay or Amazon (or similar), though note that most nets are not graded for high-speed golf balls. Cimarron Sports also sell excellent golf nets. Budget nets can cost as little as $40, purpose built nets can be several hundred dollars.
- Fabric for your enclosure is included with each of the packages below. You could source your own fabric from a variety of sources though. You’ll need to think about the length of the fabric roll unless you intend to fix together several lengths of it around your frame. Again, some fabrics may not stop a fast moving golf ball, especially when struck head on. You could source some black fabric online very cheaply though. I bought some for my original simulator build for around $50. Here’s a link for photographer’s muslin cloth which would work great.
- Foam Panels – these are generally used in simulator builds without a steel frame. You can buy high-quality foam panels at Rain or Shine Golf. You can choose between standard or premium, I recommend the preium tiles as they look the part and offer some degree of soundproofing to your simulator. They cost around $149 for 24.
- This cost will be variable depending on your choice for the sides and ceiling of your enclosure.
- Foam Insulation for your Enclosure Frame – from Amazon ($30)
- Bungees for attaching your screen – inexpensive ($20) – you can buy them individually from Carl’s
- Tools as above if you do not already own them
Total Cost: $400+
Option 2 – An Open Setup with No Frame Enclosure
This can be a very affordable option, without the need for a rigid frame, but you have to ensure you don’t skip over adequate wall and ceiling protection. Invest in your foam panels and they’ll protect your home and look great at the same time!
You only need the foam panels, some adhesive (high strength double-sided tape is often used), and a method of mounting your impact screen (which tends to be a rectangular frame made either of metal pipe or wood.
You should take note of how receptive to adhesive tape your walls and ceilings are, and try a small piece first before plastering lots of tiles on.
Remember, that you always need 1ft+ of space behind an impact screen to allow for deformation and to avoid dangerous bounceback directly off the posterior wall. You could still mount your screen on a square made from metal pipe with corner pieces providing some horizontal shape so it doesn’t topple over.
Then you’d need to fix the structure to the room. You could fix screws using wall plugs or similar to the floor or walls and then simply use bungees to attach the screen and frame to this. Alternatively, you could make a wooden square frame and attach your screen and bungees to this.
I always recommend fixing rectangular pieces of foam around the screen to protect the edge of the screen and frame, you could wrap this in blackout fabric or even off-cuts of your artificial grass flooring turf.
Cost ~ $400 (dependant on room size and how many foam panels you need)
Option 3 – Carl’s Place DIY Enclosure
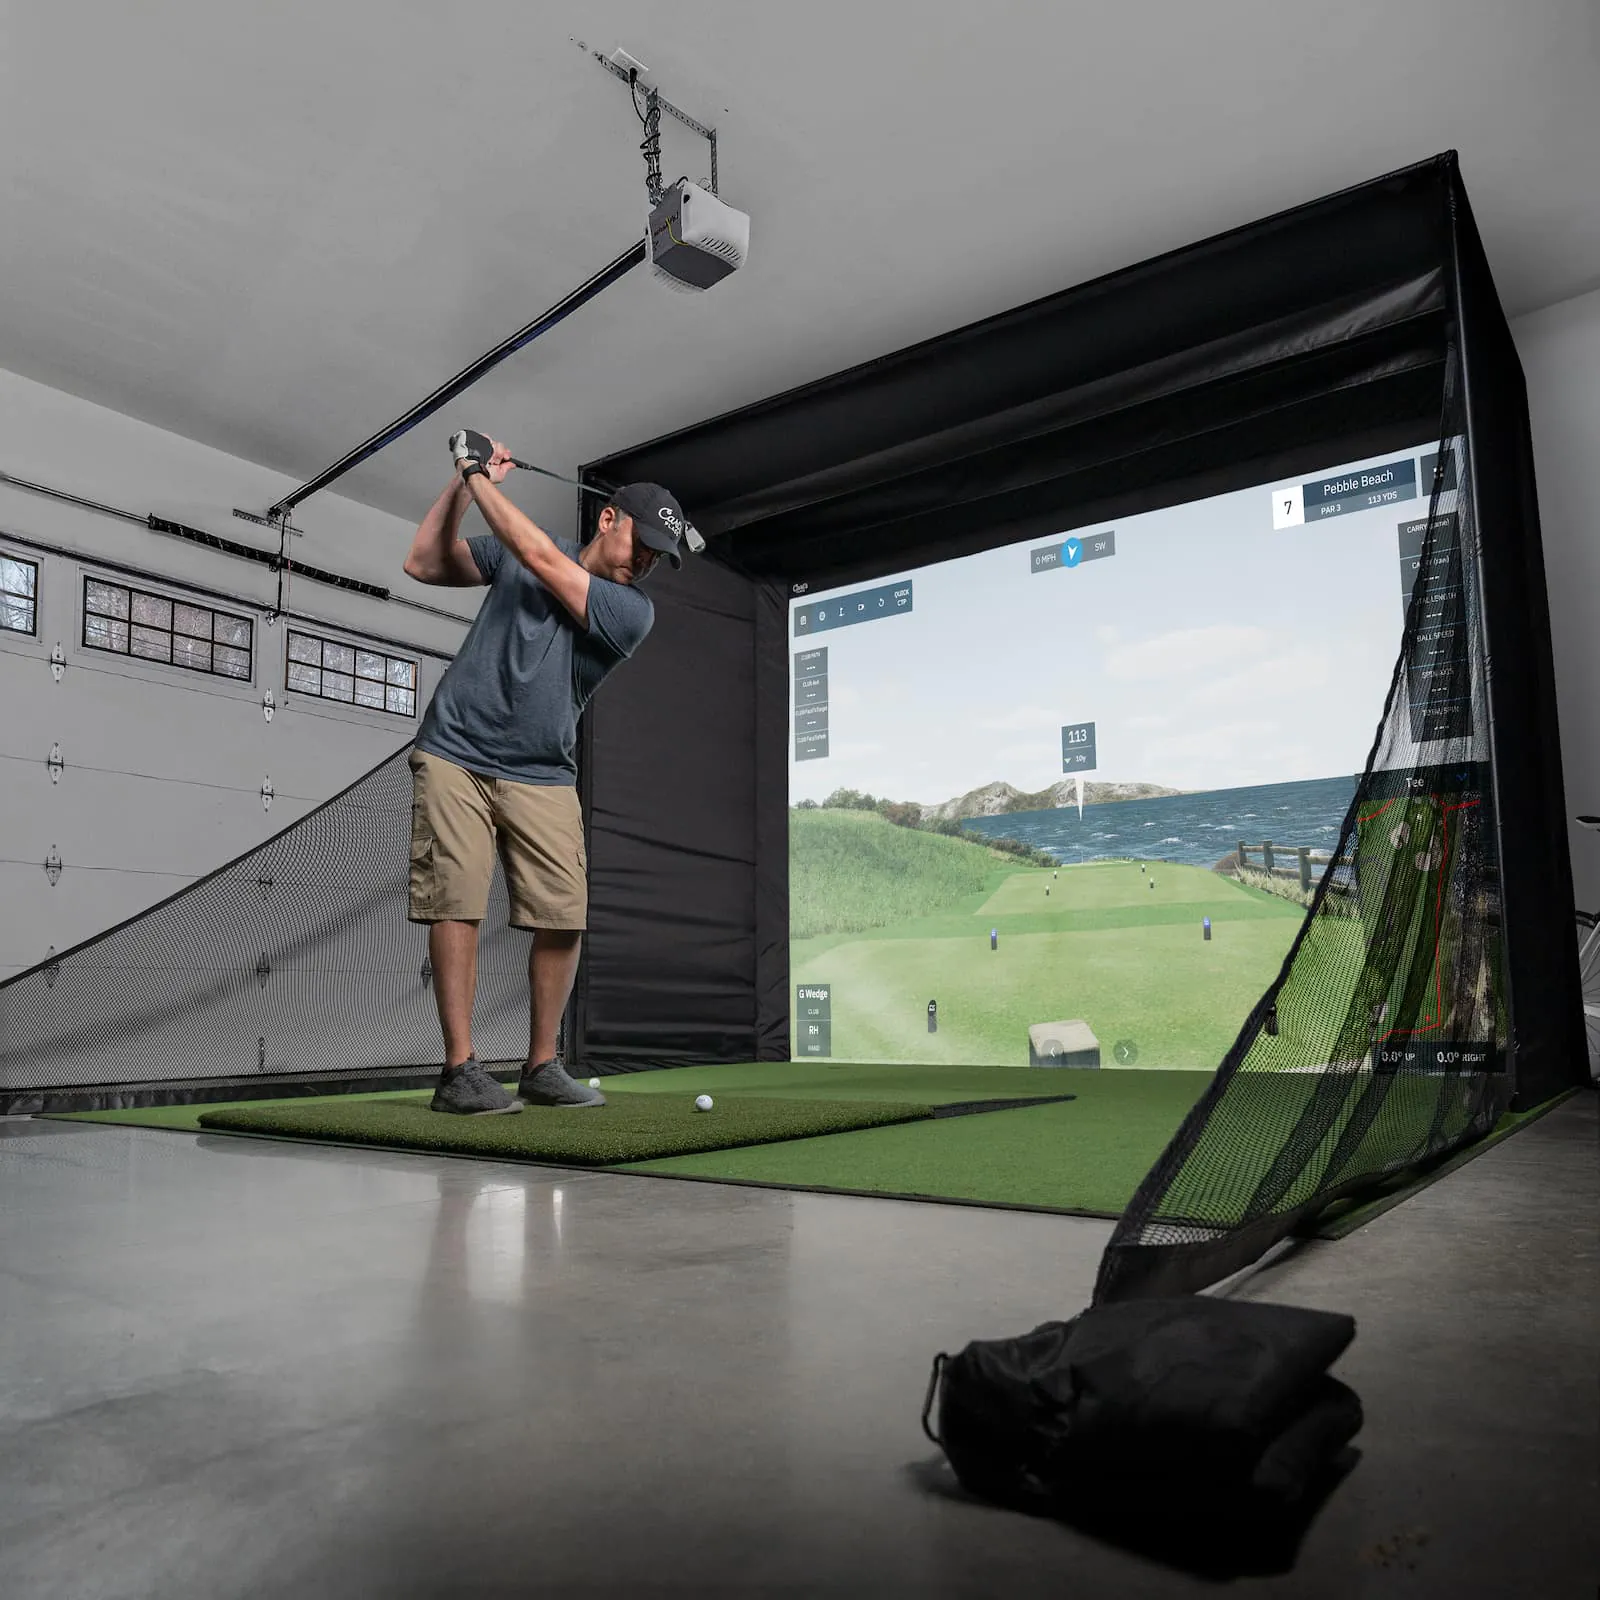
Carl's Place C-Series DIY Enclosure
- Seamless Floor-to-Turf Image: The impact screen brushes the floor for a seamless visual experience.
- High-Quality Nylon Enclosure: Ensures durability and a professional look.
- Connector Fittings Included: Facilitates easy assembly of the enclosure.
- Flexible Size Options: Available in various sizes to fit different spaces.
- Customizable Design: Can be tailored to fit specific room dimensions.
- Innovative Impact Screen System: Incorporates releasable zip ties and a bottom cable to minimize golf ball bounceback.
- Easy DIY Installation: Designed for straightforward assembly by the user.
- Screen Material Choices: Options include Standard, Preferred, or Premium Golf Impact screens.
Carl’s DIY Enclosure is great because you can combine Carl’s amazing premium impact screen with all you need to set up a golf simulator enclosure at home, including:
- Steel Frame in a range of sizes (this is an optional add-on – to give you the option of buying all the parts except the frame – you can do either
- Steel Corner Fittings
- Black Nylon Fabric Sides
- Weight Bag and Bungees
- Optional extras include foam inserts, side netting and the frame as above
You shouldn’t need any extra tools to fit your enclosure together too, so it’s great for those who just want a quick, no-hassle assembly.
Most of the size options for the DIY enclosure at Carl’s are designed to fit a 4:3 aspect ratio, though the 13×7.7ft option fits 16:9. Check out the sizing specifications for the DIY enclosure here. There is also a detailed instruction and set up manual available here.
- Cost-Effective: DIY approach can save money compared to pre-built enclosures.
- Customization: Allows for tailoring to the specific dimensions and needs of your space.
- User-Friendly Design: Easy to assemble, even for those with limited DIY experience.
- Quality Materials: High-quality nylon and impact screen materials ensure durability and a good golfing experience.
- Safety Features: The design minimizes the risk of golf ball bounceback.
1. Not Available in >5ft Depth: You'll need a Pro C-series Enclosure for this
Carl’s DIY Enclosure is great because you can combine Carl’s amazing premium impact screen with all you need to set up a golf simulator enclosure at home, including:
- Steel Frame in a range of sizes (this is an optional add-on – to give you the option of buying all the parts except the frame – you can do either
- Steel Corner Fittings
- Black Nylon Fabric Sides
- Weight Bag and Bungees
- Optional extras include foam inserts, side netting and the frame as above
You shouldn’t need any extra tools to fit your enclosure together too, so it’s great for those who just want a quick, no-hassle assembly.
Cost: ~ $1589 for 13×7.7ft (16:9 aspect ratio) including Steel frame and Carl’s Premium Screen
Most of the size options for the DIY enclosure at Carl’s are designed to fit a 4:3 aspect ratio, though the 13×7.7ft option fits 16:9. Check out the sizing specifications for the DIY enclosure here. There is also a detailed instruction and set up manual available here.
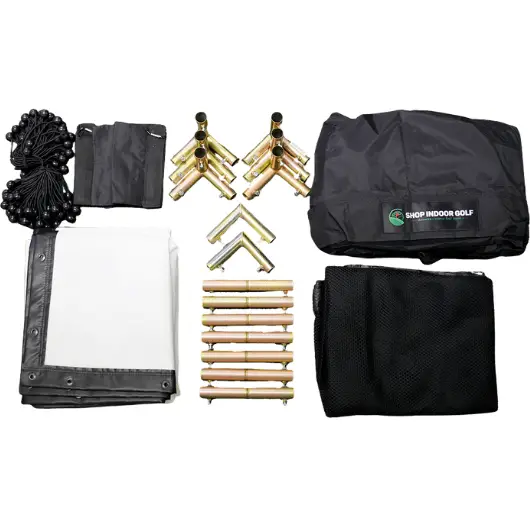
Option 4 – Shop Indoor Golf DIY Enclosure
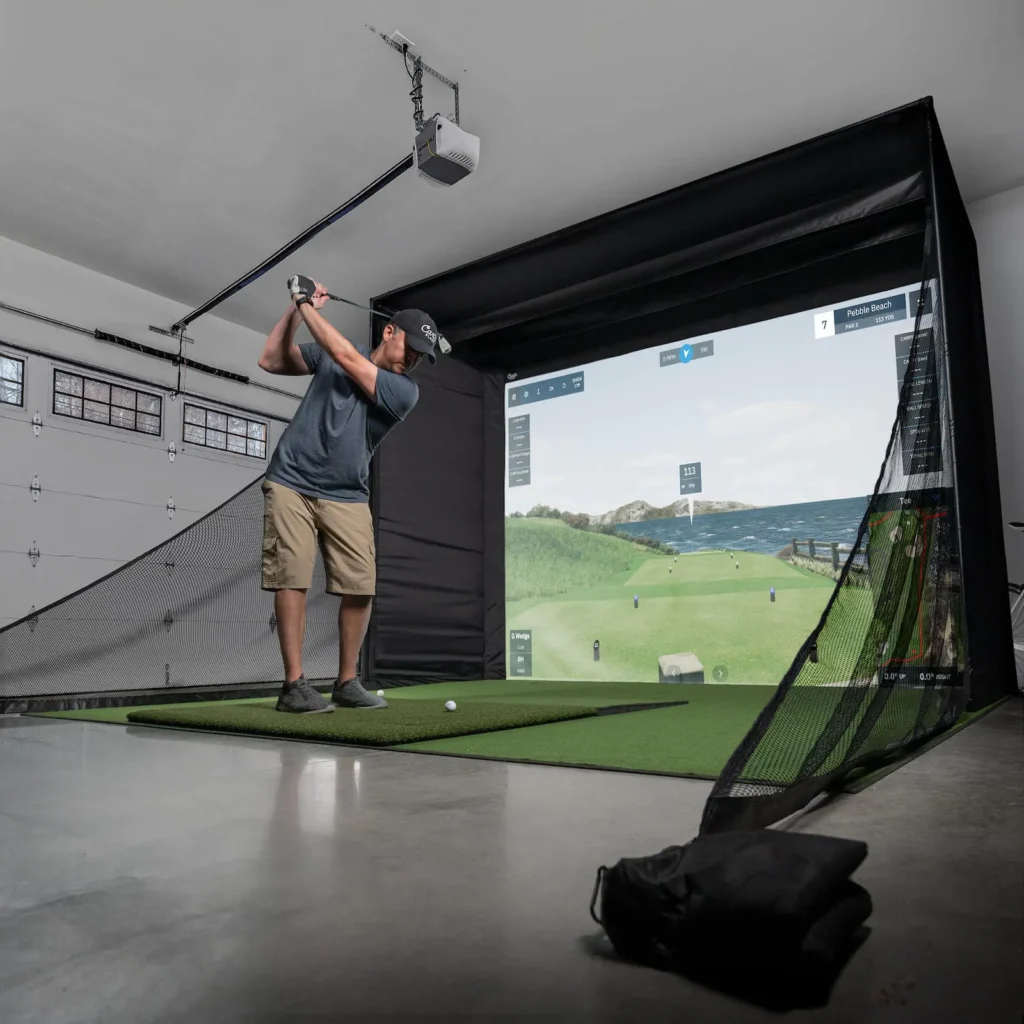
Shop Indoor Golf can provide everything you need for your golf simulator enclosure as a package but without the metal pipe frame. This kit comes in three sizes:
- 8x8ft – this is of course square so a 1:1 aspect ratio, golfers with very small spaces may opt for this size
- 8×10.5ft – 4:3 aspect ratio
- 9x12ft – 4:3
The DIY Enclosure package includes the following:
- SIGPRO Premium Impact Screen,
- Black Fabric Surround
- Side barrier netting + sand bags
- 1″ EMT canopy fittings (connectors)
- 6″ ball bungees.
Cost: around $1799 for 9x12ft enclosure size (4:3)
Option 5 – Shop Indoor Golf SIG Enclosure Packages
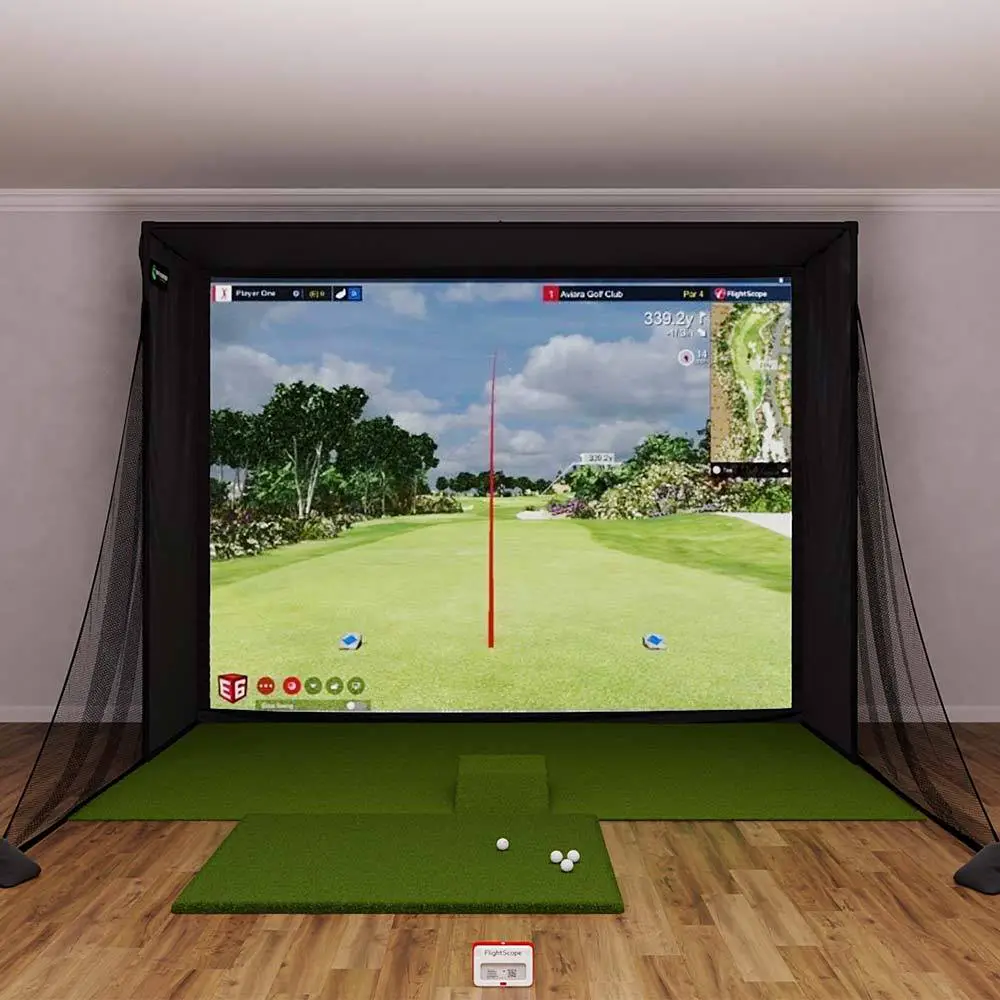
Shop Indoor Golf also sells full golf simulator enclosure packages complete with a steel frame. You have a choice of the SIG8, SIG 10, and SIG 12 packages which are sized with screen widths of around 8, 10 and 12 feet.
Each SIG enclosure package suits a 4:3 aspect ratio rather than a 16:9.
The dimensions of the SIG packages are as follows:
| Dimension | SIG 8 Enclosure | SIG 10 Enclosure | SIG 12 Enclosure |
|---|---|---|---|
| Viewable Impact Screen Size | 7ft 7in Height + Width, 10ft 8in Diagonal | 7ft 7in Height, 10ft 1in Width, 12ft 7in Diagonal | 8ft 7in Height, 11ft 5in Width, 14ft 3in Diagonal |
| Outer Enclosure Frame Size | 8ft 4 in Height and Width, 13ft 7in Depth | 8ft 4in Height, 10ft 10in Width, 13ft 7in Depth | 9ft Height, 12ft 2in Width, 16ft Depth |
| Recommended Space to House each SIG Enclosure | 9ft Height, 10ft Width, 16ft Deep | 9ft Height, 12ft Width, 18ft Deep | 10ft Height, 14ft Width, 20ft Deep |
You’ll receive the following components with each package:
- Steel Frame
- SIGPRO High-Quality Impact Screen
- Side Barrier Netting with Sand Bags
- Weight Strip for Bottom of Screen
- Connectors and Bungees
Note that you can also buy the SIG 8, SIG 10, and SIG 12 as Complete Simulator Packages, including projector, ceiling mount, flooring/landing turf, and a choice of hitting mat.
Shop Indoor Golf offer free shipping in the USA and are known for their excellent customer service.
Cost: ~$3499 for SIG 10 Enclosure
Option 6 – Rain or Shine Golf Enclosure Packages
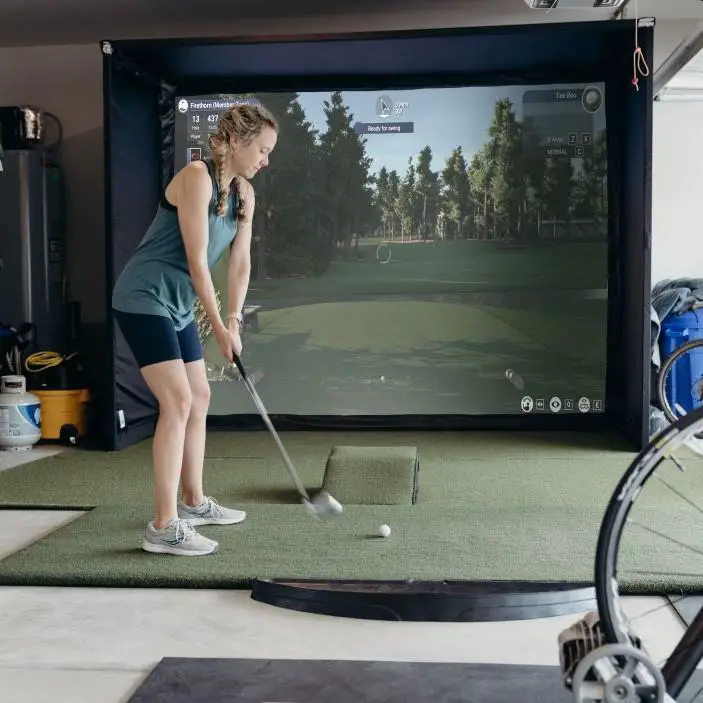
Check out the Swingbay Golf Simulator Bay from Rain or Shine Golf.
The Swingbay Enclosure package is optimized for a 4:3 aspect ratio, sold by a very reputable company in Rain or Shine Golf. This package comes as one size option.
- Dimensions of the frame itself are 8 ft high x 10ft 5 inches wide x 4ft 8 inches deep
- Recommended total room dimensions for a golf simulator using this enclosure are 9ft high x 12 ft wide x 16 ft deep
The Swingbay Golf Bay package also includes:
- An Impact Screen, which is said to be ‘tightly woven fiber material optimized for a smooth, crisp, projection’
- Blackout Fabric made from commercial grade polyester, which attaches to the frame using velcro. This should provide good protection from stray golf shots and will block lots of ambient light from the screen, increasing the quality of projection.
- Bungees for Impact Screen Attachment.
Cost: approximately $3499
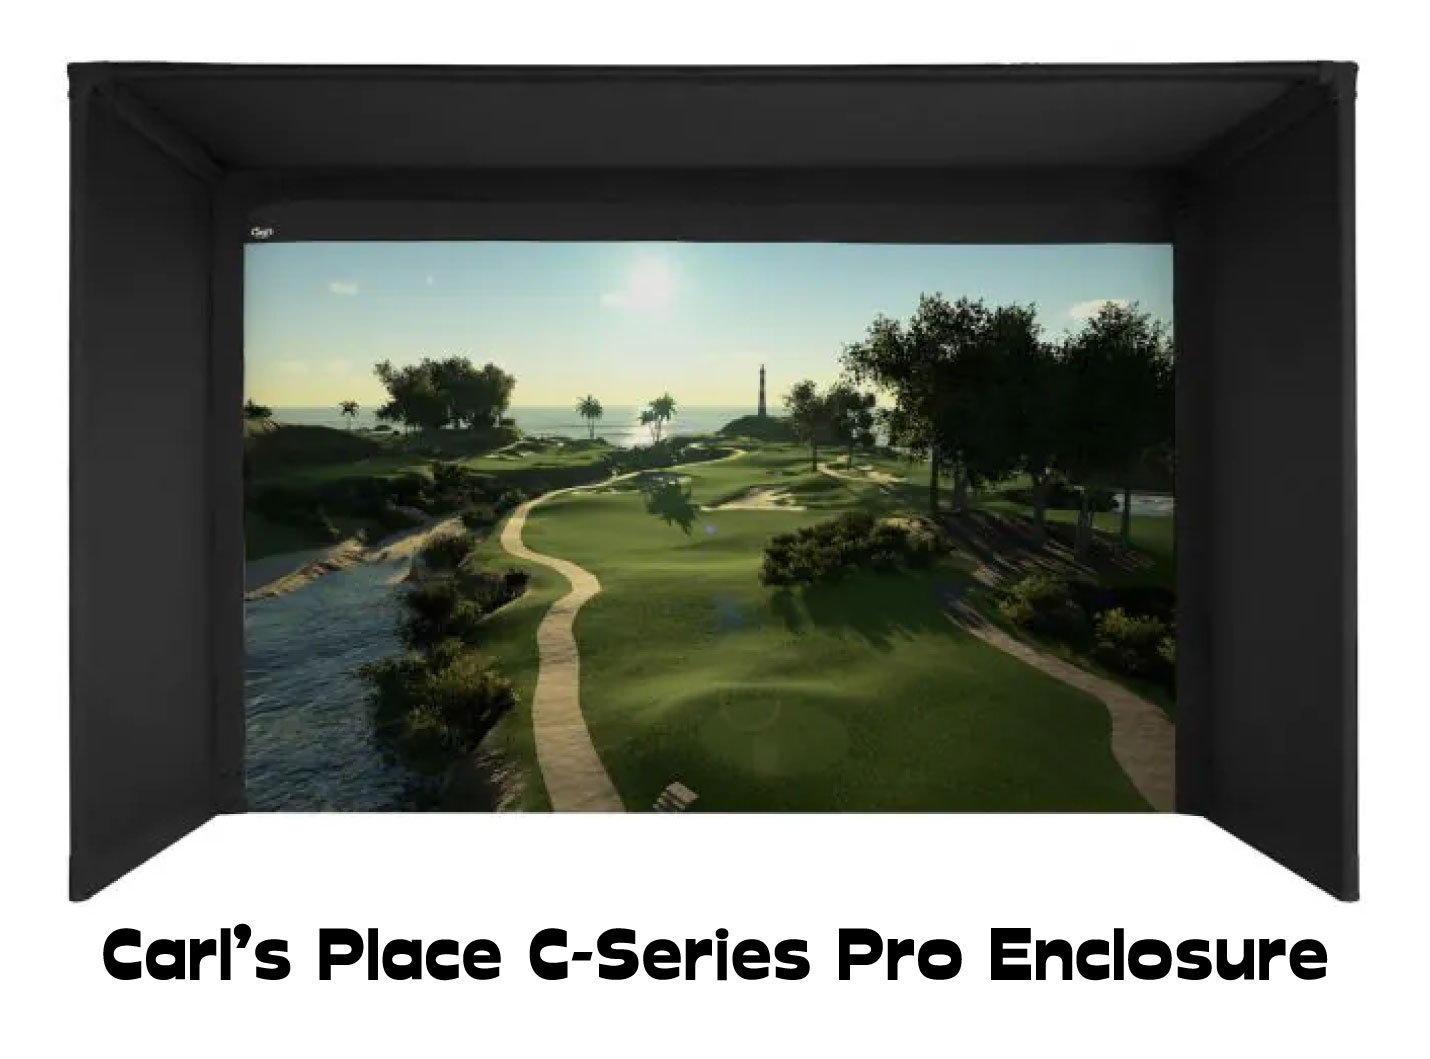
Option 7 – Carl’s Place C-Series Pro Golf Enclosure (Premium Option)
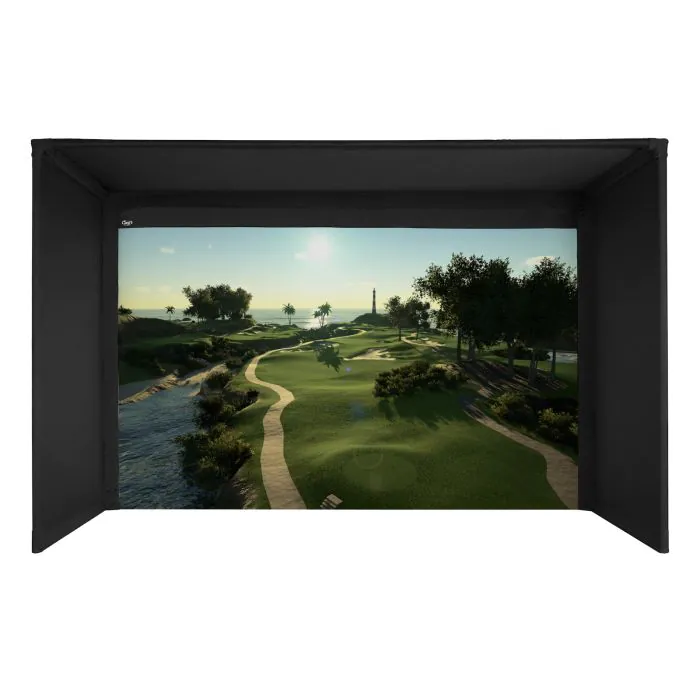
Carl’s C-Series Pro Golf Enclosure features all the bells and whistles, it costs more money than sourcing components yourself and cutting them to size, though it is high quality and very convenient to build.
Carl's Place C-Series Pro Enclosure
- Engineered for Premium Installations: Ideal for commercial simulators, golf lessons, and luxury homes.
- Large Bay Capacity: Can accommodate bays up to 20' wide or deep.
- Seamless Turf Integration: Allows turf to lead up to the premium triple-layer golf impact screen without a bottom border.
- Quality Features as Standard: Includes a black knit fabric enclosure, connector fittings for 2" EMT pipes, and a premium golf impact screen.
- Innovative Impact Screen System: Uses releasable zip ties and a bottom cable to prevent golf ball bounceback.
- Easy Add-Ons: Option to add safety foam inserts and structural pipes for a comprehensive setup.
- Size Variety: Available in multiple sizes to fit different indoor spaces.
- Customization Options: Can be tailored to specific space requirements.
Carl's Pro Golf Enclosures accommodate huge bays (20' wide or 20' deep). They're ideal for commercial golf simulators, golf lessons, and high-end houses. Allow your turf to seamlessly transition to the premium triple-layer golf impact screen. With no bottom boundary, you'll have the most immersive golf simulator experience conceivable.
The standard features include a black knit fabric shell, connecting fittings for 2" EMT pipes (pipes available separately), and a premium golf impact screen. Whether you choose all of the bells and whistles or just the essentials, this product will make your indoor golf simulator come to life!
- High-Quality Impact Screen: Ensures an immersive and realistic golfing experience.
- Versatility: Suitable for various settings, including commercial and luxury home installations.
- Safety Features: The design, including foam surrounds, minimizes golf ball bounceback, enhancing safety.
- Customizable Size: Can be adapted to fit specific room dimensions and needs, including deep simulator enclosure designs.
- Ease of Installation: Designed for hassle-free setup with options for additional components.
- Cost: Given its high-end design, the enclosure may be more expensive than basic models.
Carl’s Pro Enclosure features the following components (all you need for a top-end enclosure):
- Steel Frame
- Carl’s Premium Impact Screen
- Top and Side Fabric Panels
- Foam Safety Cushions to protect from ricochet off the frame
- Bungees and Frame Connectors
- Optional Projector or Uneekor Mounts, as well as safety baffles for the ceiling of the simulator to protect from ultra-high shots.
Cost: $4550 (for size 14.5ft x 8.5ft x 5ft with pipe frame included)
There is a range of wider sizing options with the Pro Golf Enclosure, fitting 16:9 and 16:10 aspect ratios as well as 4:3. Check out the size options in detail here.
Check out the video below showing construction of the Carl’s Pro Enclosure. There’s a second assembly video here showing steps in further detail.
Hidden Costs and Problems with Golf Simulator Enclosures
Flooring
Flooring is an important part of any golf simulator room.
You can set up your simulator without great thought devoted to the flooring, and get on just fine. However, a high-quality artificial grass turf can add a lot of the aesthetic wow-factor that golf simulator owners strive for.
Flooring is important too when considering protection against bounceback. You want your ball to land with a dull thud rather than a violent bounce.
Golfers constructing the simulator of their dreams will consider building a wooden frame floor (providing they have enough room height) into which regulation golf holes can be sunk for high-fidelity putting practice.
Putting can be accommodated as long as you have a fast enough roll on your turf, you’ll need a raised frame though to get depth in your golf holes.
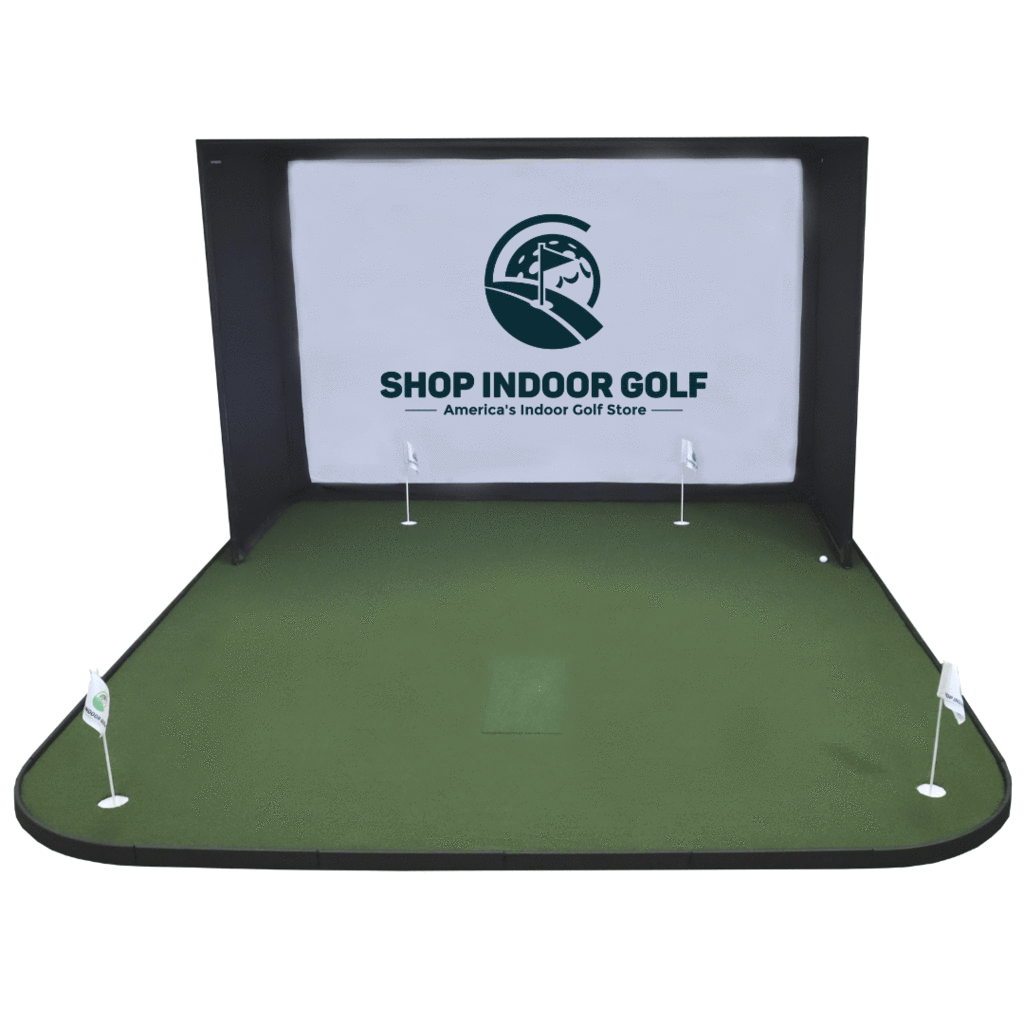
You can also sink your hitting mat into a floor frame in order to keep everything level.
Heating, Lighting, Power, Internet and Security
The inner workings of a golf simulator can not function without light and power. Think about how you’ll wire the simulator from the mains, and whether you need to feed any wires through the enclosure frame.
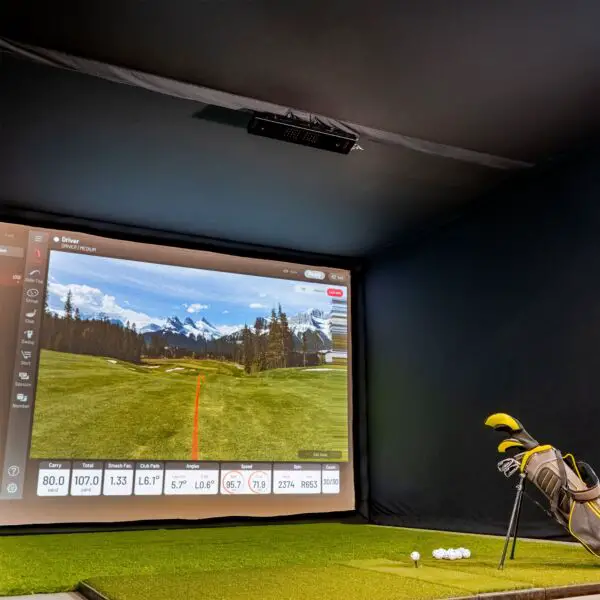
The same goes for heaters that will warm your simulator on cold nights, your internet and security solutions, and any wires that feed to and from your projector (which is likely to be mounted from or near to your enclosure frame).
I recommend having an electrician add as many sockets to your simulator room as you can (at least four double sockets).
You’ll need to consider any potential fire safety risks when passing wires near blackout fabric or your impact screen. Learning some ninja cable-management techniques will keep wires out of the way.
All these factors will cost money too, and these bills are worth factoring in when thinking about golf simulator costs.
Conclusion
A golf enclosure is the central structure of your golf simulator. Many would call their launch monitor or even their impact screen the centerpiece of their build, but I’d argue it’s the enclosure frame that supports all the other components.
I recommend the Carl’s DIY Enclosure for anyone that seeks a combination of high-quality components and a minimum amount of DIY work. Combine this package with their Premium Impact Screen and you’re all set.
I hope this article has helped you organize your thoughts about golf simulator enclosures and work out what your enclosure needs will be. Best of luck with your simulator build!
Putting with Hackmotion – Step by Step Guide
HackMotion in a Golf Simulator: All the Data you need!
ABOUT THE AUTHOR
Hello! My name is Alex and it is my mission to bring you all the information you need to build your own home golf simulator! I hope mygolfsimulator.com helps you on your journey to better golf at home!
LEGAL INFORMATION
On this site, you'll find articles on all aspects of building a golf simulator. I will also link to other sites where you can buy some of the simulator components. Some of these links may be affiliate links, which means if you click them I gain a small commission at no extra cost to you. This really helps out me and my site so thank you in advance! mygolfsimulator.com and all related social media accounts are property of Awonline LTD.
