How to Hang a Golf Impact Screen – 6 Ways
Posted in Enclosures, Golf Impact Screens, Your Swing Studio
A golf impact screen is more than just a target — it’s both your projection surface and the safety barrier that absorbs shots at full speed. The way you hang your screen directly affects image quality, bounce-back, noise, and overall durability, so choosing the right mounting method is one of the most important steps in building your simulator.
There are now several proven ways to mount an impact screen. Popular DIY methods include grommets with bungees or tarp clips, while more advanced solutions use frames, aluminium bar hems, or retractable housings. In recent years, Carl’s Place has introduced purpose-built hanging options like their loop-and-zip-tie system and ball bungee fasteners, which make it easier to achieve consistent tension across the screen.
| Method | Cost | Ease of Install | Durability | Image Quality | Best For |
|---|---|---|---|---|---|
| Grommets & Bungees | Low | Easy | Moderate – grommets can tear with heavy use | Good, but may sag between fixings | Entry-level DIY setups |
| Sleeve & Strap | High | Moderate | Excellent – distributes force evenly | Excellent – smooth, wrinkle-free | Premium home or commercial use |
| Tarp Clips & Bungees | Low | Easy | Low – clips can slip or damage fabric | Fair – uneven tension likely | Temporary setups or testing |
| Aluminum Bar with Hem | Medium-High | More complex | Excellent – rigid and secure | Excellent – very even tension | Permanent installations |
| Frame Mounting | Medium | Moderate-Difficult | Very good – depends on build quality | Good-Excellent, depending on fixings | Dedicated simulator rooms |
| Retractable Systems | High | Professional install recommended | Very good if properly installed | Good – some limitations on fabric thickness | Multi-purpose spaces |
No matter which method you choose, the goal is the same: find the sweet spot in screen tension. A screen that’s too tight will be noisy and can cause excess bounce-back, while a screen that’s too loose will wrinkle or pucker, reducing picture quality. With proper planning — and the right hanging system for your room — you can achieve a smooth, durable, and realistic simulator setup.
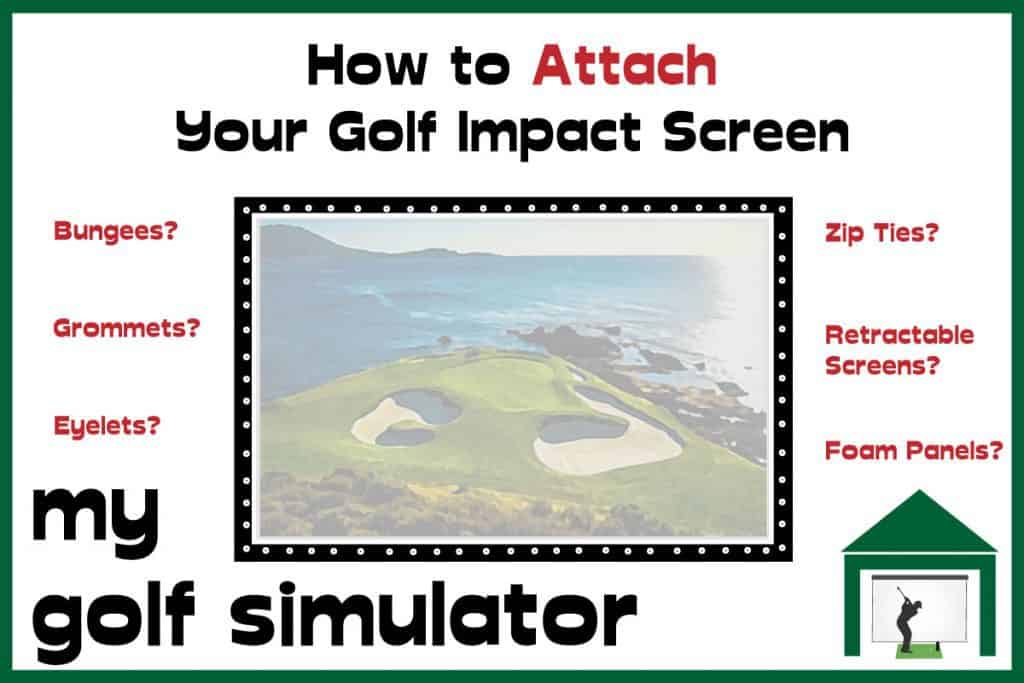
The Functions of a Golf Impact Screen
A golf impact screen is one of the most important parts of a simulator setup. It has two core jobs:
- Projection Surface – providing a bright, smooth canvas for your simulator graphics.
- Safety Barrier – absorbing high-speed golf ball impacts (often over 180 mph) so they don’t damage your walls, ceiling, or anything else in the room.
You can build a simple hitting area with just a net, and for golfers on a budget this can be a good starting point. But if you want a true simulator experience, you need a proper impact screen — one that balances image quality, durability, noise reduction, and safety.
Not all impact screens are the same. Premium, multi-layer designs not only provide sharper picture quality but also reduce bounce-back and noise, while cheaper single-layer fabrics may be louder, wrinkle more, and wear out faster.
Why Screen Function Affects How You Hang It
The way your screen is built directly influences how it should be attached to your frame. Most modern impact screens are made from tightly woven polyester or spacer mesh, often in multiple layers for added strength. When struck by a golf ball at full speed, the screen needs enough flex and space behind it to absorb the force safely.
- A screen that’s hung too tight will be noisy and send balls bouncing back.
- A screen that’s hung too loose will sag or pucker, reducing image clarity.
- A well-mounted screen balances tension evenly across all edges, giving you a smooth picture and safe energy absorption.
👉 In other words: the function of the screen (absorbing force, protecting your space, and showing a clear image) determines the best attachment method. That’s why choosing the right hanging system — whether bungees, straps, or a professional sleeve system — is just as important as choosing the screen itself.
Energy Absorption and Bounceback
One of the most important jobs of a golf impact screen is to safely absorb the force of your shots. With ball speeds often exceeding 180 mph, the screen must withstand thousands of repeated strikes in the same area without tearing or wearing out.
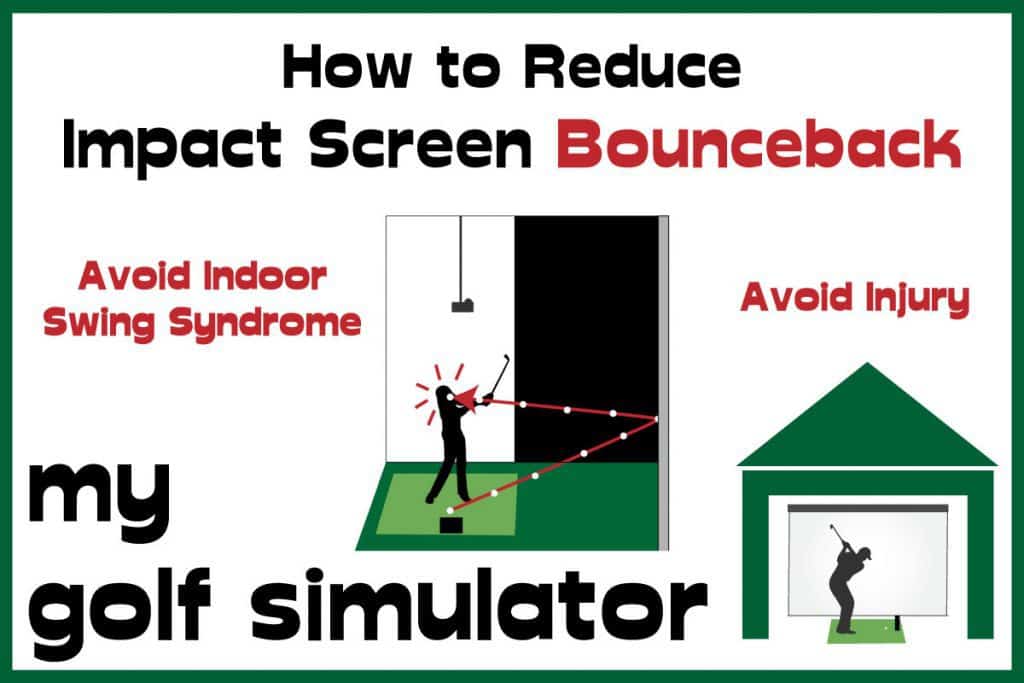
Bounceback occurs when the screen is hung too tightly, leaving little room for it to flex on impact. Instead of absorbing energy, the ball rebounds toward the player. How much of a problem this is depends on two factors:
- The distance between the hitting area and the screen
- How much tension is applied when the screen is mounted
The closer you stand to a screen that has been pulled too tight, the greater the risk of the ball coming back at you.
The type of material also plays a major role. Premium screens often use multi-layer construction with a cushioning or spacer mesh layer. These designs absorb more energy, significantly reducing bounceback compared to thinner, single-layer fabrics.
For best results:
- Consider premium screens if bounceback is a concern, as they are engineered to handle repeated high-speed impacts while keeping rebound to a minimum
- Maintain at least 12 inches (30 cm) of space behind the screen so it can flex safely
- Avoid over-tightening bungees or straps — tension should be firm but not rigid
Noise Reduction
The way an impact screen is mounted affects not just bounceback but also noise levels. A screen that is pulled too tight will absorb less energy, creating a louder, sharper sound every time the ball makes contact. This can be disruptive if you practice late at night, have family sleeping nearby, or live in a home with thin walls.
Modern premium screens often include a cushioning or damping layer within the fabric, which helps to absorb energy and cut down on noise. There are also installation choices that can make a big difference:
- Add an acoustic backing such as foam panels or blackout curtains behind the screen
- Maintain a small gap (6–12 inches) between the screen and the wall to let it flex and disperse impact noise
- Avoid over-tensioning the screen, which increases both sound and bounceback
For golfers who need to keep noise levels down, the best results come from combining a multi-layer premium screen with a properly tensioned mounting system and some form of sound-dampening material behind it.
Impact Screen Quality
For the sharpest projected image, your impact screen needs to hang evenly with smooth tension across all edges. Wrinkles, sagging, or puckering can distort the picture and make even a high-end projector look soft.
A few key factors influence picture quality:
- Screen tension: Firm, even tension across the frame creates a flat surface, but avoid over-tightening as this increases both bounceback and noise.
- Fixings: Where possible, cover or position fasteners so projector light does not reflect off metal grommets or clips.
- Screen material: Premium screens with tighter weaves and multi-layer construction provide smoother projection surfaces with minimal texture.
Carl’s Premium Impact Screen remains one of the top choices for image quality, thanks to its dense weave and durable three-layer build. Newer options, such as the SIGPRO Premier gray screen, are also worth considering if your simulator space has ambient light, as they help maintain contrast and prevent washout.

Aesthetics
A golf simulator isn’t just about performance — most golfers want a setup that looks sharp and feels immersive. A clean, professional-looking hitting area makes practice more enjoyable and creates a space you’ll be proud to show off.
Key factors that improve aesthetics include:
- Smooth, even screen tension with minimal puckering
- Concealed fixings so light from the projector doesn’t catch on metal parts
- A dark enclosure around the screen to frame the image and enhance contrast
- Consistent borders and padding that give the simulator a finished, polished look
Attention to these details can transform a basic DIY build into a simulator that not only performs well but also looks like a professional installation.
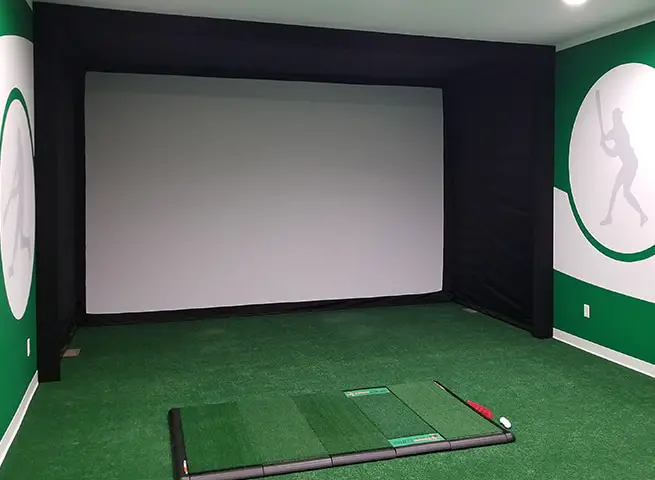
Avoiding Screen Puckering
Puckering happens when an impact screen develops ripples or creases due to uneven tension at the edges or corners. Even small distortions can reduce image quality by warping the projected picture.
The best way to avoid puckering is to ensure balanced tension across the entire screen. Adjustable fixings such as bungees, ball fasteners, or straps allow you to fine-tune each connection point until the screen hangs evenly.
Other tips to reduce puckering:
- Use a mounting method that distributes force evenly, such as a sleeve-and-strap system or an aluminum bar with hem.
- Recheck screen tension periodically, as materials can stretch slightly over time.
- Make sure your frame or enclosure is square and level so the screen pulls evenly on all sides.
With the right mounting method and a little fine-tuning, you can keep your screen smooth and wrinkle-free for the best possible picture quality.
6 Options for Hanging a Golf Impact Screen
Once you’ve chosen your impact screen, the next step is to hang it securely. The attachment method you use affects not only the lifespan of the screen, but also image quality, bounceback, and noise. The key is achieving even tension across all sides without pulling the screen too tight.
Below are the most common methods used today, from simple DIY fixes to professional-grade systems.
1. Grommets, Eyelets, and Bungees
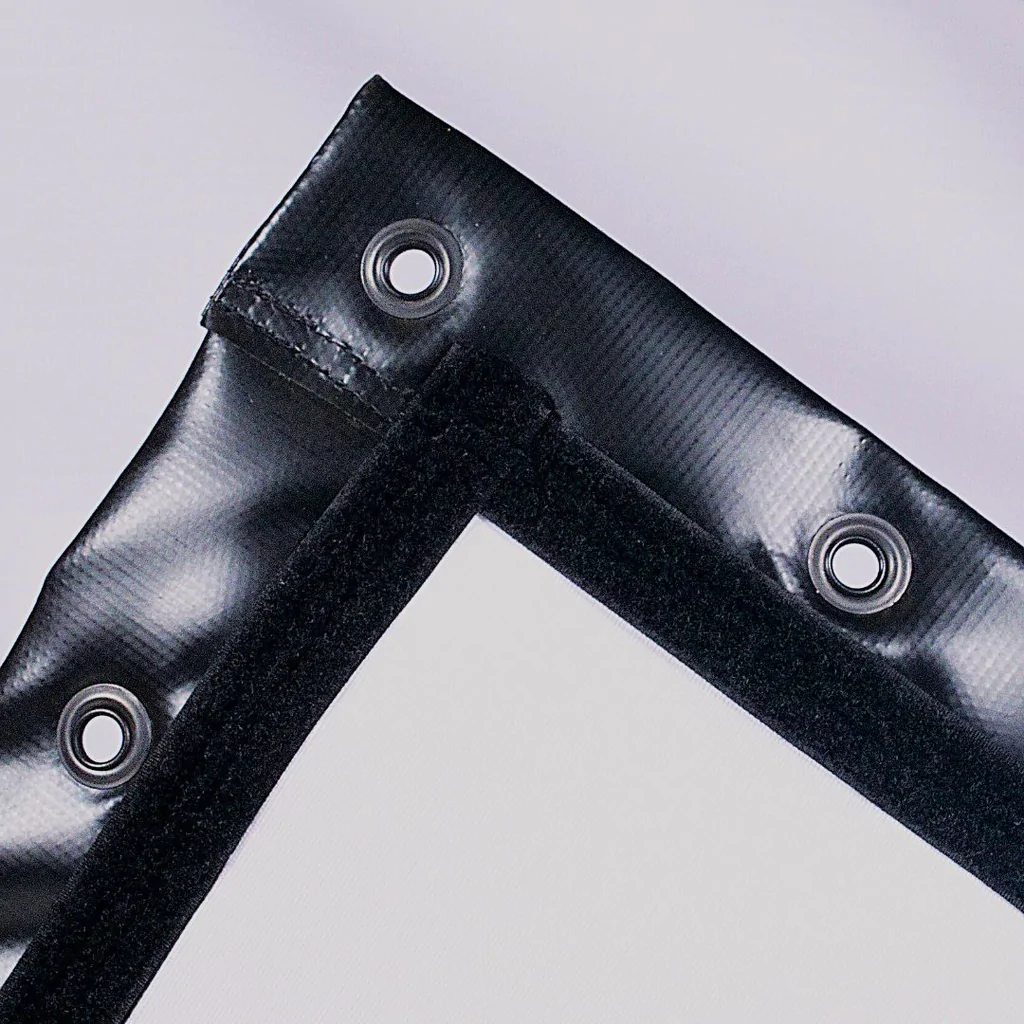
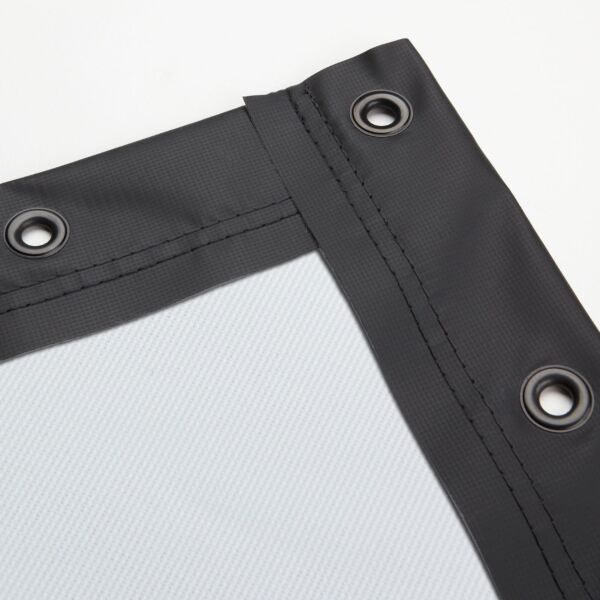
The most common way to hang an impact screen is with reinforced grommets and elastic bungees. Most screens from Carl’s Place and other manufacturers come with grommets pre-installed.
How it works:
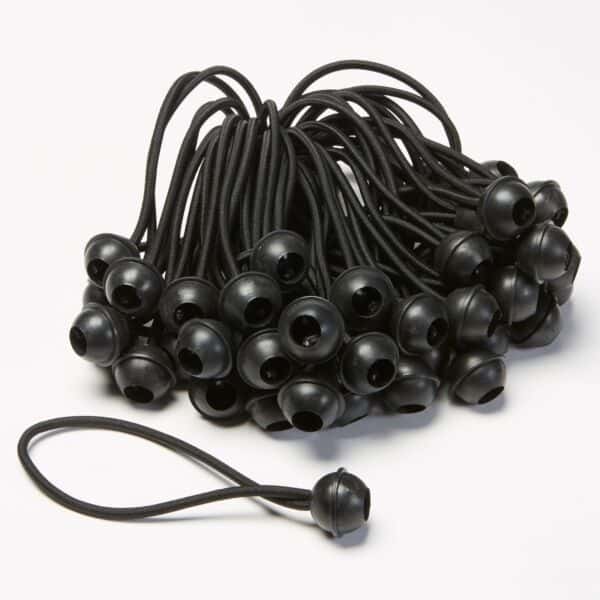
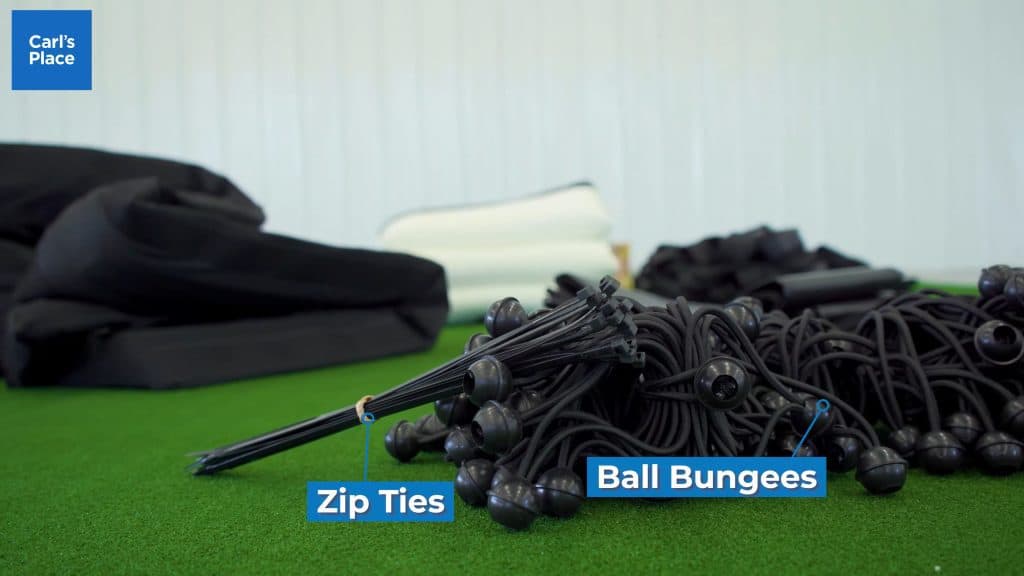
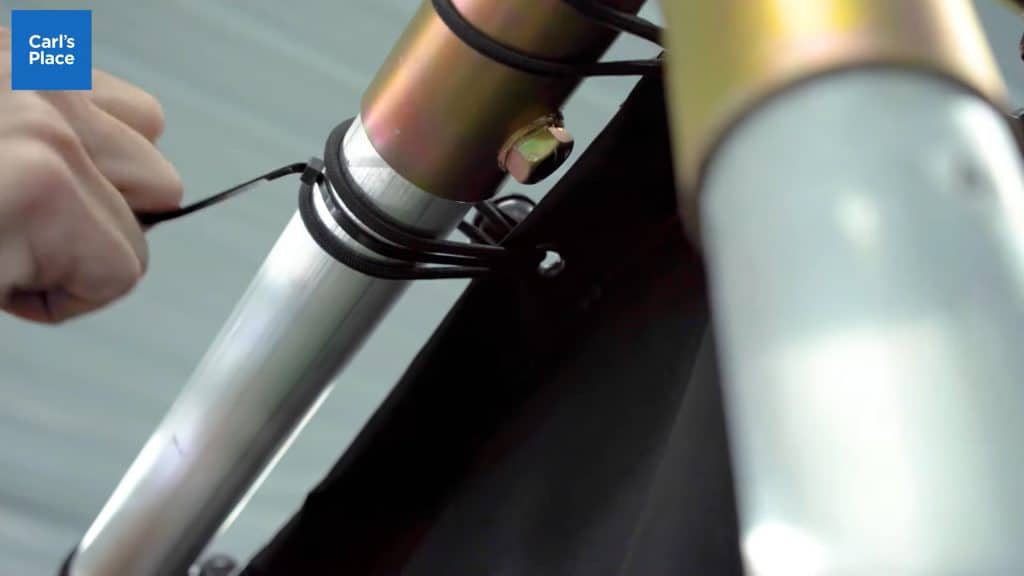
- Thread a bungee ball fastener through each grommet and around your frame.
- Adjust loops for tension — tighter loops increase tension, looser loops allow more give.
- Bungees absorb some impact energy, helping to reduce stress on the screen and frame.
Pros:
- Affordable and simple to install
- Compatible with most enclosures
- Easy to replace or adjust
Cons:
- Grommets may tear over time with heavy use
- Tension adjustments are limited to set steps rather than fully fine-tuned
- Visible fixings can reflect projector light if uncovered
Best for: DIY builds and entry-level setups.
2. Sleeve-and-Strap Systems
A premium alternative, pioneered by Spectrum Golf, is the sleeve-and-strap system. Instead of grommets, reinforced fabric sleeves run along the edges of the screen, housing PVC pipes. Adjustable straps then connect these to the frame.
Pros:
- Eliminates stress points on grommets
- Creates even tension across the whole screen
- Durable enough for heavy-use or commercial setups
- Provides a smooth, wrinkle-free projection surface
Cons:
- Higher cost
- Requires a compatible screen
Best for: Permanent setups where durability and image quality are top priorities.
3. Tarp Clips and Adjustable Bungees
For screens without grommets, tarp clips can be used to grip the screen edges and attach to bungees.
Pros:
- Useful for raw or unfinished screens
- Allows repositioning of clips for better tension
- Easy DIY solution
Cons:
- Can damage the fabric over time
- Less secure than grommets or sleeves
- Creates uneven tension points
Best for: Temporary setups or testing screen positions before committing.
4. Aluminum Bar with Hem Sleeve
Some screens are manufactured with a sewn hem along the edges, allowing a thin aluminum bar to be inserted. The bar can then be fixed directly to a wooden or metal frame.
Pros:
- Very even tension
- Professional, clean appearance
- Strong and durable
Cons:
- More permanent and complex to install
- Requires sewing or professional modification if not supplied with a hem
Best for: Permanent builds where aesthetics and screen smoothness are key.
5. Frame Mounting
A dedicated frame can be built from EMT conduit, wood, or aluminum tubing. The screen is then attached to the frame with one of the above methods.
Pros:
- Customizable to fit your room
- Can integrate side nets, curtains, or full enclosures
- Portable if built free-standing
Cons:
- Requires DIY skills and extra space
- More materials needed
Best for: Garage or dedicated simulator rooms where walls can’t be used directly.
6. Retractable Systems
For multi-purpose rooms, retractable impact screens provide the ultimate convenience. These work much like home theater projector screens, rolling down from a ceiling or wall-mounted housing when in use.
Pros:
- Saves space when not in use
- Clean, professional look
- Protects the screen when retracted
Cons:
- Most expensive option
- Limited screen thickness options due to roller design
- Mechanical systems may require maintenance
Best for: Multi-use rooms where the simulator is only used part-time.
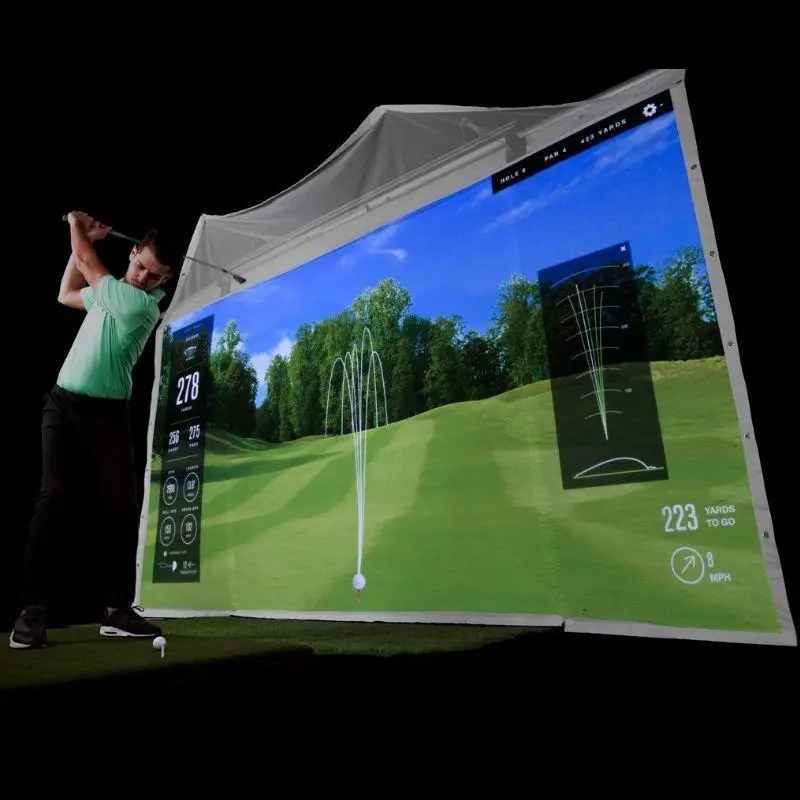
If that all sounds like too much hard work for your liking, one way to get around it is simply to buy a retractable screen. These are remarkably like the projector screens that you see in colleges or workplaces.
They can be rolled down out of their housing when they’re needed and then at the click of a button they retract when you don’t need them. They tend to be supplied with their own mounting kit and instructions and we’ve found that most of them will use a standard ceiling mount.
You need to be a little careful when installing anything on a ceiling, so following the manufacturer’s instructions is vital for this. However, it’s a fairly simple job to carry out.
Check out the Homecourse retractable impact screen here at Shop Indoor Golf. The instruction manual is also pretty useful reading.
Here’s the Stealth Golf Impact Screen available at GolfTechSystems (this video is from their Youtube Channel) or Par2Pro.
Which Method Should You Choose?
Comparison of Hanging Methods
| Method | Cost | Ease of Install | Durability | Image Quality | Best For |
|---|---|---|---|---|---|
| Grommets & Bungees | Low | Easy | Moderate – grommets can tear with heavy use | Good, but may sag between fixings | Entry-level DIY setups |
| Sleeve & Strap | High | Moderate | Excellent – distributes force evenly | Excellent – smooth, wrinkle-free | Premium home or commercial use |
| Tarp Clips & Bungees | Low | Easy | Low – clips can slip or damage fabric | Fair – uneven tension likely | Temporary setups or testing |
| Aluminum Bar with Hem | Medium-High | More complex | Excellent – rigid and secure | Excellent – very even tension | Permanent installations |
| Frame Mounting | Medium | Moderate-Difficult | Very good – depends on build quality | Good-Excellent, depending on fixings | Dedicated simulator rooms |
| Retractable Systems | High | Professional install recommended | Very good if properly installed | Good – some limitations on fabric thickness | Multi-purpose spaces |
Which Hanging Method Fits Your Setup?
- Budget DIY builds: Grommets with bungees
- Premium home setups: Sleeve-and-strap or aluminum hem systems
- Temporary or test installs: Tarp clips with bungees
- Permanent enclosures: Custom frame mounting
- Multi-purpose rooms: Retractable screen systems
Hanging a Golf Impact Screen with Grommets and Bungees
Most commercial screens, including those from Carl’s Place, come with reinforced grommets already installed around the edges. These are designed to be paired with ball bungee cords, which provide an adjustable and slightly elastic connection to your enclosure frame.
How it works:
- Thread the bungee cord through the grommet, then loop it back through itself.
- Pull tight so the ball forms a seal, then loop the cord over the ball to secure it.
- For more tension, loop the cord around the ball a second time.
Benefits:
- Simple and affordable
- Quick to set up and adjust
- Elasticity allows the screen to flex on impact, reducing stress and bounceback
Limitations:
- Tension adjustments are step-based rather than fully fine-tuned
- Over-tightening increases bounceback and noise
- Grommets may eventually wear out with heavy use, especially if paired with rigid fixings like hooks
While some golfers try to replace bungees with fixed hooks, this usually puts extra stress on the grommets and increases the chance of tearing. Bungees remain the safer and more reliable choice. Carl’s Place offers a wide range of affordable bungees that fit perfectly with their screens and frames.
Can you Hang a Golf Impact Screen with Simple String
An ultra cheap option is to use simple string as opposed to bungees or other fixings. The string can fit through the grommets/eyelets on your screen and then be tied around your enclosure. You can string being used crudely in this image below. The disadvantage of string is that each knot would have to be untied or cut in order to adjust the tension.
It looks so much neater to use bungees or to cover the fixings up altogether!
Can you Hang a Golf Impact Screen with Velcro Straps
Some impact screens use adjustable velcro straps which feed around the enclosure frame, rather than bungees. You have to ensure your screen and enclosure are fairly similar in size for this to work but it can be a good option.
I only recommend metal enclosures rather than PVC piping which is shown on some pictures of velcro strapped screens if you google search it. PVC piping enclosures are liable to smash with one direct hit from a golf ball.
Screens Directly Hung From The Ceiling Or Wall
If you want to hang any other kind of impact screen from a ceiling or even from a protruding wall ledge, you just need to make sure that you attach the housing to the studs of the ceiling or wall. If you don’t the weight of the screen is likely to tear it quickly out of the ceiling or wall.
Many impact screen manufacturers will provide a mounting kit to make this job easier.
However, I don’t recommend mounting your screen directly onto or from a ceiling. You will probably experience screen puckering with a deterioration in the image, and you will still need enclosure sides to avoid any poor shots striking the side walls of your room.
One option is to use a long curtain rail, with hooks in each grommet, however something would need to pull the sides taut to avoid puckering and I am doubtful that these would produce the most aesthetically pleasing setup. I am happy to be proved wrong so anyone with this setup please send me a picture!
Screens with no attached grommets
Again, screens with no grommets are more difficult. You’re working with just the raw material and will have to find a solution that gives you the ability to add some sort of fixings to the screen. If I found myself in this position I’d take the screen to a professional who works with fabric, and have grommets added.
Another option is adding a significant quantity of velcro to the sides of your screen and mounting it this way. There would be the possibility the velcro wouldn’t hold the weight of the screen but it might work! I don’t recommend cutting holes in your screen material yourself.
The No Impact Screen Option
If you’re just starting out in your golf simulator journey, consider just using a net, enclosure, and mat. Anything to get you going! You can add screen and projector and even launch monitor later!
The Relationship Between The Golf Impact Screen And The Enclosure
The size of your overall enclosure matters and to some extent, it will dictate the size of the screen, you will need to consider this carefully before you decide to order the material for your impact screen.
What I like about the website at Carl’s Place is that you can check the sizes of the entire impact screen and the screen area without the grommets. You can also choose a screen with a specific size that works with a specific aspect ratio. They have tables of sizes and ratios to help you, as well as a guide on what to look for.
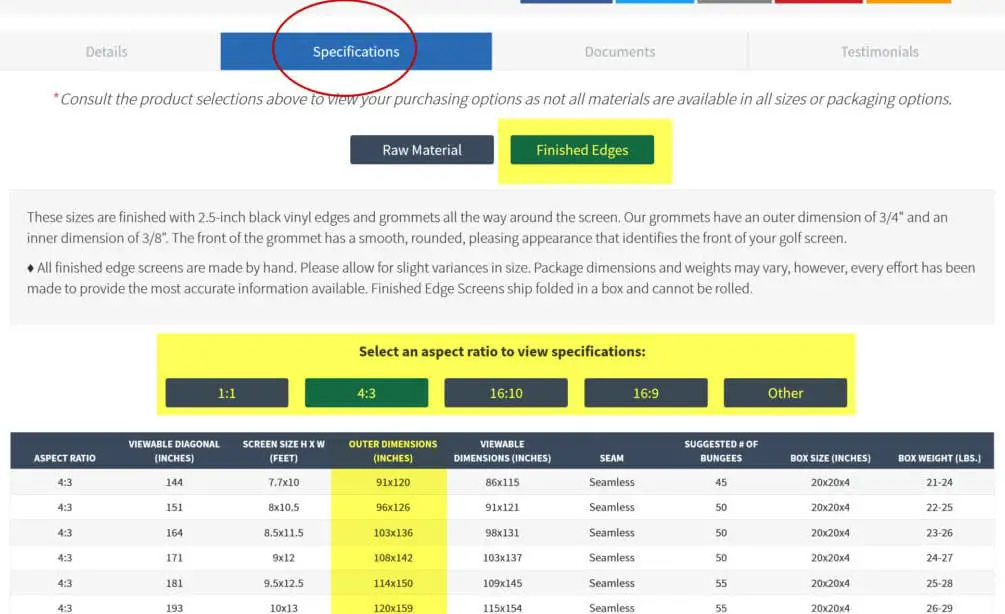
We’ve talked at length about the aspect ratio and how it affects the size of your impact screen here.
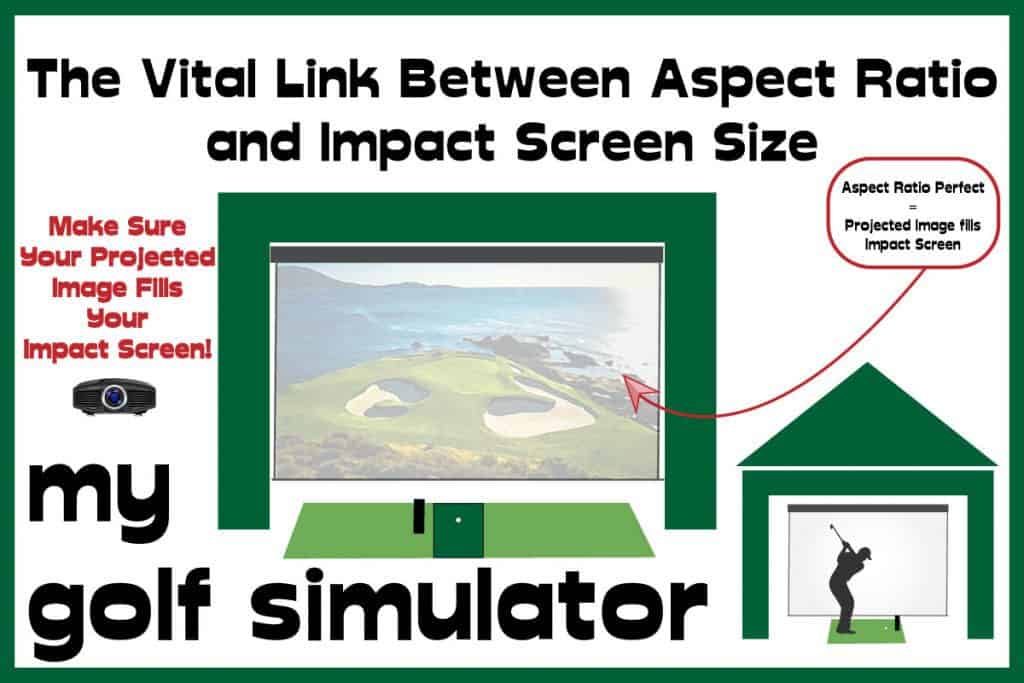
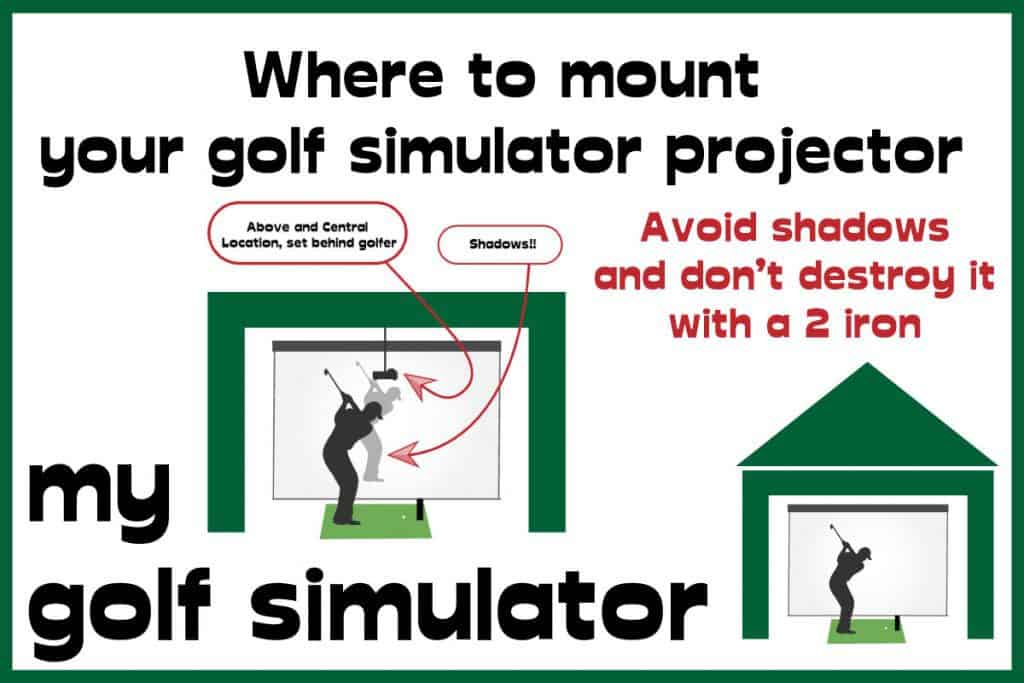
Check out our dedicated article on where to mount your golf simulator projector too. The relationship between screen and projector is so important for a golf simulator build.
Types of Golf Simulator Enclosures
The enclosure forms the structure around your golf simulator, providing both safety and a framework to hang your impact screen and accessories. The type you choose depends on your budget, space, and whether you want a DIY or professional look.
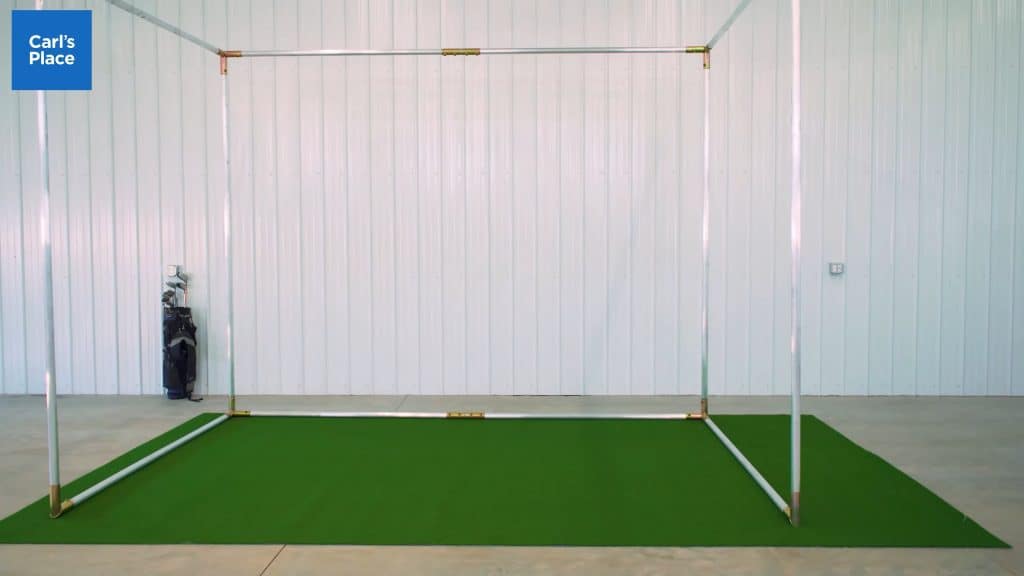
Metal Cage Enclosure
The most popular and durable choice is a standalone cage built from metal pipe. Many golfers use aluminum tubing or electrical conduit pipe, secured with corner fittings. You can:
- Buy a pre-made kit from suppliers like Carl’s Place
- Or build your own custom-sized cage with parts from a local hardware store
Advantages:
- Strong and stable, ideal for mounting screens, side panels, projectors, and even launch monitors like Uneekor overhead units
- Flexible design – you can leave a 12-inch gap behind the screen to reduce bounceback
- Easy to expand with blackout curtains, safety baffles, and foam padding
Netting and Fabric Walls
For the side and top barriers of your enclosure, you can choose between:
- Netting: Lightweight, effective, and easy to install
- Fabric: Provides a more polished look, especially blackout panels that improve image contrast
- Hybrid: Many enclosures use both — netting for safety and fabric for aesthetics
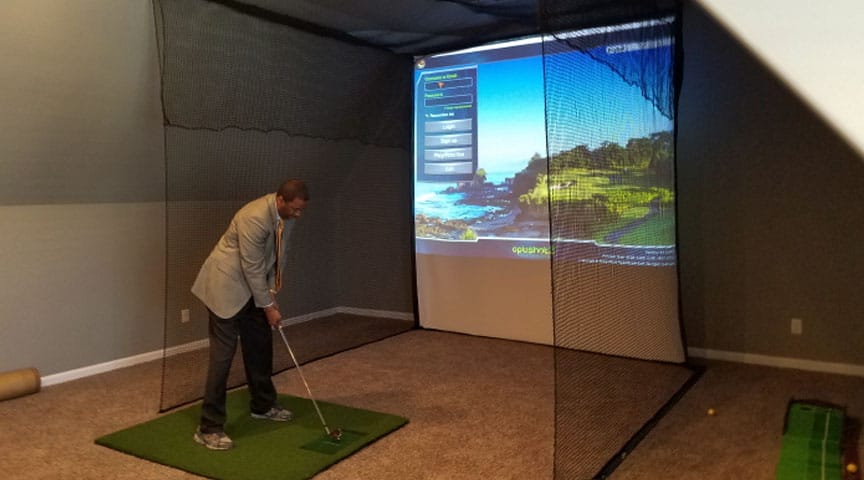
Netting or Fabric for the Walls?
You’ll need to decide whether to use netting or fabric for the walls of your enclosure. You may end up using both. Many golf simulators use netting like this image above and this is fine, as long as you have something that you like and that works!
The Space Behind Your Screen Matters
One thing that probably doesn’t get enough attention in most setups is the space behind your impact screen.
You need some space behind, I recommend at least 1ft, to avoid serious problems with bounceback. The ball will ricochet off the wall behind, given the screen has not had enough room to deform and absorb the energy. These ricochet events can lead to the ball firing straight back at you at speed.
I also recommend considering a secondary piece of material just behind the impact screen, which will absorb even more of the kinetic and sound energy from the ball and collision.
Here are some suggestions for materials that you might want to consider for this purpose:
- Archery net (otherwise known as “baffle”). You can buy heavy duty netting from suppliers like Cimarron for a very reasonable price. It’s meant to boost the cushioning effect of the impact screen and it ought to help improve the lifespan of the screen too. It’s very easy to install directly behind your screen.
- Memory foam mattress toppers. You might not have thought of dragging bits of bedding into your simulator room even if you live and breathe golf, you probably don’t want to sleep next to it but a lot of golfers swear by this stuff. You would need to experiment with fixing methods, eg suspending them from the ceiling.
- Blankets. Blankets are pretty much always the fallback position when it comes to muffling sounds or impact and the same is true here. They tend to be less aesthetically pleasing as part of a simulator setup than they might be as part of a bedroom suite but choose some large, heavy blankets and hang them behind your screen and they will soon be keeping noise to a minimum and we’d imagine that they’d have a similar effect on the longevity of your screen as the archery netting does, though we haven’t got any data to support that.
You can see blankets in use in this YouTube video from Garage Golf:
Tips to Avoid Common Problems
Hanging a golf impact screen may seem straightforward, but small mistakes can reduce image quality, shorten screen life, or create safety issues. Here are some key tips:
- Check the manual: Some screens come with specific installation requirements. Always review the manufacturer’s instructions before choosing a hanging method.
- Space your fixings evenly: Whether you’re using bungees, straps, or grommets, make sure attachment points are evenly spaced around the frame to avoid puckering or uneven tension.
- Leave room behind the screen: Maintain at least 12 inches of clearance from the back wall so the screen can flex and safely absorb impacts.
- Keep the screen level: Avoid angling the screen unless specifically recommended. A flat surface ensures the ball behaves predictably after impact.
- Follow hitting distance guidelines: Manufacturers specify a minimum tee-to-screen distance for both safety and launch monitor accuracy. Standing too close increases bounceback risk.
- Rotate your screen: If wear develops in the high-impact zone, take the screen down and rotate it (top-to-bottom or side-to-side). This extends the life of the fabric by spreading out ball strikes.
What to Do with the Edges of Your Impact Screen
How you finish the edges of your impact screen has a big effect on both performance and appearance. Exposed fixings can cause light reflections from the projector, while unprotected edges are more vulnerable to damage from off-center shots.
The Bottom Edge
Deciding whether your screen should touch the floor is a common question:
- Touching the floor improves immersion by making the projected ground align with your hitting surface.
- However, it increases the risk of puckering and image distortion where the screen bunches against the floor.
Most setups allow the screen to rest lightly against the floor, with tension adjusted so it stays smooth. To keep things tidy, cover the bottom row of grommets or straps with a dark border.
Finishing the Edges
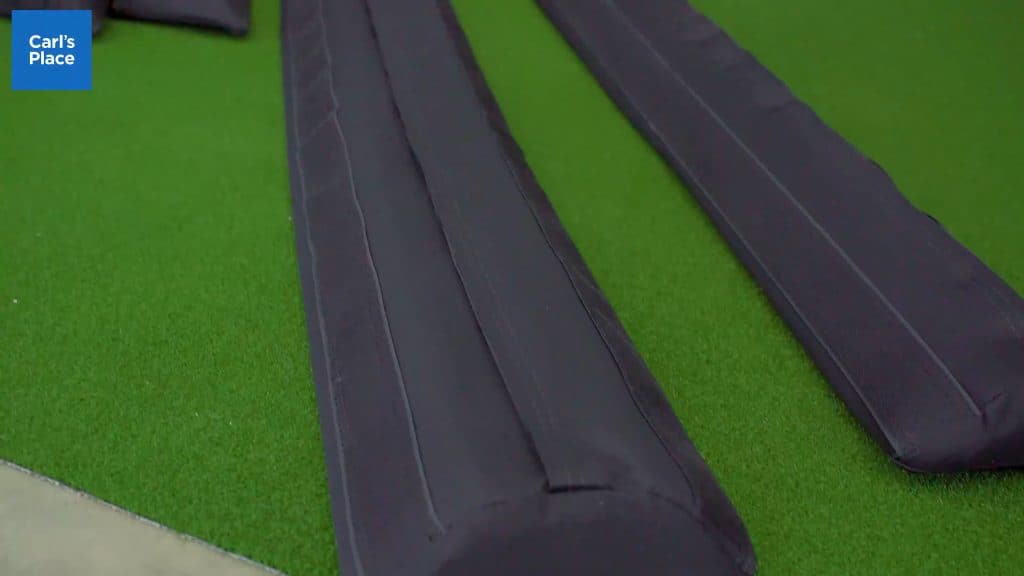
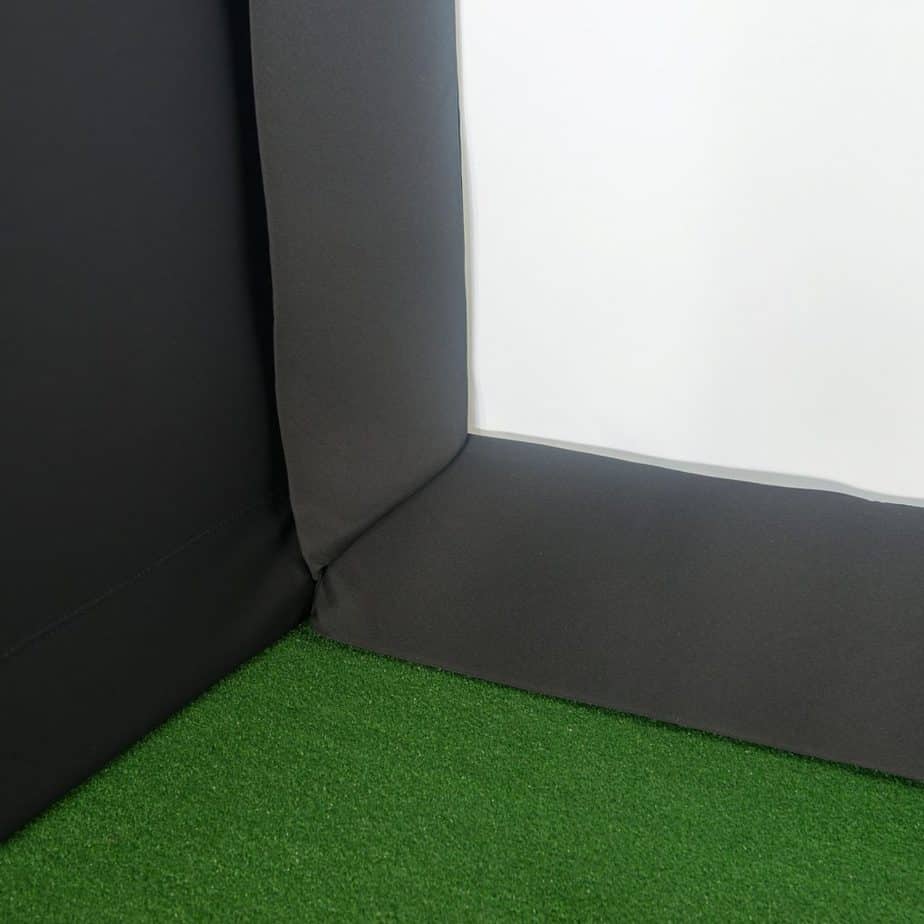
Adding protective padding around the screen edges improves both safety and aesthetics. Carl’s Place offers foam panels that can be fitted to the sides, top, or bottom of your screen. These:
- Hide grommets, straps, or bungees from view
- Prevent stray shots from damaging fixings or the frame
- Create a cleaner, professional-looking simulator enclosure
If you’re building your own enclosure, black foam, fabric borders, or custom panels can achieve a similar effect. The key is to conceal edges and keep the projected image free of distractions.
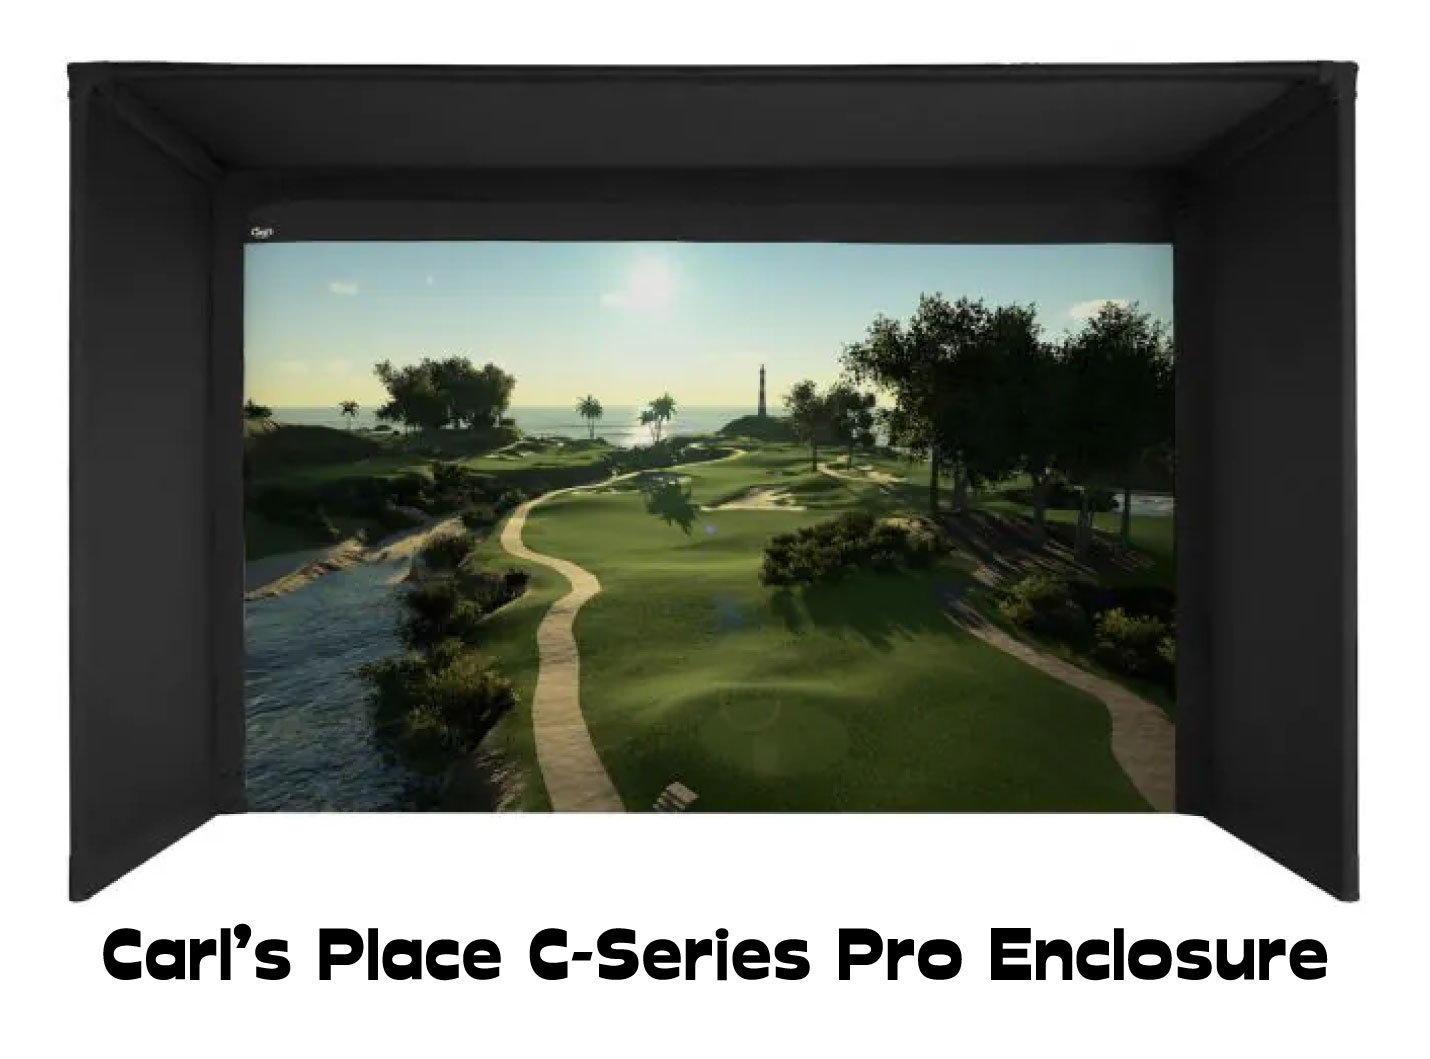
Carl’s Place produce these excellent foam panels for any side of your impact screen. They can be purchased as part of the Pro Golf Enclosure, or you could contact Carl’s Place about an individual order.
What to Do with the Top of Your Impact Screen
The top edge of your impact screen is one of the most important areas to protect. A stray wedge shot can easily rise higher than expected, and if it strikes an exposed metal frame the result can be a dangerous ricochet.
To reduce this risk and improve the look of your simulator:
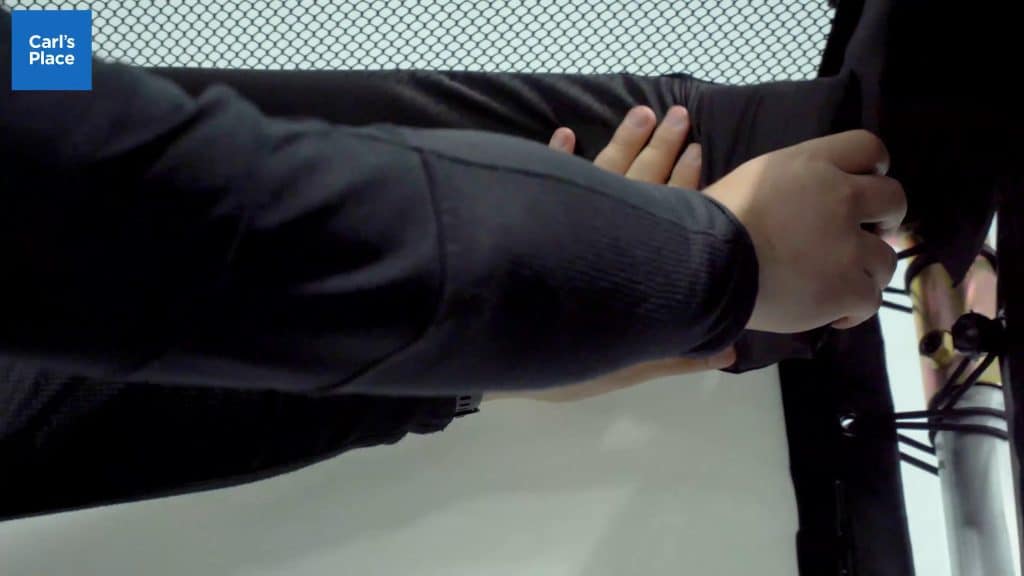
- Use dedicated foam panels, such as those offered by Carl’s Place, to cover the top edge and sides of the screen
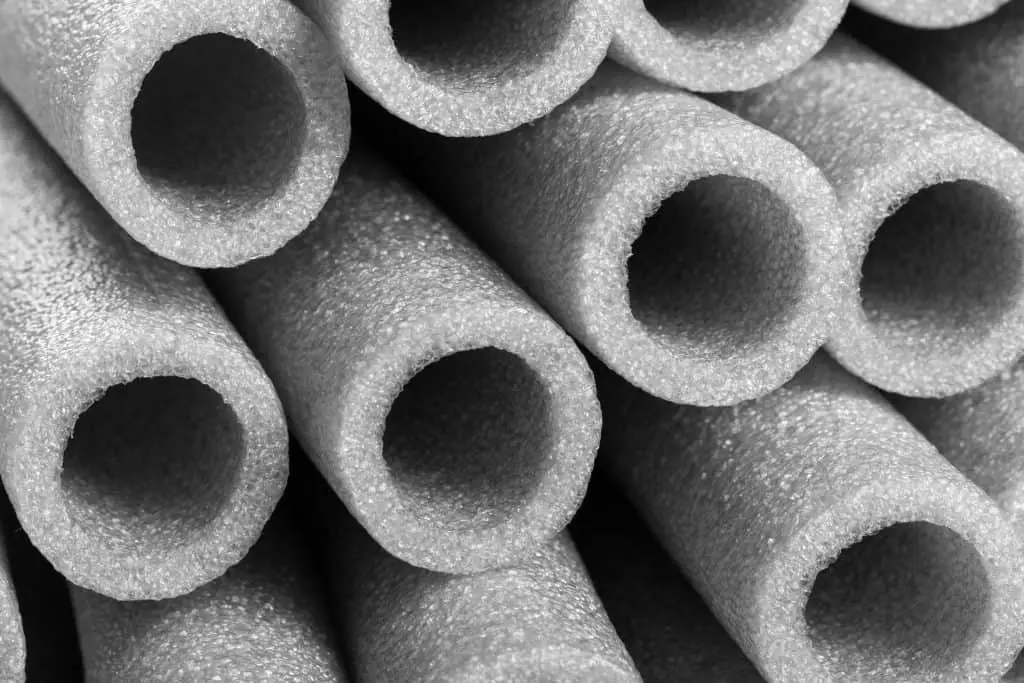
- As a budget alternative, add pipe insulation foam or padded tubing around the frame to cushion any mis-hits
- Make sure the top of the screen is tensioned evenly so it doesn’t sag, as loose fabric increases the chance of unpredictable ball rebounds
Finishing the top edge with foam protection not only makes your simulator safer, it also gives the enclosure a more professional appearance.
Think About The Package Deal (Enclosure + Screen)
OK, now that we’ve got all the technical details out of the way, let’s look at the easiest way to get set up with your impact screen and to be sure of almost no hassle whatsoever during the setup.
While it’s not the cheapest method of getting set up, I;m pretty certain that a large number of golfers would be happy to pay a little extra for some peace of mind on this project – particularly those who find DIY a little challenging. Can you picture yourself cutting metal pipe with a saw?
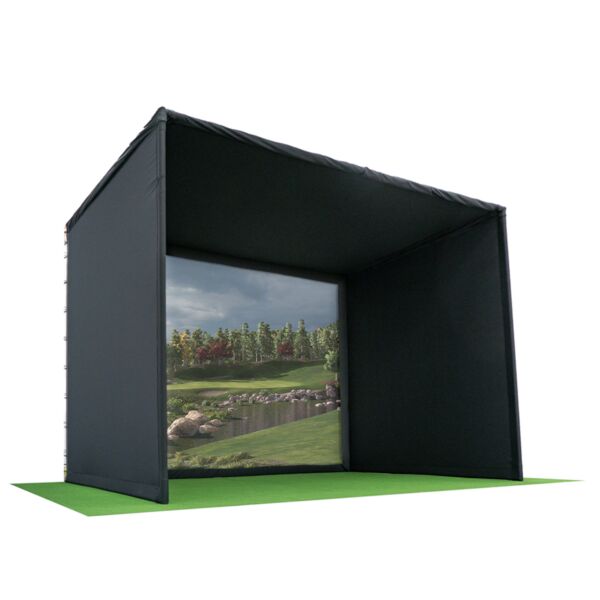
I recommend checking out Carl’s Place and their Pro Golf Enclosure, which features everything you’ll need to get set up. You can buy the setup with metal pipes included (a freight delivery) or without.
That means a complete package that is all tailored to work together, the impact screen, the netting, the framework, blackout curtains, and possibly even the projector mount, all in one easy to put together box.
Check out this video showing the Carl’s Place Pro Golf Enclosure and Impact Screen being installed. Even if you have your own screen and enclosure, this video is really helpful for showing how to put everything together.
To Sum Up – How Should You Hang Your Impact Screen?
Choosing the right way to hang your golf impact screen makes a big difference to your simulator’s performance, safety, and overall look. The best method for you depends on your space, budget, and how permanent you want your setup to be:
- Grommets and bungees are the simplest, most budget-friendly option for DIY builds
- Sleeve-and-strap systems or aluminum bar hems offer the cleanest, most durable finish for long-term setups
- Tarp clips work well for testing or temporary builds without grommets
- Custom frames provide flexibility for garage and dedicated simulator rooms
- Retractable systems are ideal for multi-purpose spaces where the screen needs to disappear when not in use
No matter which method you choose, remember to leave space behind the screen, apply even tension, and protect the edges with padding for both safety and image quality.
Carl’s Place offers a full range of premium impact screens, enclosures, bungees, and foam panels that make installation easier and help you achieve a professional finish at home. With the right setup, you’ll have a simulator that looks great, performs smoothly, and lasts for years of practice.
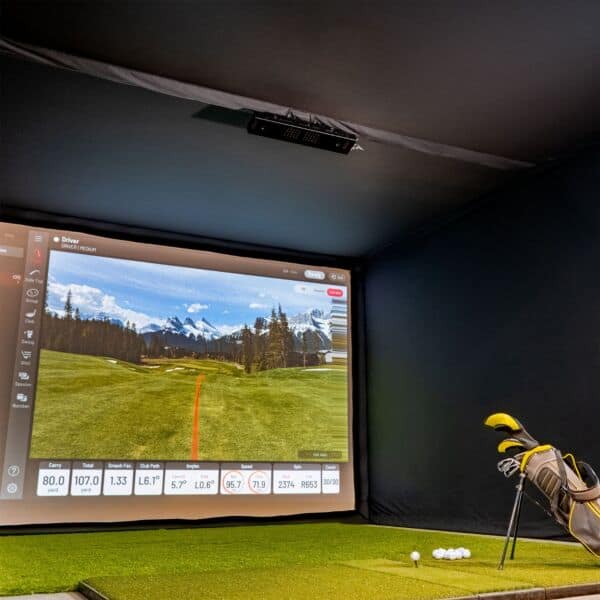
Carl's Place Premium Impact Screen
- High-Quality Images: Tightly woven, multilayer screen for a smoother, crisper image up to 4K.
- Durability: Designed to withstand direct impact from golf balls traveling up to 250 MPH.
- Custom and Standard Sizes: Available in various sizes to fit different room dimensions.
- Material Quality: Made of three layers of heavy-duty, tight-knit, impact-resistant polyester.
- Noise Reduction: Features a cushioned center layer to quiet noise from the golf ball hitting the screen.
- Versatile Finishing Styles: Options for edge finishing to suit installation needs.
- Compatibility: Can be attached to different frames, used with golf enclosures, or as part of a DIY golf simulator.
Carl’s Premium Golf Simulator Screen features a bright white surface with ultra-tight weaves, enhancing image detail and quality. There is a central cushioning layer that allows a reduction in light bleed, bounceback, and noise.
- Excellent Image Quality: Realistic golf simulation experience.
- High Durability: Suitable for intense use with high-speed impacts.
- Customizable Size and Finish: Tailored to specific room sizes and design preferences.
- Noise Reduction: Less noise disturbance during play.
- Versatile Installation Options: Flexible setup or integration into existing setups.
- Few - more expensive than budget screens, but this screen is worth it in my opinion
Alex’s Expertise and Experience with Golf Impact Screens
I am to provide clear, detailed, and specific information on golf impact screens within the broader context of golf simulators. I understand the critical role that a high-quality impact screen occupies in the overall experience and strive to guide my readers through the complexities of choosing and installing the perfect screen for their needs.

- My Specialized Knowledge in Golf Impact Screens: Since starting mygolfsimulator.com, I’ve honed my expertise specifically in the area of golf impact screens. My extensive research and writing have been centered on understanding every nuance of impact screen technology and its application in golf simulator builds.
- My Deep Dive into Impact Screen Quality: I’ve dedicated significant time to exploring the intricacies of impact screen picture quality. Understanding the importance of a clear, sharp image for an immersive golfing experience, I’ve analyzed various screen materials and their impact on image clarity and resolution.
- My Insights on Sizing and Aspect Ratio: Recognizing that the size and aspect ratio of an impact screen are critical for a perfect simulator setup, I’ve delved into the specifics of how to choose the right dimensions. I provide detailed guidance on selecting the right screen size and aspect ratio to ensure a seamless fit within any simulator space, additionally covering issues with the bottom of the impact screen. I have also written in great depth on curved impact screen builds.
- My Experience with Impact Screen Installation: I’ve personally experimented with various methods of attaching impact screens within golf simulators. My hands-on experience allows me to offer practical advice on the best practices for mounting screens, ensuring both safety and optimal visual quality.
- My Focus on Practical Solutions: In my work, I emphasize practical solutions to common issues like minimizing bounceback and noise. I explore different screen tensions and additional cushioning techniques to enhance the safety and comfort of using a golf simulator. I have also compared impact screen simulator builds with alternatives such as golf simulator nets.
- A Detailed Knowledge of Projector Specifications: I have developed strong expertise in selecting the ideal projector and impact screen combination for golf simulators. My knowledge extends to understanding projector specifications in detail, enabling me to recommend the perfect projector for any given space. I ensure the projected image aligns flawlessly with the screen, considering factors like throw ratio, keystone correction, and resolution. This expertise allows me to provide tailored advice, ensuring an immersive and accurate golfing experience for every setup.
- Hands-on Experience Building Enclosure Frames: I have built a variety of golf simulator enclosure frames over the last four years, from fully DIY builds to pre-packaged premium enclosures. I have experience cutting metal conduit pipes to size as well as tinkering with bungees and zip ties to create the perfect impact screen tension.
- Putting it all together: I have amalgamated all of the above in-depth information into a comprehensive impact screen buying guide.
Check out my other Impact Screen Content!
Mevo Gen 2 Space Requirements
Gray Impact Screens – Pros and Cons
ABOUT THE AUTHOR
Hello! My name is Alex and it is my mission to bring you all the information you need to build your own home golf simulator! I hope mygolfsimulator.com helps you on your journey to better golf at home!
LEGAL INFORMATION
On this site, you'll find articles on all aspects of building a golf simulator. I will also link to other sites where you can buy some of the simulator components. Some of these links may be affiliate links, which means if you click them I gain a small commission at no extra cost to you. This really helps out me and my site so thank you in advance! mygolfsimulator.com and all related social media accounts are property of Awonline LTD.
