Curved Impact Screens in Golf Simulators – Complete Guide
Posted in Enclosures, Golf Impact Screens, Projectors, Room Setup
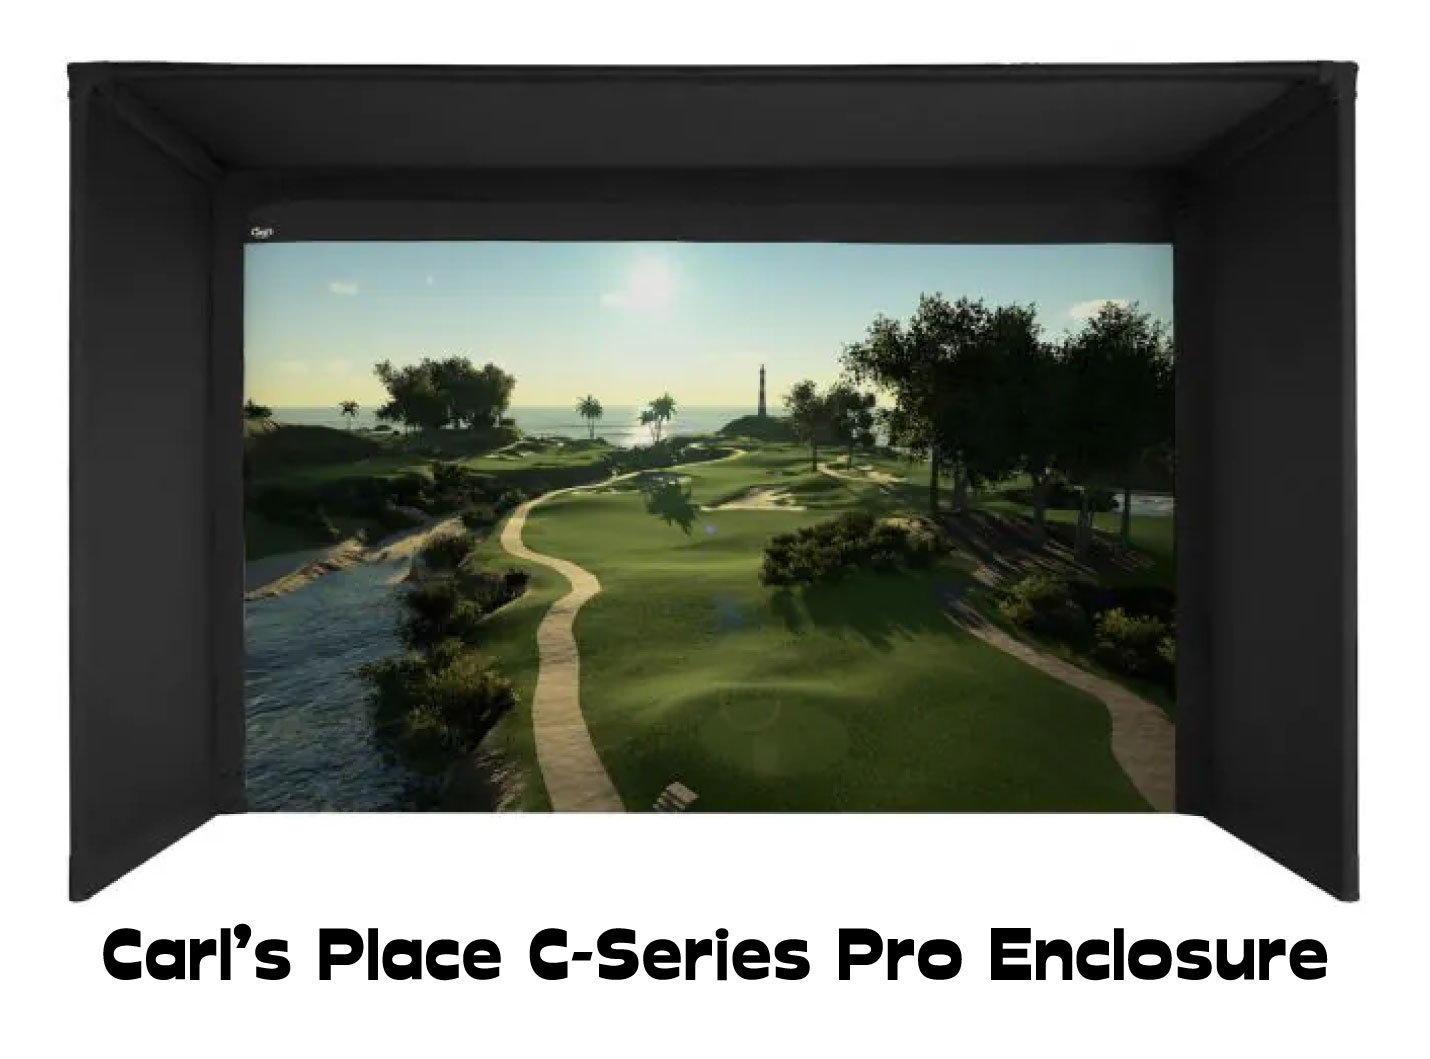
Many golfers dream of a huge, wrap-around curved impact screen that places them right in the middle of the course. Until recently, curved setups were reserved for ultra-premium simulator builds, but that has changed. Today, companies like Carl’s Place offer ready-to-install curved impact screen enclosures that bring panoramic immersion within reach of serious home users as well as commercial facilities.
Curved screens add a level of realism and depth perception that flat screens simply can’t match. By extending the image into your peripheral vision, they make every shot feel more like standing on the tee outdoors. They do require a bit more room depth and investment than flat screen setups, and their ultra-wide format means your projector choice and computer output need to be considered carefully.
The good news? With Carl’s DIY Curved Golf Enclosure Kits and projector specialised for curved screens like BenQ’s AK700ST, the process is simpler and more accessible than ever—no longer just a luxury option, but a practical upgrade for golfers who want the most immersive simulator experience possible.
Carl’s Curved Impact Screen – Key Features at a Glance
| Feature | Benefit |
|---|---|
| Wide Size & Depth Range | Six standard sizes (e.g. from ~9 ft × 14 ft eye-width to ~10 ft × 17 ft and depths from ~8 ft to 15 ft), a range of enclosure depths, plus custom sizing to the inch. Gives flexibility depending on room size. |
| Frame & Accessories | Includes Blackstop fabric enclosure, steel fittings, foam inserts to protect frame, plus all fasteners (bungees, zip ties) for screen tension. Optional accessories available (pipe framing kit, back cover, safety baffles). shop.carlofet.com+1 |
| Image Quality Options | Choose between white or high-contrast gray, different screen materials (standard, preferred, premium) depending on budget and lighting conditions. shop.carlofet.com+1 |
| Ease of Assembly / DIY Friendly | Carl’s provides instructions, cut sheets (for pipe usage if you source locally), and customer support. Basic handy skills required; pipe kit when selected ships freight. |
I believe a lightly curved screen setup is now within reach for most golfers building their own simulators. With the availability of DIY curved kits, even a gentle curve can transform your setup, adding immersion and wow factor that will impress every visitor.
This article also explores the challenges of the ultra-premium approach: the dramatic, full wrap-around curved screens seen in commercial installations. These look incredible but are much harder to perfect, requiring careful planning, the right projector, and plenty of space. We’ll cover those advanced setups later — but first, let’s walk through the fundamentals.
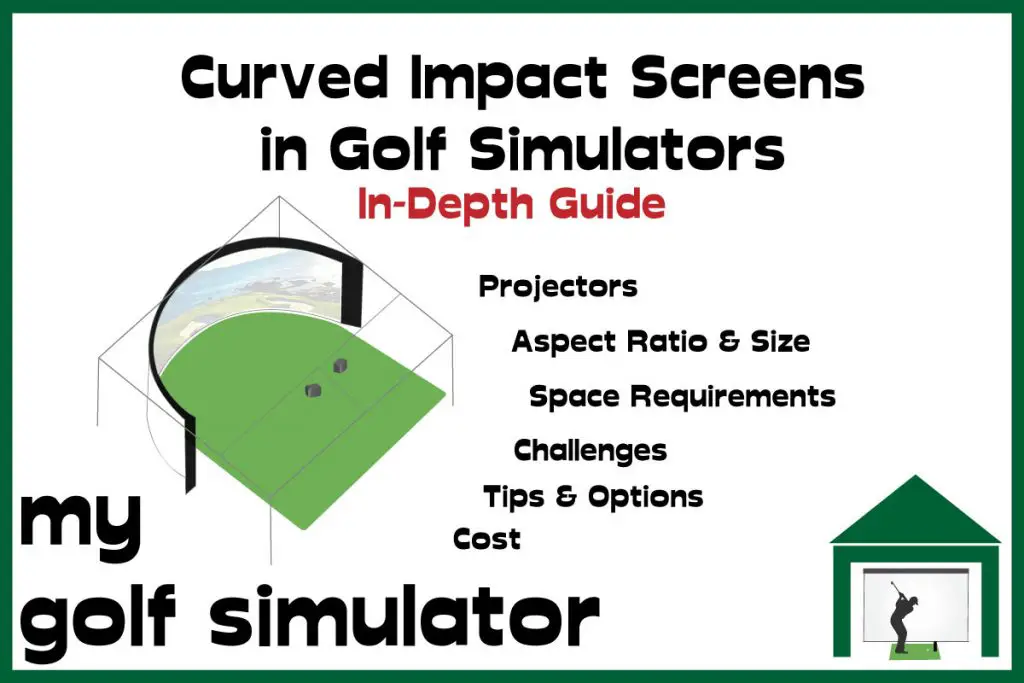
Who Needs a Curved Impact Screen
- Serious home simulators who want “best-in-class” visuals.
- Commercial facilities (coaching bays, golf complexes, entertainment venues) that want to impress and offer premium experiences.
- People who have the room and budget — if your ceiling or width is limited, you’ll want to check carefully.
- Those who appreciate durable gear; one-and-done over repeated upgrades.
Pros and Cons of a Curved Impact Screen in a Golf Simulator
Pros of a Curved Golf Simulator Impact Screen
Immersion and depth of image
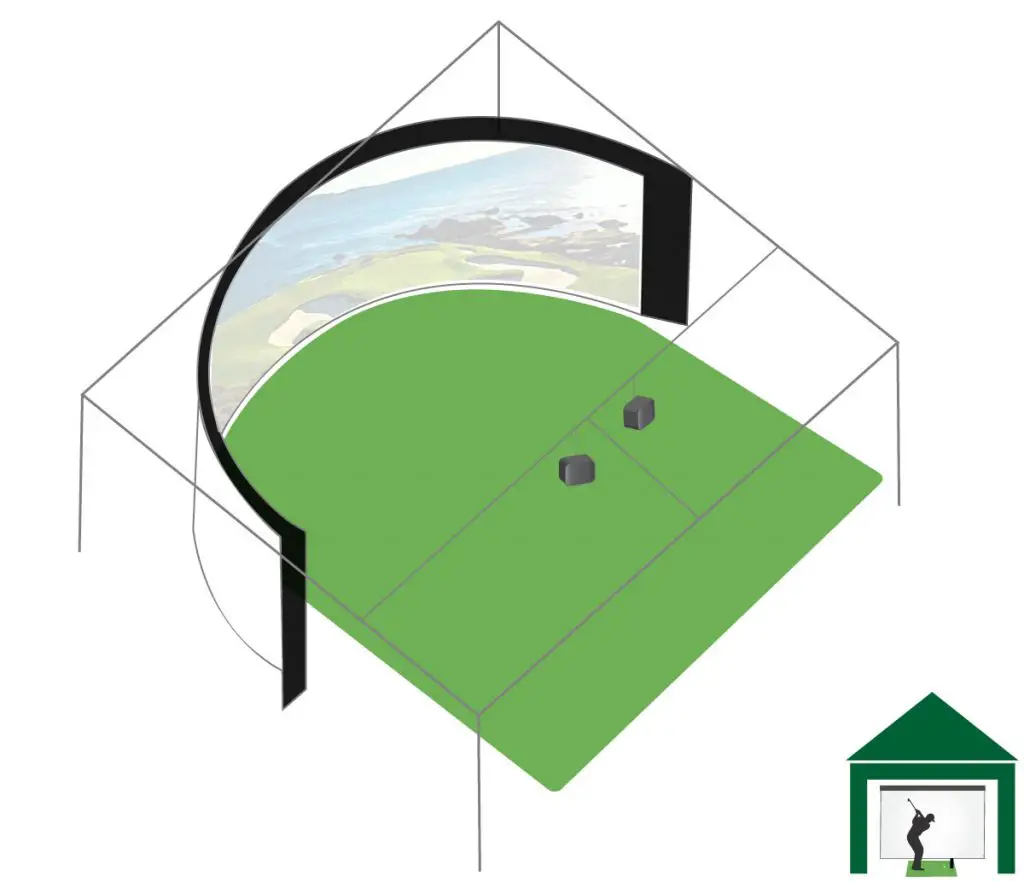
A curved impact screen, correctly set up, provides the ultimate immersive experience. The curvature brings the picture into your peripheral vision, making courses feel far more lifelike. Standing on a curved screen setup at Pebble Beach feels closer to being there than a flat screen ever could
A curved image also adds depth perception and realism that can’t be matched by flat setups.
Impress your friends
Even a flat-screen simulator is an impressive addition to a home. But a carefully built curved setup takes things to another level. A wide, panoramic enclosure not only enhances play but will leave your friends in awe of your build.
Space efficiency in some rooms
Sometimes a curve can mean you get more screen width for your space. In fact, one benefit is that you can often fit a wider image into the same width of room compared to a flat screen. Without a curve, limited room width may force you into a tall 4:3 aspect ratio or even a square image. With a gentle curve, you can unlock a wider view in the same footprint.
Cons of a Curved Golf Simulator Impact Screen
Cost
Curved setups still cost more than flat-screen builds. The screens are usually larger, the frames more complex, and projector choices often need to be more precise. Carl’s curved kits now make things more affordable than before, but you should still expect a higher investment than a flat screen build.
Space requirements
You will usually need more room depth to accommodate the curve and the deeper enclosure frame. The screen can’t sit flush against the back wall, so plan carefully for the footprint. That said, if your room is wide enough, your hitting position doesn’t have to move far forward compared to a flat screen setup.
Image quality optimization
Curved screens demand more attention to projector setup. You need to account for throw distance, throw ratio, and mounting height while avoiding shadows. The image must also be corrected to follow the curve without distortion or blurring. The good news is that new projectors like the BenQ AK700ST, designed for curved setups, can handle this much more easily than older models.
Harder to build and plan
Curved enclosures are more complex than flat ones. Building a frame that holds tension evenly across a curve is trickier, and aligning the projector adds to the challenge. DIYers with experience building simulators will find it manageable, but for first-time builders it can feel daunting. Carl’s DIY curved kits reduce this complexity, but planning is still key.

A curved screen shouldn’t impact room height requirements too much.
| Pros | Things to Think About / Plan For |
|---|---|
| Immersive, “wrap-around” visuals that make gameplay feel more real. | Requires more space; you must account for buffer around the enclosure (side, above, behind) to ensure installation and safety. |
| Premium screen materials, sturdiness, added accessories help prolong life. | Higher cost vs flat screens; also heavier shipping / handling if pipe‐kit is included. |
| Strong image in ambient light if using High-Contrast Gray screen. | Curved screens may need projector warping / distortion correction or more careful projector choice. Some projectors adapt better than others. Carl has partner tech (e.g. BenQ) to help with warp / correction. |
| Stands out: a premium being, helps resale value, impresses clients or visitors. | Complexity of setup (getting curvature, tension, frame alignment) is greater. Might require more time / patience. |
Curved Golf Simulator Impact Screens – Gimmick or Gamechanger?
Before starting a curved build, it’s worth asking whether the added effort and cost will genuinely improve your experience compared with a well-designed flat-screen simulator.
The key factor is field of view. The more of your peripheral vision you can fill, the more immersive your simulator feels. How much screen you see depends on both the curve and your hitting distance from the screen.
A lightly curved screen with a single projector won’t always expand your field of view dramatically, but it can still provide a smoother, more natural image and allow for a wider aspect ratio in tighter rooms. It’s also much easier to build and, thanks to DIY kits, now within reach of many golfers.
The major leap in realism comes with highly curved screens that wrap far around the golfer. These builds deliver the panoramic effect that makes you feel like you’re really on the course. In the past, this often meant using multiple projectors with complex blending software. Today, projectors like the BenQ AK700ST, designed for curved setups, can achieve this with a single unit, removing much of the technical barrier.
So is a curved screen an expensive gimmick? In reality, it depends on your goals. If you want the most immersive, next-level simulator experience, a curved setup can absolutely be a gamechanger. If your priority is simplicity and value, a flat screen may remain the smarter choice.
Consider Field of View and Peripheral Vision
The maximum field of view of a human using both eyes looking forwards is around 210 degrees, however, you only have 114 degrees of your central gaze that can perceive depth or objects in three dimensions. Your peripheral vision can not perceive depth as only one of your eyes on each side can see that area.
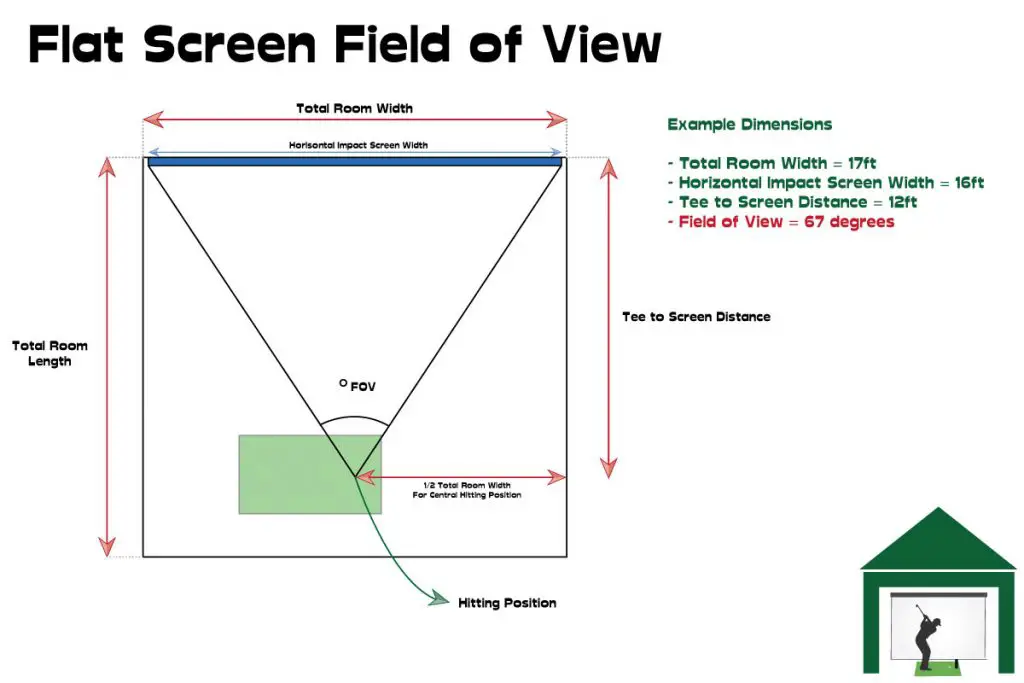
Taking this into account, let’s consider a 16ft x 9ft flat impact screen golf simulator build. 16ft is fairly wide by normal golf simulator standards.
Standing 12ft away from the screen, you would achieve a 67 degree field of view if you managed to fill your impact screen with your projected image. There is room for improvement in the quest for full immersion. You would of course increase this field of view if you addressed the ball closer to the screen.
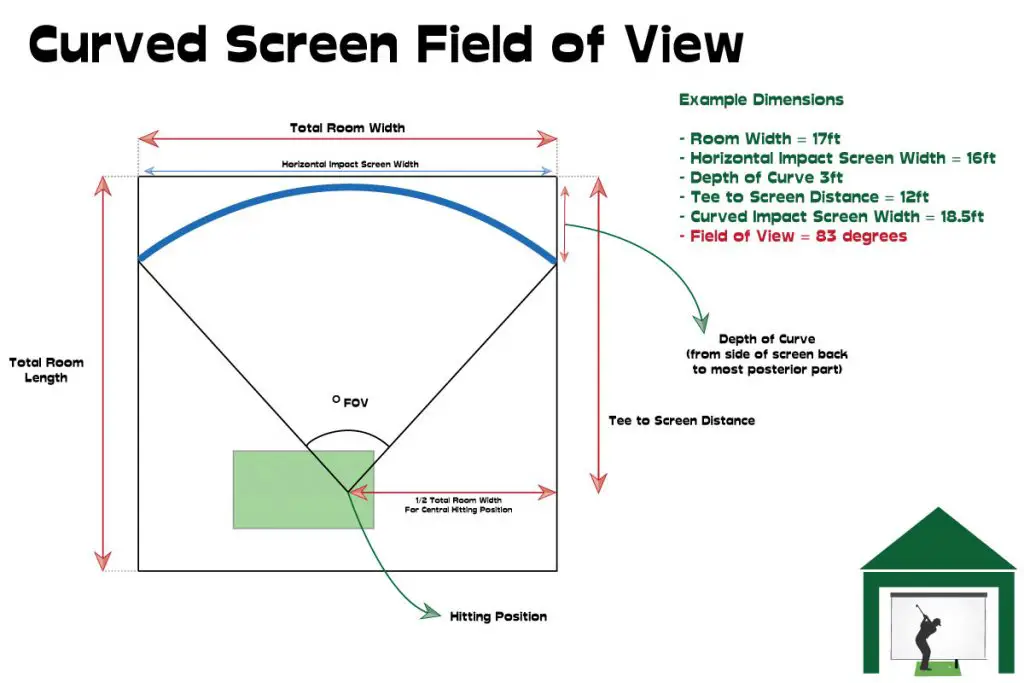
Adding a light curvature to your screen will bring the sides closer to you. You will also be able to have a wider screen within the same room width. You can see by the diagram below that your field of view in this example of a 16ft wide space increased to 83 degrees. This is an improvement, but it is not close to the full field of view of human vision.
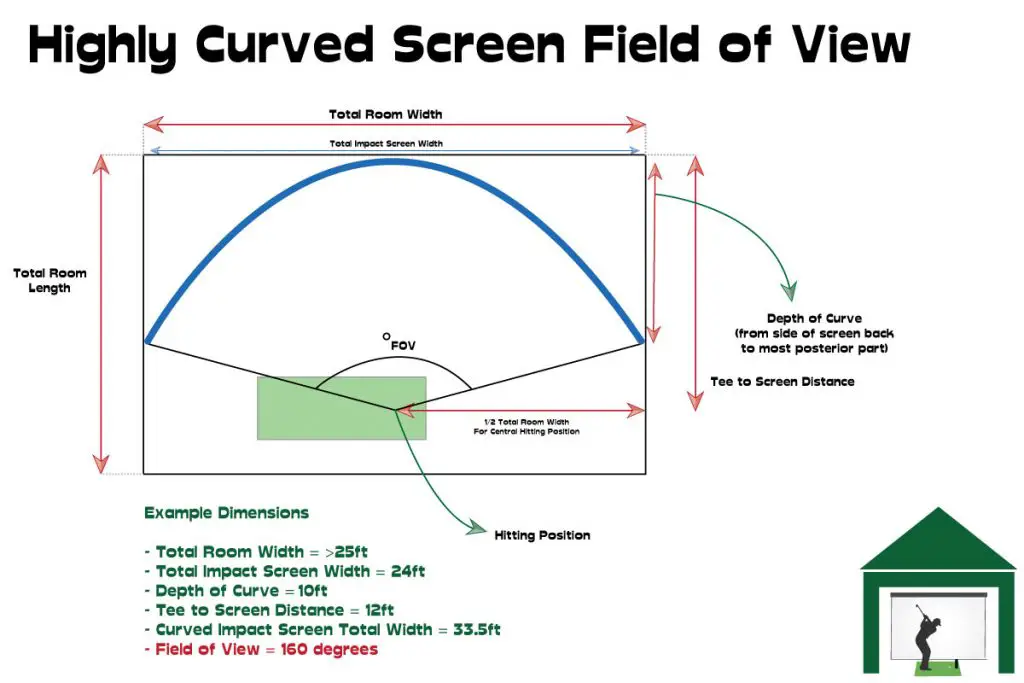
Now, let’s consider a highly curved screen. In this example, the depth of curve is 10ft rather than 3ft.
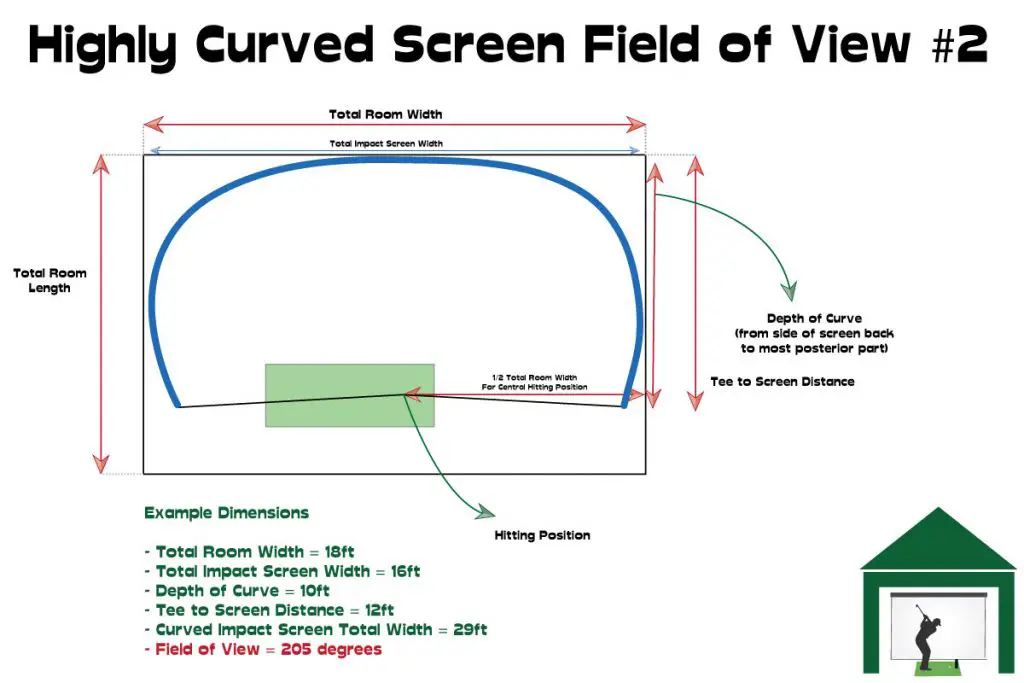
We will probably need a space that is a lot wider to accommodate such a screen. You can see I have set up two examples below of highly curved screens within an 18ft wide space and a 24ft wide space, generating fields of view of 160 and 205 degrees. The calculations were done at The Complete Circular Arc Calculator.
Note that you would definitely need more than one projector (perhaps three or more), along with edge blending software to fill this size of impact screen with a projected image. We talk in detail later in this post about blending images from multiple projectors.
The second example (205-degree FOV) is more extreme a curvature than I recommend embarking on. You would need probably more than three projectors and it would be a difficult project even for that expert in each facet of the build.
Perhaps this extreme FOV would mean the image of the golf course is stretched too wide. fore, if you wish to house a highly curved screen, I think you probably need the extra room width as in example number one.
Please get in contact if you have managed to build a simulator like in example 2!
Curved Impact Screen Concepts
Length and size
A curved golf simulator screen is usually wider than a flat screen chosen for the same room. You can opt for a gentle curve that doesn’t change the overall dimensions too much, or you can go for a deeper wraparound design that fills more of your peripheral vision. The more curvature you add, the longer the screen fabric needs to be, since it spans a greater arc.
Screen height remains similar to flat-screen builds, but width and arc length are where curved setups differ. Tools such as a circular arc calculator can help you work out the relationship between width, curvature depth, and total screen length. Remember that your hitting position also affects how much wrap you perceive — the closer you are to the screen, the more immersive it feels.
Hanging and tensioning
When hanging a curved impact screen, it helps to have more eyelets along the border than you would with a flat screen. This allows you to attach additional bungees and apply even tension across the curve, reducing the chance of wrinkles or the screen “cornering” where the arc bends. Carl’s curved kits account for this by including pre-curved framing and sufficient attachment points, which saves a lot of DIY trial and error.
Aspect ratio considerations
Curved setups often end up with much wider aspect ratios than traditional golf simulator screens. A 16:9 or 4:3 screen can still be curved and deliver benefits, but true wraparound designs may reach 2.35:1, 2.40:1, or even 3:1. For example, a 10-foot high screen stretched to 30 feet wide yields a 3:1 ratio. These ultra-wide screens maximize immersion but require careful projector planning.
Historically, this meant blending two or three projectors. With the release of projectors like the BenQ AK700ST, designed to work with curved enclosures, a single projector can now cover many curved builds. For extreme widths, though, multi-projector setups may still be needed.
Amount of curvature
Curvature exists on a spectrum. At one end is the mild curve — easy to build, easy to project onto, and achievable in most DIY spaces. At the other end is the super-wide, commercial-style curve that wraps completely around the golfer. These builds demand more space, more planning, and often higher budgets. Your decision will come down to how much immersion you want and how much complexity you’re prepared to handle.
Space requirements
Curved screens take up more physical space than flat screens. They protrude further into the room, and your hitting position often shifts slightly forward. A room only 10 feet wide is unlikely to be suitable for a curved build, because the enclosure may bring the sidewalls too close to your swing path. If you have both width and depth, a curved design becomes much more practical.
Avoiding a cornered screen
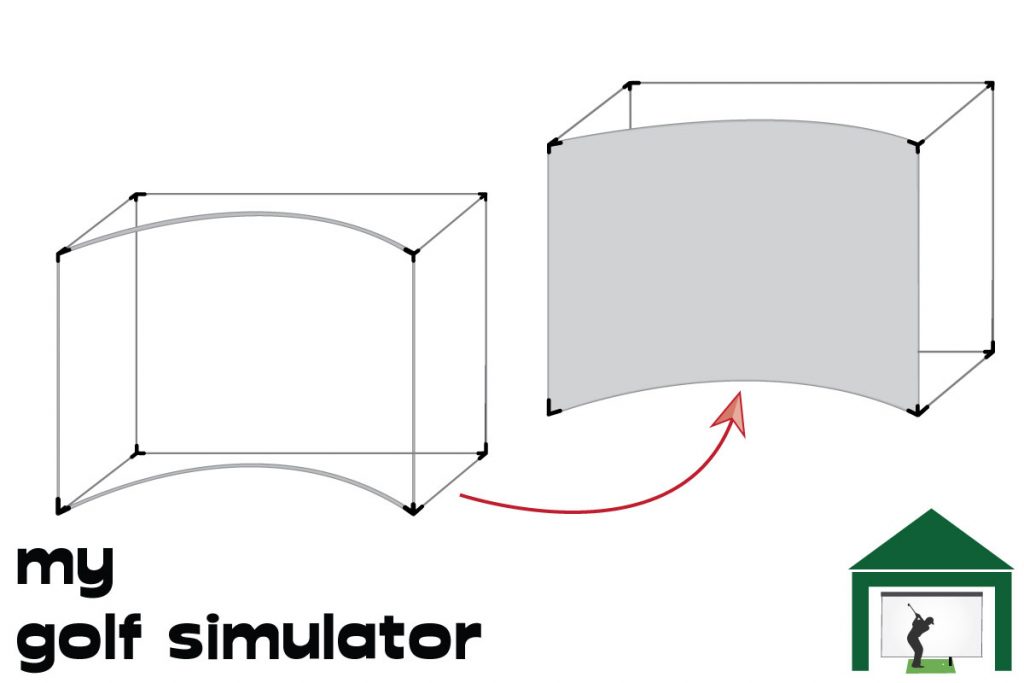
For a curved screen to look right, the enclosure itself must follow a curve. Trying to bend a screen around squared-off corners never works — it leaves creases and flat spots. A rigid pre-curved frame or a flexible border pipe is essential to maintain a smooth, continuous arc. This is one of the reasons DIY kits with pre-engineered curved frames have become so popular: they take the guesswork out of achieving a clean curve.
Decision #1 – DIY Curved Impact Screen Setup vs Pre-Designed Package
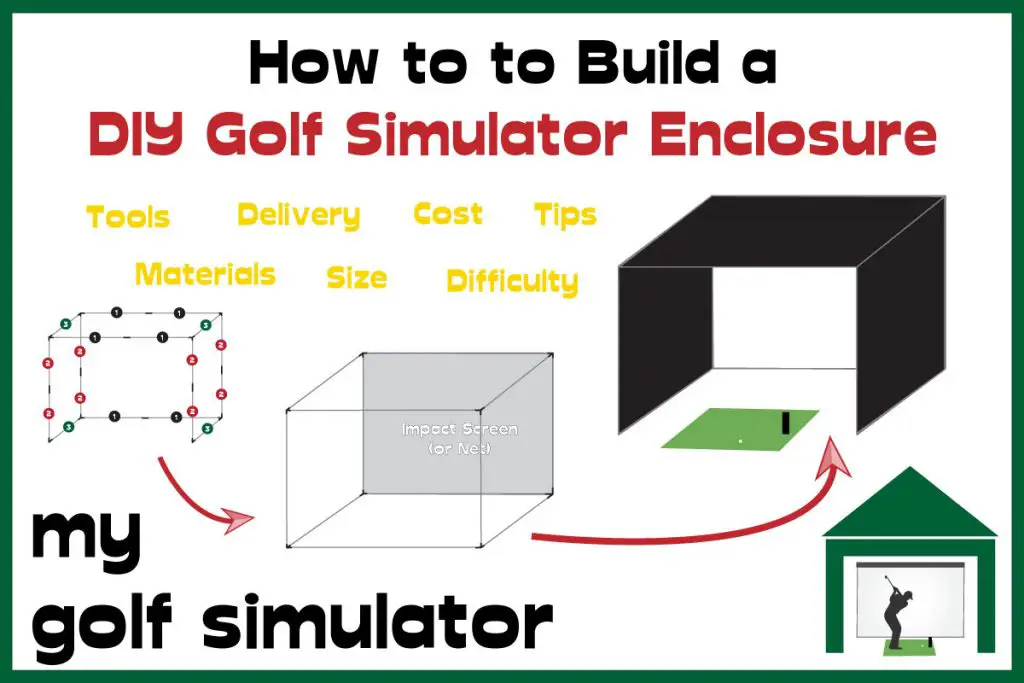
If you decide to build a curved golf simulator, you now have two clear options. You can either go the DIY route, sourcing an enclosure and screen yourself, or you can buy a pre-designed package. The DIY option is still cheaper, but it’s no longer as complicated as it once was.
Carl’s Place now offers Curved Golf Enclosure Kits that include the frame design, curved screen, and mounting hardware. These kits remove much of the guesswork, making it possible for home builders to achieve a professional-looking curve without bending pipes or reinventing the frame.
Decision #2 – How Much Curvature Do You Want in Your Impact Screen?
This is one of the biggest decisions you’ll make. The degree of curvature has major implications for both projector setup and cost.
A gentle curve is the simpler option. It slightly improves immersion and aesthetics, while still being compatible with a single central projector. With the arrival of projectors like the BenQ AK700ST, designed for curved setups, you can now achieve a seamless image on a curved screen without extra lenses or blending software.
A full wraparound design is at the other end of the spectrum. This type of build delivers unmatched immersion, but it requires a larger room and a more advanced projector strategy. Historically, that meant two or three projectors with warping and blending software. In 2025, many of these challenges have been reduced thanks to single-projector solutions, but for extreme widths, multiple projectors may still be necessary.
If you get this type of setup right, the result is spectacular — a simulator that wraps around you, maximizes field of view, and creates a truly unforgettable golf experience.
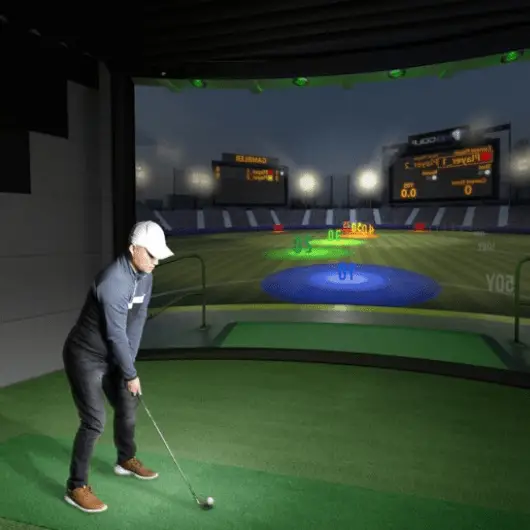
Decision #3 – How to Mount a Curved Impact Screen in your Golf Simulator – 3 DIY Options
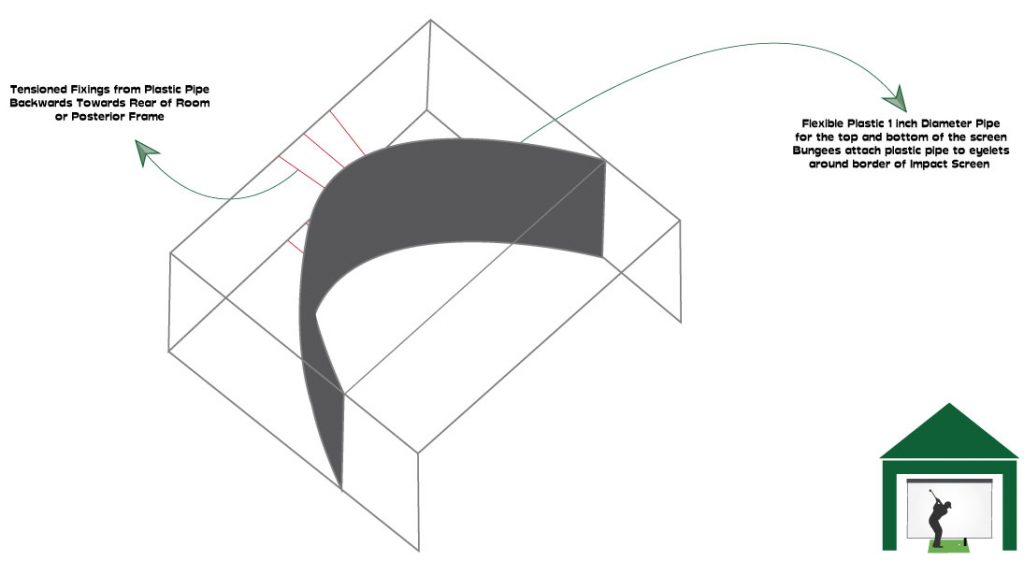
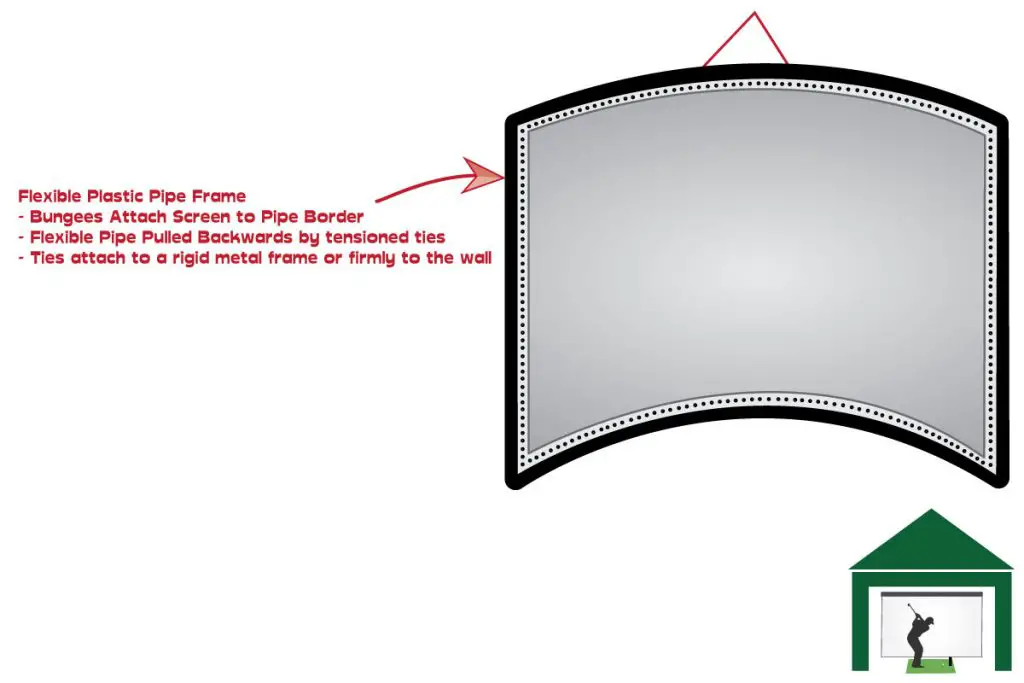
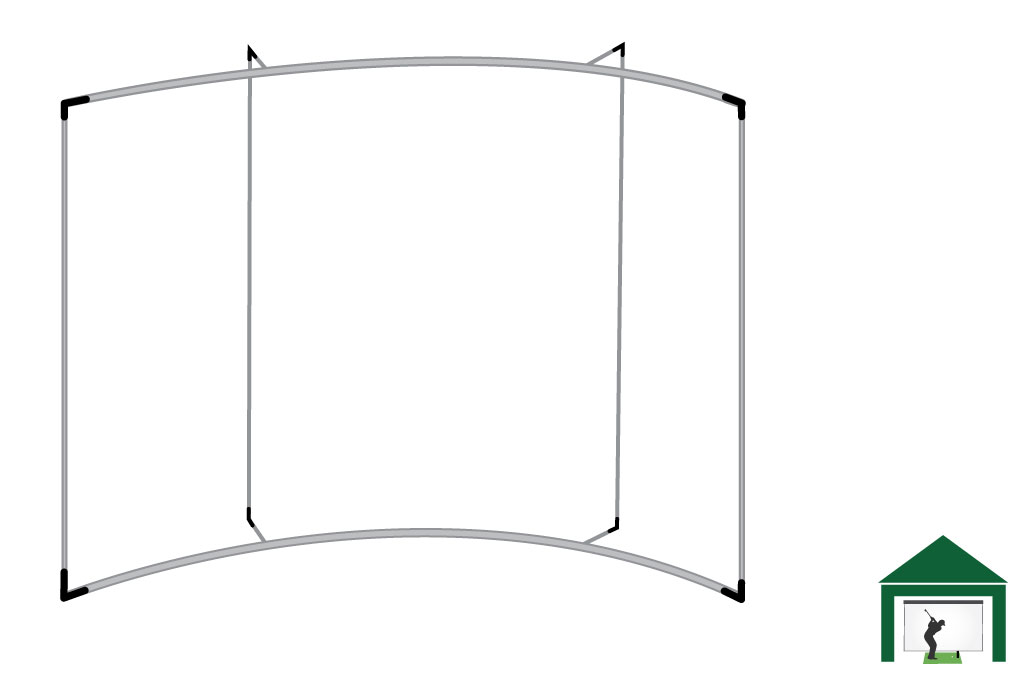
Option 1: Flexible plastic pipe frame
One approach is to build a rigid enclosure and use long, flexible plastic pipes as the curved borders for your screen. Each side of the screen (top, bottom, left, right) can be pulled back under tension with ties to create the curve. The more tension, the deeper the curve. This method is budget-friendly but requires careful planning to handle the pressure safely and avoid uneven screen corners.
Option 2: Bend metal conduit into a curve
Another method is to bend regular EMT metal conduit into the exact curve you need. Using a pipe roller, you can create consistent arcs, then connect them with standard fittings. This produces a strong, permanent frame that holds tension well. However, it is probably outside the DIY skills of most golfers.
Option 3: Curved curtain rail system
For lighter-duty builds, some golfers use curved curtain rails or poles (similar to those used for bay windows). The screen attaches to the rail with hooks or bungees, creating a smooth curve. This option can work for very wide screens but requires rails of the right size and curvature, which can be hard to source.
Decision #4 – Projector Considerations with Curved Golf Impact Screens
Your projector choice depends on how much curvature you want. A gentle curve is relatively straightforward, while a full wraparound screen pushes projectors to their limits.
Single vs multiple projectors
In the past, highly curved screens required two or three short-throw projectors with blending software to merge the images. This added cost and complexity. That barrier has now been broken.
The BenQ AK700ST, developed in partnership with Carl’s Place, was designed specifically for curved golf simulators. Its Auto-Fit feature automatically detects the screen edges and warps the image to match the curve, all with a single projector. This means you can achieve a wide, seamless curved image without learning blending software or investing in multiple projectors.
For mild curves, other short-throw projectors with geometric correction can still work well. But if you want maximum wraparound immersion, the AK700ST is the go-to option in 2025.
Understanding the pincushion effect
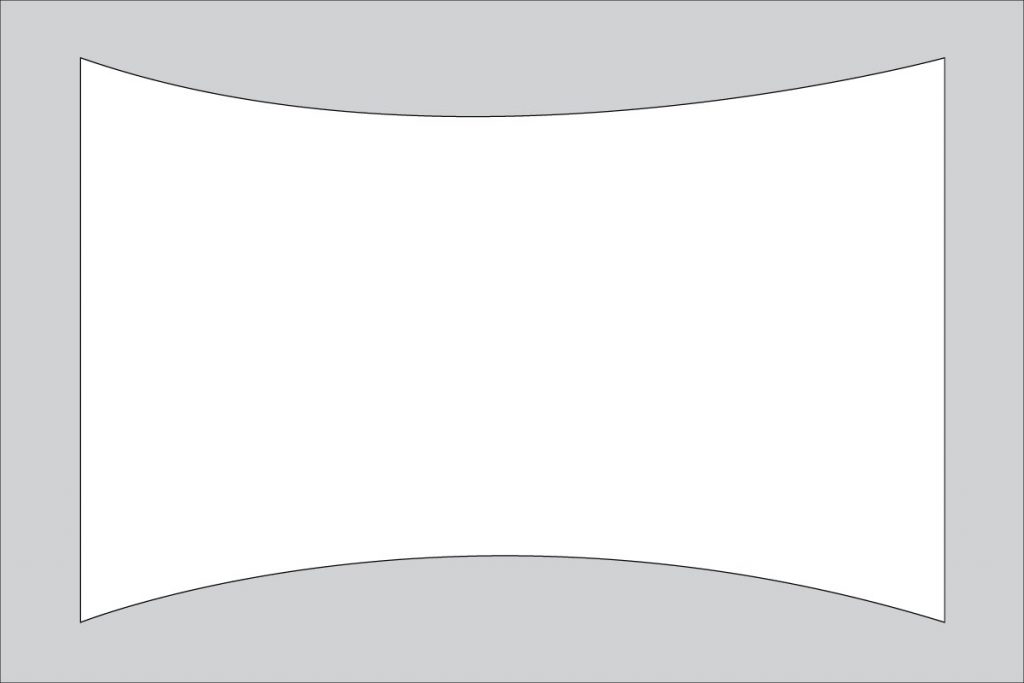
Projecting onto a wide surface normally introduces pincushion distortion, where the image bows inward at the edges. A curved screen naturally reduces this, since the corners are closer to the projector. The AK700ST goes further by applying automatic geometric correction, so the image stays rectangular and properly proportioned across the whole curve.
Do you need an anamorphic lens?
Anamorphic lenses can stretch the image to very wide ratios, but they aren’t practical for most golf simulators. Short-throw projectors with built-in correction (and especially the AK700ST’s Auto-Fit system) achieve the same effect without costly lens attachments.
Mounting considerations
No matter which projector you choose, you’ll still need to mount it carefully to avoid shadows from your swing and to keep it safe from golf balls. Ceiling mounting is usually best. With curved setups, positioning becomes even more important, but Auto-Fit reduces the fine-tuning normally required.
Recommended specs
For curved screen builds, aim for:
- Short throw ratio between about 0.4–1.0
- At least 3,000–4,000 lumens of brightness
- Native 1080p or 4K resolution
- Geometric correction (essential for non-Auto-Fit projectors)
If you want the easiest and most reliable option, Carl’s Place and BenQ’s AK700ST partnership is currently the best choice for curved simulator enclosures. It removes the need for multiple projectors and blending software, making curved screens far more accessible. Correction. However, both problems are caused by differing distances traveled by the projector light.
An Ultra-Wide Screen with Multiple Projectors and Image Blending Software
The last option is the most impressive but also the most expensive and technically challenging. You will need a super-wide screen of at least 2.35:1 aspect ratio, perhaps even wider depending on the degree of curvature you choose and whether you’re limited by screen (and room) height.
Once you’ve mounted and hung your screen, you’ll need to set up your multiple projector system. Some builds like this may get away with two projectors, some wider builds will require three.
You will need to sync your projector outputs through a computer program, warping and blending them into a large curve. Every time you run your golf simulator software, you’ll need to use the blending program, though once calibrated you should be fine unless you accidentally move the projector positions.
The calibration must be done meticulously to ensure that the edges are blended perfectly. When using two projectors, the edges that are blended together will be right in the centre of your image, so you will notice if the blending is off. This is actually less of a problem with three projectors as the blended edges will be more lateral.
I recommend trying a program such as Immersive Display Pro and Immersive Calibration Pro. These are programs often used by avid aviation fans to construct a home flight simulator. I have not used this program yet in my own golf simulator, but I feel it is available at a solid price.
It will take quite a bit of learning to master the technique of warping your projector outputs into a wide curve, but if you nail it you will have a golf simulator that professional installers would charge tens of thousands of dollars for.
Check out this video from The Back Bedroom Pilot on Youtube where he builds his flight simulator on a highly curved screen using Immersive Display Pro and Immersive Calibration Pro. See below for a stepwise approach to doing this.
How to Sync Multiple Projectors on a Highly Curved Impact Screen
Say you do opt for a super-wide screen and for a multiple projector setup. How are you going to sync them together to show two sides of the same image?
I would approach this headache-inducing scenario like this:
- Calculate the dimensions of your intended screen, including the height, width and degree of curvature. You can calculate degree of curve here.
- Pin down your hitting position within your simulator (this is the starting point for all projector plans). Do you have enough room width for a central target line?
- What is your room height / available headroom? This will determine the need for projector mounts and will inform your decisions about placement as you’ll need to avoid hitting them with your swing.
- Buy two (three will be needed for wider screens) high-lumen, short throw projectors that are suitable for golf simulators.
- Mount both (or three) projectors so that they display their images over the left and right portions of the screen. Try to go for a mounting position that allows the vertical height of both images to match the vertical height of the centre of the screen. This way you will have the throw distance pretty close to being correct.
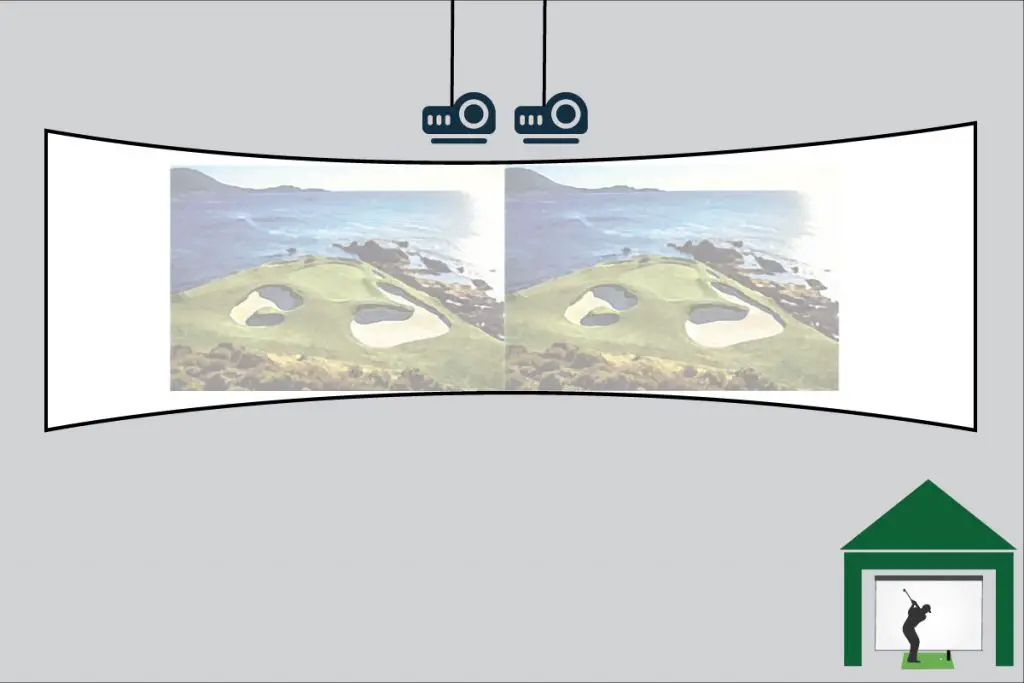
- Next, you will need to set up your warping and blending software (see Immersive Display Pro and Immersive Calibration Pro above). This is an additional cost to the build, but it shouldn’t break the bank.
- You will need to take some time to learn how to set this software up and calibrate it. Proper calibration is important so that certain areas of the screen such as the very centre have proper focus and there is no blurring.
- Once set up, you shouldn’t need to re-calibrate every time you use your golf simulator, only if you change the projector’s position (deliberately or accidentally). You would need to start up the image blending software each time though, and this is an addiitonal program that your PC would need to run, hence having enough RAM and CPU power is important.
- You may also need components such as an HDMI hub which allow more than one HDMI cable to be attached to the PC at once, these components shouldn’t be expensive but are worth considering in the planning stages.
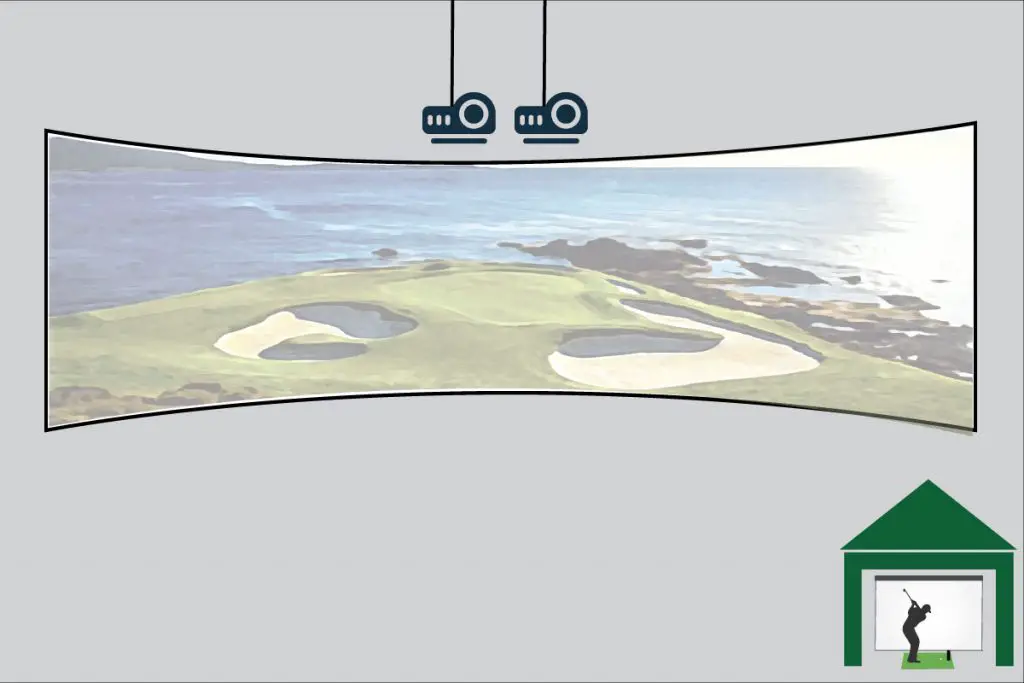
Note that this is an advanced strategy that requires computer and projector knowledge above the level of the average golfer. If you’re not confident with computers or projectors and it is your first golf simulator build, consider sticking to a single projector, light-curve build, or flat-screen build.
How Expensive Are Curved Impact Screens in a Golf Simulator?
Curved impact screens do cost more than flat ones, but prices have come down significantly in the last year. The extra expense comes from the larger screen surface area, the more complex enclosure, and the need for a projector that can handle curved geometry.
Entry-level curved kits
Carl’s Place curved golf enclosure kits start at around $4,900 for a 9 x 14 x 8 foot setup with a premium impact screen. Larger builds, such as a 10 x 15 x 15 foot kit, are closer to $6,000. Custom sizing is also available, but expect the price to increase with width and depth.
Projector costs
The BenQ AK700ST projector, designed specifically for curved enclosures, sells for around $3,000–$3,500. It eliminates the need for multiple projectors and blending software, which used to add $5,000–$10,000 to a build. For golfers choosing mild curves, other short-throw projectors with geometric correction can be used for less, but the AK700ST is the best option for full wraparound screens.
Total curved package examples
- DIY curved enclosure (9 x 14 x 8 ft) + AK700ST projector: about $8,000
- Larger DIY curved enclosure (10 x 15 x 15 ft) + AK700ST projector: about $9,000
- Add launch monitor (Uneekor, Foresight, etc.), hitting mat, and software: $5,000–$15,000 depending on choices
Compared with flat builds
A flat DIY Carl’s enclosure with a premium screen can cost as little as $1,800–$2,500, with decent short-throw projectors available for $1,000–$2,000. That means going curved usually adds $4,000–$6,000 to the price of your simulator.
The takeaway
Curved setups are still more expensive, but they no longer require the $20,000–$40,000 investment that used to be standard for ultra-premium installations. With Carl’s kits and the AK700ST, a fully immersive curved simulator is now achievable in the $8,000–$10,000 range before adding launch monitor and software.
Conclusion – What are the Main Considerations and Challenges when designing a Curved Impact Screen Setup
I hope this article has been helpful to golfers investigating the feasibility of a curved impact screen in their golf simulators.
In summary, a lightly curved screen is within the capabilities of all golf simulator owners as long as the enclosure and mounting challenges are overcome and a suitable projector is purchased. A highly curved super-wide screen presents many challenges but the results are epic.
Here are the main considerations to aid your decision about whether you can install a curved impact screen, and whether you should.
- Do the space dimensions of your golf simulator room lend themselves to a curved screen (is there adequate length and width)
- Would you plan on a DIY curved screen build or a professional installation (which is likely to be expensive)?
- Are you okay with some aspects of the screen installation requiring a bit of DIY planning and skill?
- You need to decide whether to choose a lightly curved, standard aspect ratio (16:9) screen, or a super-wide screen challenge?
- The projector setup can be more intricate and daunting than a normal golf simulator build.
- Costs are higher with a super-wide screen build, but if designed correctly you could achieve the same amazing curved screen golf simulator you often see advertised by companies charging tens of thousands of dollars.
Action Steps & Purchasing Guide
- Measure Your Space Carefully
- Height from teeing area to ceiling (or lowest obstruction)
- Width between walls or fixed points, plus buffer on each side (~2-3″)
- Depth you’ve got behind the ball → needed for enclosure depth + room behind for movement.
- Decide Screen Material & Color
- If ambient light is controlled → white screen gives brightness.
- If light leaks or overhead lights, invest in High-Contrast Gray.
- Choose Size
- Start with standard sizes that match your space.
- If your space falls outside, use Carl’s custom sizing.
- Pick Accessories Needed
- Pipe Framing Kit if you don’t want to source EMT yourself.
- Back Cover Kit (and pipe) if blocking ambient light / walls behind screen matters.
- Safety baffles to protect your screen & surroundings.
- Order & Install
- Review freight/shipping costs, import duties (if applicable)
- Plan enough time & help to assemble — two people typically helpful for larger sizes.
- Projector Setup / Warping
- If using a projector that supports image warp / correction, pair it with Carl’s enclosure for best visuals. Carl has content and partner recommendations (e.g. projectors like BenQ with correction features).
Where to Buy Your Curved Impact Screen
I thoroughly recommend the Premoium Curved Impact Screen at Carls’ Place, here’s why:
- Custom sizing & premium materials ensure that you aren’t stuck with a “one-size-fits-all” compromise.
- Quality backed by reputation — Carl’s Place is pushing innovation with curved enclosures. Recent technologies (screen material, ambient light handling, etc.) show they care about real golfer experience.
- Support & accessories — you can add pipe kits, back covers, baffles, etc., so the setup can be tailored to your space and usage.
- Investment into longevity — the screen is built for full-impact, multiple thickness layers, reinforced fabrics. The frame and materials are not throw-aways.
Best of luck with your curved impact screen golf simulator builds!
Alex’s Expertise and Experience with Golf Impact Screens
I am to provide clear, detailed, and specific information on golf impact screens within the broader context of golf simulators. I understand the critical role that a high-quality impact screen occupies in the overall experience and strive to guide my readers through the complexities of choosing and installing the perfect screen for their needs.

- My Specialized Knowledge in Golf Impact Screens: Since starting mygolfsimulator.com, I’ve honed my expertise specifically in the area of golf impact screens. My extensive research and writing have been centered on understanding every nuance of impact screen technology and its application in golf simulator builds.
- My Deep Dive into Impact Screen Quality: I’ve dedicated significant time to exploring the intricacies of impact screen picture quality. Understanding the importance of a clear, sharp image for an immersive golfing experience, I’ve analyzed various screen materials and their impact on image clarity and resolution.
- My Insights on Sizing and Aspect Ratio: Recognizing that the size and aspect ratio of an impact screen are critical for a perfect simulator setup, I’ve delved into the specifics of how to choose the right dimensions. I provide detailed guidance on selecting the right screen size and aspect ratio to ensure a seamless fit within any simulator space, additionally covering issues with the bottom of the impact screen. I have also written in great depth on curved impact screen builds.
- My Experience with Impact Screen Installation: I’ve personally experimented with various methods of attaching impact screens within golf simulators. My hands-on experience allows me to offer practical advice on the best practices for mounting screens, ensuring both safety and optimal visual quality.
- My Focus on Practical Solutions: In my work, I emphasize practical solutions to common issues like minimizing bounceback and noise. I explore different screen tensions and additional cushioning techniques to enhance the safety and comfort of using a golf simulator. I have also compared impact screen simulator builds with alternatives such as golf simulator nets.
- A Detailed Knowledge of Projector Specifications: I have developed strong expertise in selecting the ideal projector and impact screen combination for golf simulators. My knowledge extends to understanding projector specifications in detail, enabling me to recommend the perfect projector for any given space. I ensure the projected image aligns flawlessly with the screen, considering factors like throw ratio, keystone correction, and resolution. This expertise allows me to provide tailored advice, ensuring an immersive and accurate golfing experience for every setup.
- Hands-on Experience Building Enclosure Frames: I have built a variety of golf simulator enclosure frames over the last four years, from fully DIY builds to pre-packaged premium enclosures. I have experience cutting metal conduit pipes to size as well as tinkering with bungees and zip ties to create the perfect impact screen tension.
- Putting it all together: I have amalgamated all of the above in-depth information into a comprehensive impact screen buying guide.
Mevo Gen 2 Space Requirements
Gray Impact Screens – Pros and Cons
ABOUT THE AUTHOR
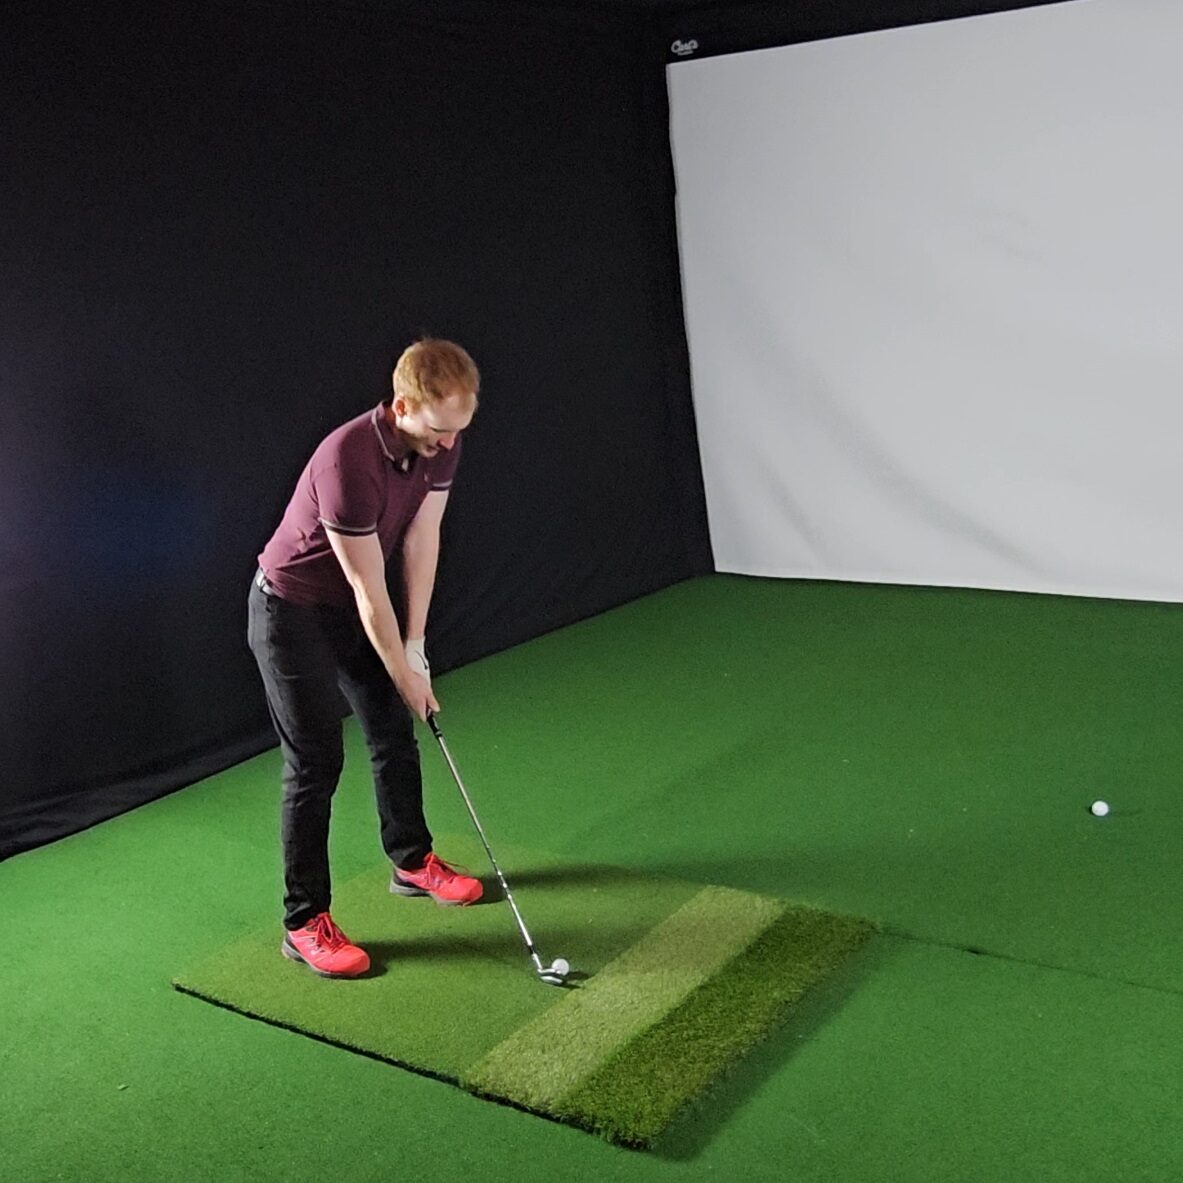
Hello! My name is Alex and it is my mission to bring you all the information you need to build your own home golf simulator! I hope mygolfsimulator.com helps you on your journey to better golf at home!
LEGAL INFORMATION
On this site, you'll find articles on all aspects of building a golf simulator. I will also link to other sites where you can buy some of the simulator components. Some of these links may be affiliate links, which means if you click them I gain a small commission at no extra cost to you. This really helps out me and my site so thank you in advance! mygolfsimulator.com and all related social media accounts are property of Awonline LTD.
