Carl’s Place Pro Golf Enclosure Review (2026): What’s in the Box, Real Cost and Owner Reports
Posted in Enclosures
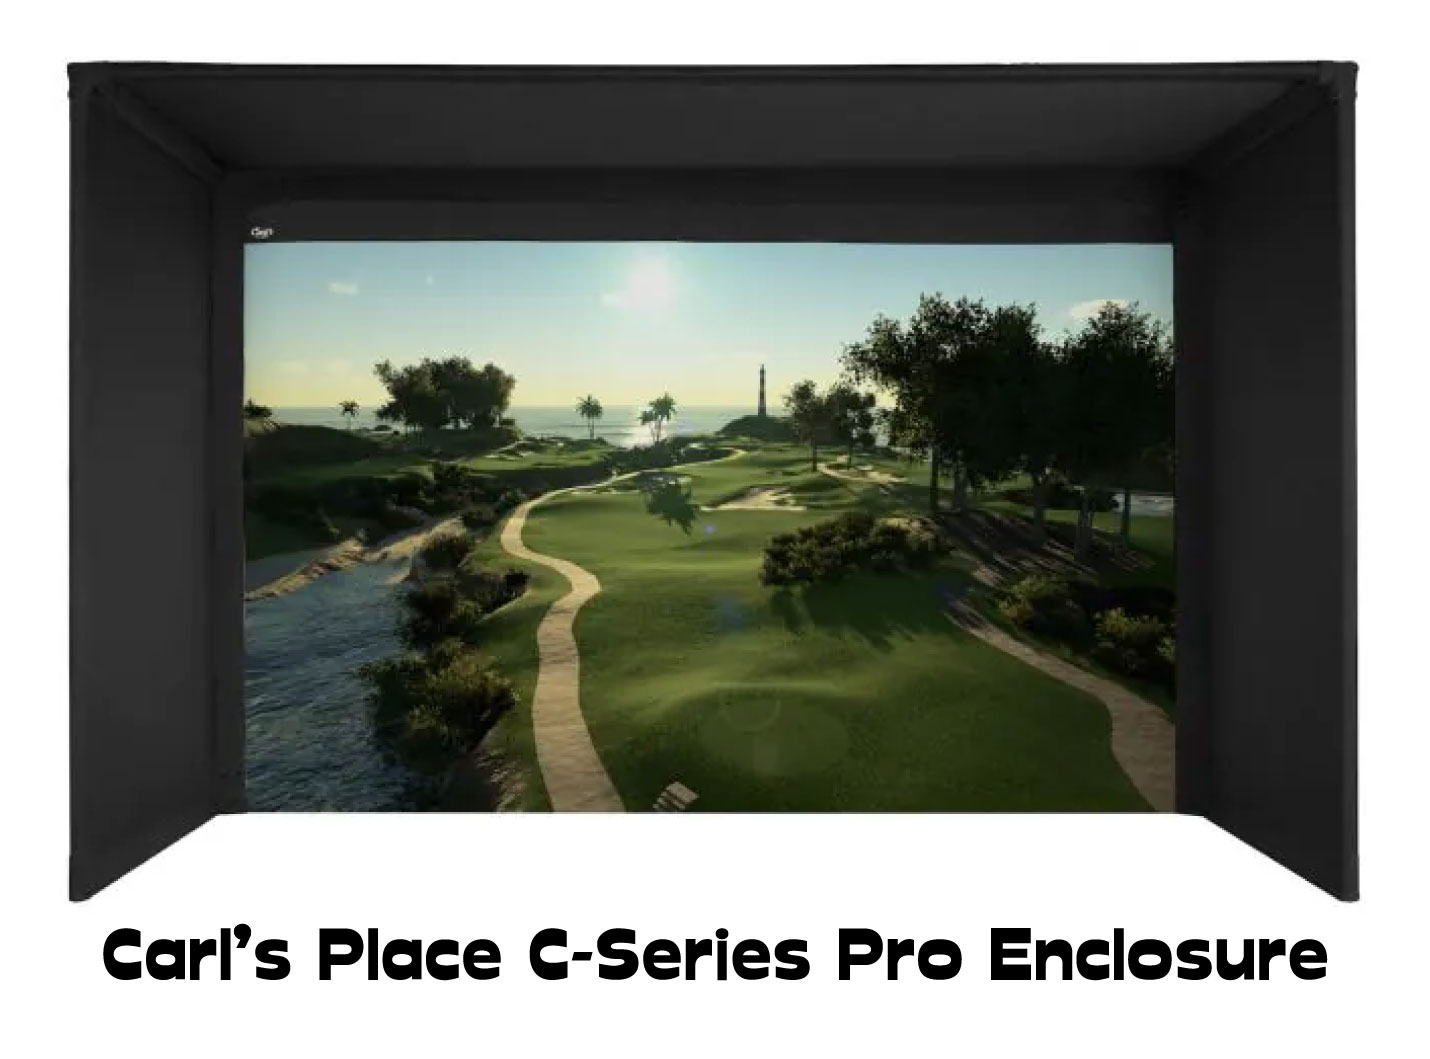
The Carl’s Place Pro is worth buying if you want a frame that, per Carl’s, carries a projector and an overhead launch monitor, and you’ve priced the whole build. If you only need a safe enclosure, Carl’s DIY kit or a conduit frame of your own costs much less.
In a Nutshell
Worth it if you want a freestanding, screen-to-floor frame that Carl’s says can carry a projector and an overhead launch monitor. For just a safe enclosure, Carl’s DIY kit is about half the Pro’s kit price at the same size.
👉 Add the pipe kit, freight and depth to the headline price before you pick a size.
Jargon, once:
- EMT — electrical metal tubing, the steel conduit the frame is built from.
- BlackStop — Carl’s light-blocking cover fabric.
- Safety baffle — a vinyl strip hung from the ceiling to knock down high shots.
- Crossbar — an optional ceiling bar for an overhead launch monitor or lights.
- Depth — screen to front of the frame.
- Aspect ratio — the screen’s shape, width to height.
This review draws on Carl’s published specs and prices (checked 21 October 2026) and owner and reviewer posts on Reddit and YouTube since 2022. It is not based on hands-on testing, and few owners have reported on the current version yet.
What’s Different from the 2024 Owner Accounts
- One-piece cover: the current kit wraps the ceiling and both side walls in one cover, which Carl’s says cuts setup to about two hours from three. A reviewer described it by January 2025; Carl’s earlier manual used a ceiling panel and two wall panels.
- Movable crossbar: a $550 add-on, reported by a reviewer in October 2025.
- Foam inserts: Carl’s current page and current manual list them in the box; its earlier manual listed them as optional.
- Unchanged: the 2-inch steel EMT frame.
What’s in the Box, and What Isn’t
| Item | In the box? | Notes and extra cost (21 Oct 2026) |
|---|---|---|
| BlackStop wraparound cover and five detached flaps | Yes | Ceiling and both sides in one piece |
| Impact screen | Yes | Premium White or High-Contrast Gray only; Gray adds $355–$505 in the Pro configurator, by size and depth |
| Bottom cable, two springs, two cable receivers, zip ties | Yes | Tension the bottom edge |
| Foam inserts | Yes | Pad the frame against stray shots |
| Fittings and a custom cut diagram | Yes | The diagram gives pipe lengths if you buy your own |
| 2-inch EMT pipes | No | Pipe Framing Kit $910–$1,550 by size and depth, or buy your own |
| Movable Crossbar | No | $550 |
| Safety Baffle | No | $50 (Carl’s doesn’t say whether per baffle) |
| Back Cover Kit and its pipe kit | No | $675–$1,005 plus $295–$380 across the sizes |
| Projector or launch monitor mount | No | An optional accessory in Carl’s manual; price not checked |
| Shank-net extensions | Not offered on the Pro | Carl’s DIY kit sells a pair for $140 |
Bought on its own, Carl’s gray screen starts $10 above white and the gap varies by size; inside the Pro configurator the gap is larger, as above. A Carl’s rep and Reddit posters agree white works well in a fully light-controlled room (4 reports from 4 posters, 2025):
Gray Impact Screens – Pros and Cons
The foam inserts can run long, per two reviewers (2025); Carl’s current manual says to trim the excess.
Sizes, Depth, Price and the Room You Need
| Size (H × W ft, aspect ratio) | Outer H × W (in) | Premium kit at 5 / 8 / 10 / 15 ft deep | Pipe Framing Kit at 5 / 8 / 10 / 15 ft |
|---|---|---|---|
| 8 × 10.5 (4:3) | 102 × 132.4 | $3,409.95 / $3,784.95 / — / — | $910 / $1,035 / — / — |
| 8.5 × 11 (4:3) | 107 × 139.1 | $3,469.95 / $3,844.95 / — / — | $945 / $1,070 / — / — |
| 8.5 × 14.5 (16:9) | 107 × 181.8 | $3,734.95 / $4,114.95 / — / — | $1,055 / $1,180 / — / — |
| 9 × 12 (4:3) | 114 × 148.4 | $3,549.95 / $3,929.95 / $4,179.95 / $4,809.95 | $995 / $1,120 / $1,200 / $1,410 |
| 10 × 13 (4:3) | 123 × 160.4 | $3,659.95 / $4,034.95 / $4,289.95 / $4,919.95 | $1,055 / $1,180 / $1,265 / $1,475 |
| 10 × 15.5 (16:10) | 123 × 190.3 | $3,844.95 / $4,224.95 / $4,474.95 / $5,104.95 | $1,135 / $1,260 / $1,340 / $1,550 |
Prices from Carl’s configurator on 21 October 2026, with no sale prices shown; High-Contrast Gray adds $355–$505. Carl’s spec sheet calls the listing size a simplified name, so check the outer dimensions.
Carl’s spec sheet lists the depths as:
| Depth option | 5 ft | 8 ft | 10 ft | 15 ft |
|---|---|---|---|---|
| Carl’s inch figure | 69.5 in | 105.5 in | 129.5 in | 189.5 in |
The sheet says a backset rear fitting adds 9.5 in, and each inch figure is the nominal depth plus that 9.5 in, so plan floor space to the inch figure. The three 8–8.5 ft-tall sizes come only 5 or 8 ft deep. Depth costs money: a 9 × 12 with Premium is $3,549.95 at 5 ft and $4,179.95 at 10 ft. Carl’s also custom-sizes to the inch; its product page and spec sheet give no maximum.
For the room, Carl’s gives these figures:
- Above the enclosure: at least 2 in, for assembly.
- Each side: 2–3 in.
- Behind: 12 in recommended.
- Standing distance: at least 10–12 ft.
A shallow frame leaves little margin. One 2024 owner of a custom Pro:
“I got the 5′ depth, and I’ve managed to dent my wall (and so has a buddy of mine).” (u/Dahn626, 2024-04-28)
Impact Screen Size Guide – Find the Perfect Impact Screen Size for your Golf Simulator
Build Quality and Materials
Frame: 2-inch EMT, a true outer diameter of 2.197 in, against the 1-inch EMT in Carl’s DIY kit. Carl’s says the thicker walls let it span wider bays and carry an overhead launch monitor or mounted projector, which the 1-inch can’t.
Feedback: build quality draws praise (6 reports from 6 reviewers and owners, 2022–2025).
Premium screen: a three-layer polyester that Carl’s rates to 250 mph. One owner of a Carl’s Place enclosure, kit not stated:
“Three years and not a mark on my screen.” (u/Golfandrun, 2025-03-20)
Fabric: Carl’s says the black enclosure fabric isn’t built to take a ball head-on, though a ball that bounces off the screen into it is fine:
How to Build a DIY Golf Simulator Enclosure – Steps, Tools, Costs + Materials
Installation and Screen Tension
The Metal Frame
Carl’s Pipe Framing Kit comes cut and marked, on a freight pallet. Buying your own 2-inch EMT saves money but splits owners on the hassle (3 reports from 3 owners, 2024–2025), and Carl’s warns it can be hard to find locally. One commenter’s pre-cut bars came up 2 inches short, supplier unstated (September 2025).
Working at Height
Carl’s says about 2 hours with a couple of helpers and an 8 ft step ladder that fits inside the frame. Owners and reviewers describe a heavier job (8 reports from 6 reviewers and owners, 2024–2025). One 2024 owner of a custom Pro:
“You will absolutely need a minimum of 2 friends and 2 ladders to get this installed.” (u/Dahn626, 2024-04-28)
Fitting the Cover
Per Carl’s manual, the cover goes over the frame, grommets to the rear, edges wrapped under the bottom; five flaps hide the exposed pipes, with foam behind the width and height flaps.
Top and Bottom of the Screen
Carl’s manual has the screen hang loosely from top zip ties, with a cable through its bottom edge tensioned by springs at the rear corners, without overtightening. The top ties tighten until the screen barely touches the floor, the finish that decided one buyer:
“I ended up going Carl’s place just because I liked the screen going to the ground better.” (u/bgrewing, 2026-06-01)
What to do with the Bottom of your Impact Screen?
Cable Ties and Bungees
Carl’s current manual uses zip ties only; its earlier one added ball bungees at the ceiling corners. Ties breaking is a repeated complaint among Carl’s Place enclosure buyers, kit not stated (6 reports from 5 owners, early 2026); one switched to bungees anyway and another advised them, though one custom-setup owner reports no breakage.
Adjusting the Tension
Carl’s says ties should be snug without stretching the screen; if the bottom edge lifts, replace the overtightened tie. It adds that fold marks fade within weeks. Wide enclosures in general can sag mid-span, which owners fix with spring clamps or a turnbuckle (8 reports from 5 owners, 2026).
How to Hang a Golf Impact Screen – 6 Ways
Safety: High Shots, Rebounds and Shanks
- High shots: safety baffles hang 12 in from the ceiling to knock them down, commonly 1–1.5 ft apart, per Carl’s.
- Frame strikes: a ball off the frame can bounce back, Carl’s says; the foam inserts are for that.
- Roof rebounds: in August 2026, one commenter said lofted shots into the roof of a Carl’s Place custom enclosure were pushing it up. A second commenter was hit on the forehead by a rebound, and a third suggested a memory-foam topper. Leave clearance above the frame.
- Shanks: no net-extension add-on for the Pro.
How to Reduce Golf Impact Screen Bounceback (9 Practical Strategies)
Protect Your Golf Simulator Walls and Ceiling – 12 Simulator Safety Tips
Pro vs DIY vs SIG: Price, Shipping and Terms
| Option | Frame | Kit price (21 Oct 2026) | Pipes included? | Best for |
|---|---|---|---|---|
| Carl’s Pro | 2-inch EMT | From $3,409.95 (8 × 10.5, 5 ft, Premium) | No: kit $910–$1,550 | Bays with a mounted projector or overhead launch monitor |
| Carl’s Pro with pipe kit | 2-inch EMT | 9 × 12, 10 ft, Premium $4,179.95 + pipe kit $1,200 = $5,379.95 | In that total | — |
| Carl’s DIY | 1-inch EMT | From $999.95 (8 × 8, Standard); 9 × 12 Premium $1,749.95 | No: 9 × 12 kit $414.95 | Budget bays; foam is a $150 add-on |
| SIG enclosures | Not covered here | Check SIG’s current price; not confirmed for this review | — | Buyers who want foam-sided screen edges |
| Your own EMT frame | Your choice | Not priced | You buy and cut | Builders with a saw |
At the same 9 × 12, 5 ft, Premium setup the Pro kit is $3,549.95 and the DIY kit $1,749.95, about half. The extra money buys 2-inch conduit, depths to 15 ft (DIY listings are 5 ft), sizes to 10 × 15.5 ft and a frame Carl’s engineers for mounted electronics.
Check current price: Carl’s Place DIY Golf Simulator Enclosure Kit
A prospective buyer in July 2026:
“have a hard time buying a $4000 commercial enclosure from carls place” (u/golfer9955, 2026-07-01)
One buyer chose SimSpace on cost, another SIG for foam-sided edges; others call SIG more durable (3 reports from 3 reviewers and owners, 2024–2026). One buyer who paid up:
“I concluded paying the premium for convenience and something that looked good at the end was worth it.” (u/babbage_ct, 2025-09-22)
How to Build a DIY Golf Simulator Enclosure – Steps, Tools, Costs + Materials
Buying terms
- Shipping: base-kit shipping shows only at checkout; the pipe kit ships freight, which free shipping excludes.
- Changes: Carl’s makes each Pro to order. Its policy says changes or cancellations on custom items may not be honored after 24 hours; honored ones carry a restocking fee of up to 30% (custom dimensions) or 50% (special finishes or untraditional dimensions).
- Returns: 30 days on most items, approved by Carl’s first.
- Warranty: Carl’s publishes no warranty of its own for this product; its Terms of Sale refer to manufacturers’ warranties and carry a site-wide “as is” disclaimer.
Pros, Cons and Who Should Buy the Pro
Pros
- 2-inch steel frame Carl’s says can carry a mounted projector and overhead launch monitor
- Screen to the floor, with no bottom pole
- Foam inserts in the box
- Six sizes, custom to the inch, depths to 15 ft
- About 2 hours to assemble, per Carl’s
Cons
- The headline price excludes pipes, and the pipe kit ships freight
- A heavy two-person build, by owners’ and reviewers’ accounts
- Zip ties break for some buyers
- No warranty of Carl’s own; changes and cancellations are restricted on custom items
- No shank-net add-on
Who should buy what
- A dedicated room with a ceiling-mounted projector or overhead launch monitor: the Pro.
- A budget or simple, safe bay: Carl’s DIY kit, about half the kit price at 9 × 12.
- Foam-sided edges and durability first: SIG, per its buyers.
- Handy with a saw: the Pro kit without the Pipe Framing Kit, cutting 2-inch EMT to Carl’s diagram.
Carl’s Pro Enclosure FAQ
What comes with the Pro enclosure?
The cover, a Premium White or High-Contrast Gray screen, foam inserts, fittings, bottom-cable hardware, zip ties and a cut diagram.
Are pipes included?
No. Buy the $910–$1,550 Pipe Framing Kit or cut 2-inch EMT to Carl’s diagram.
How long does assembly take?
About 2 hours with helpers, Carl’s says; owners describe a two-person, two-ladder job.
What size fits a 10 ft ceiling?
Allowing 2 in above, the 9 × 12 (114 in tall outside) and shorter; not the 10 ft-tall sizes (123 in).
DIY or Pro?
The Pro adds 2-inch EMT, larger sizes, more depths and mounted-electronics strength, at about twice the 9 × 12 kit price.
Does the Pro have a warranty?
Carl’s publishes no warranty of its own; its Terms of Sale refer to manufacturers’ warranties.
Can the Pro carry a projector and launch monitor?
Yes, per Carl’s: the front bar or the optional $550 crossbar.
Final Thoughts
Price the Pro as a build, not a kit: size, depth, pipes, freight and any baffles or crossbar. If the frame must carry a projector or an overhead launch monitor, that total buys Carl’s 2-inch frame, not the DIY kit’s 1-inch.

Is SkyTrak Portable? Battery, Direct Mode and Range Days (2026)
Uneekor EYE XO vs Foresight GC3 (2026): Overhead vs Floor, the New Software Costs, and Where the XO2 Fits
ABOUT THE AUTHOR
Hello! My name is Alex and it is my mission to bring you all the information you need to build your own home golf simulator! I hope mygolfsimulator.com helps you on your journey to better golf at home!
LEGAL INFORMATION
On this site, you'll find articles on all aspects of building a golf simulator. I will also link to other sites where you can buy some of the simulator components. Some of these links may be affiliate links, which means if you click them I gain a small commission at no extra cost to you. This really helps out me and my site so thank you in advance! mygolfsimulator.com and all related social media accounts are property of Awonline LTD.