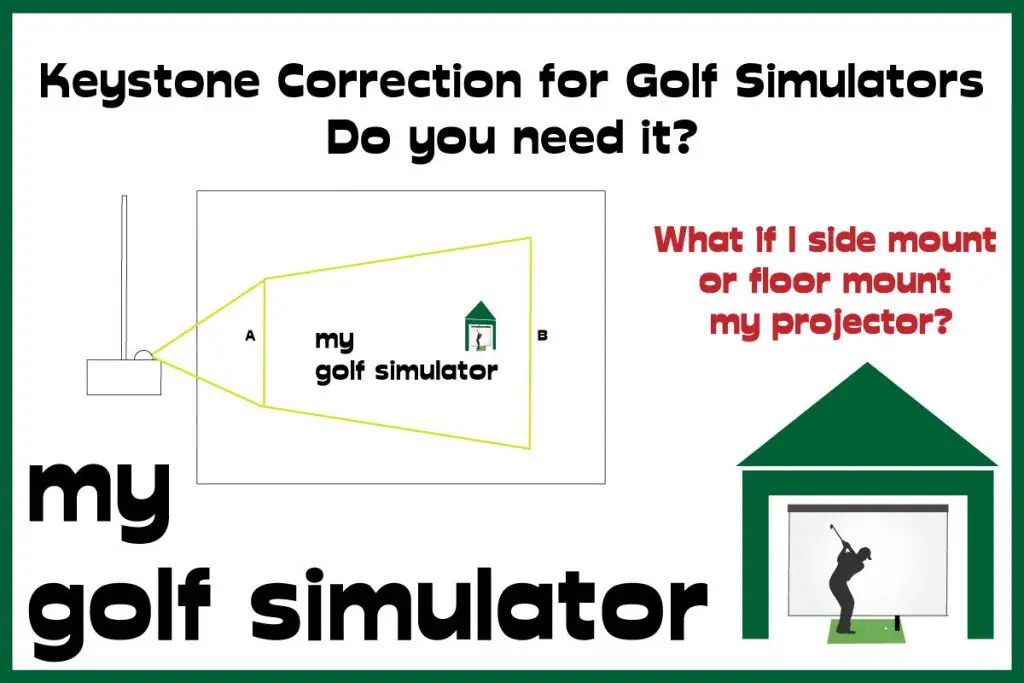
Keystone Correction for Golf Simulator Projectors – Do you need it?
Posted in Projectors, Room Setup
Keystone correction matters—but ideally, you want to avoid relying on it. In a golf simulator, projectors are often mounted off-center, higher on the ceiling, or slightly to the side to keep them out of the swing path. This imperfect placement causes the image to skew into a trapezoid instead of a neat rectangle.
Keystone correction digitally adjusts the image so it looks square on the screen again. While this makes setup easier, there’s a trade-off: digital keystone reduces effective resolution, brightness, and sometimes adds a touch of input lag. The more you use it, the greater the loss of clarity.
The best approach is:
- Apply minimal digital keystone only as a last resort.
- Physically align the projector first (centerline, height, and angle).
- Use optical lens shift if available.
This article will examine whether you need a projector with keystone correction for your golf simulator. Don’t make a mistake with your projector choice and end up with a wonky image!
What is Vertical Keystone Correction?
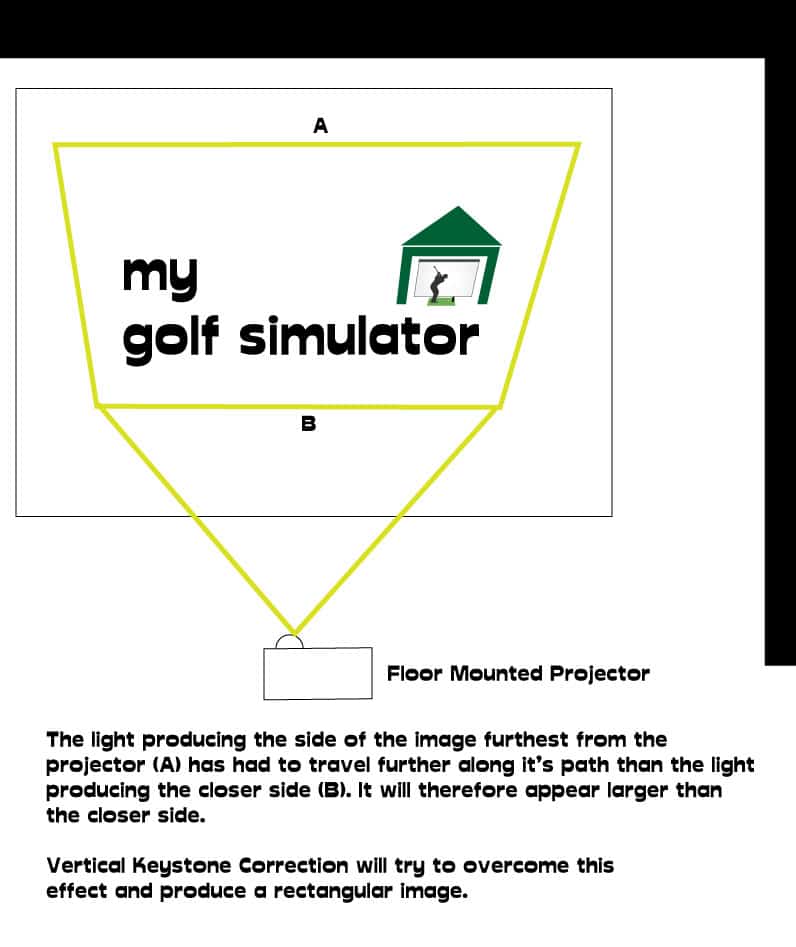
Vertical Keystone Correction is needed when a projector is mounted above or below the centre of the screen. The projector will skew the image upwards or downwards so that it produces a rectangular image on the screen.
This feature allows a rectangular image to be produced despite the height difference. You will probably be looking at a trapezoidal image if your projector is very high or very low (or off to the side).
Vertical keystone correction is great for projectors mounted very high up above the golfer. They’re also great for floor mounted projectors.
(This is a very old grainy picture of an old projector I once owned. I played around with keystone correction before I mounted it).
Floor Mounting Your Projector
If you choose to mount your projector centrally on the floor in front of your hitting mat, you’ll need a decent protective casing. Otherwise, any low thinned shot will take out the projector’s posterior and end your simulator experience for the day!
Floor Mounting a projector will also mean you will probably need to have vertical keystone correction. There is only so much you can ‘point’ the projector upwards.
Horizontal Keystone Correction
Horizontal Keystone correction is needed when the projector is mounted off to the side of the centre of your screen.
You can allow for a small distance off centre by simply pointing the projector.
If you intend on mounting the projector on the side wall of the simulator enclosure you are very likely to need this feature.
The projector will be out of the way and it will probably be even easier to manage the cables going to and from it.
You will definitely need a projector capable of horizontal keystone correction for this set up though.
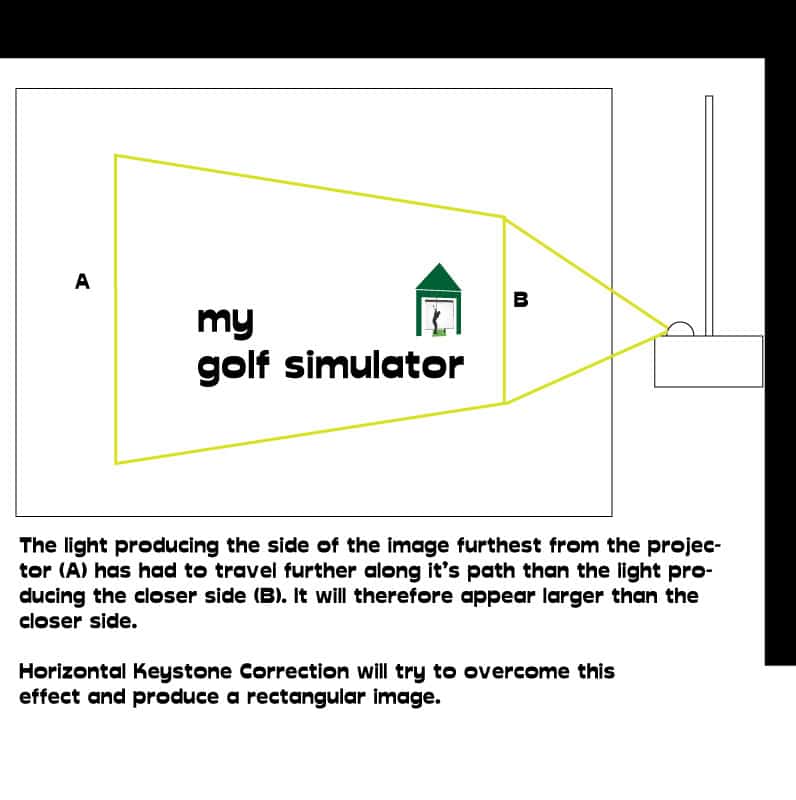
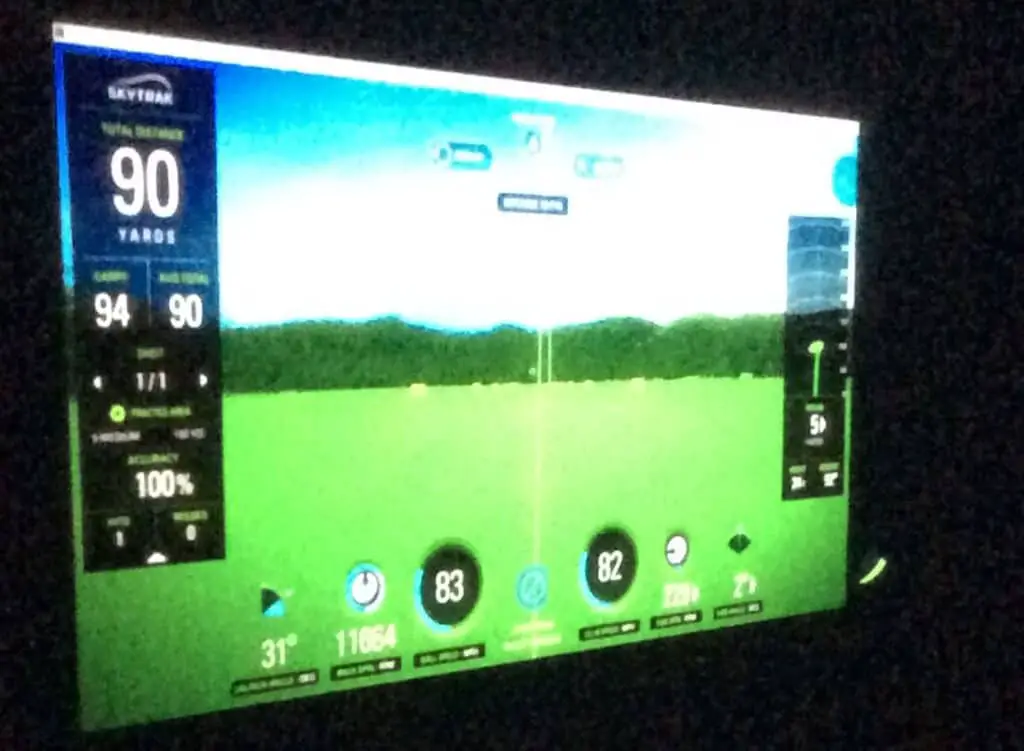
(A grainy picture of when I was experimenting with my projector’s keystone correction).
What Golf Simulator Problems Can Keystone Correction Fix?
Projector placement is one of the trickiest parts of building a golf simulator. You need to fill the screen, avoid hitting the projector with your swing, and minimize shadows—all within a limited room. Keystone correction can help, but it’s not a cure-all.
Mounting Challenges
- Limited space: In smaller rooms, you may have no choice but to offset the projector.
- Side mounting: Horizontal keystone correction can square the image if the projector is shifted left or right to avoid the swing path.
- High or low mounts: Vertical keystone correction helps when ceiling-mounting well above the hitting area or using a floor mount.
Can’t I Just Tilt the Projector?
Yes, to a point. Physically tilting or angling your projector can correct small offsets, and many golfers do this. For example, mounting 3 ft off-center horizontally and 4 ft vertically often works fine for golf play. However:
- Excessive tilt can distort focus, making some parts of the image less sharp.
- For movies or gaming, these distortions become more noticeable.
Image Quality Considerations
Still, the best results always come from proper physical alignment first, with keystone as a last-resort fine-tune.
Minor tilts usually cause less degradation than heavy digital keystone correction.
Many projectors allow manual focus adjustment, which can reduce the issue.
Buying a projector mount
If you’re planning on achieving the desired image by tilting and pointing your projector, make sure you buy a sufficiently adjustable projector mount.
I’m using the SIMBR Universal Projector Mount. This has an adjustable extension pole with a range of 25 inches, can rotate 360 degrees and tilt 60 degrees vertically and horizontally. It was easy to set up and fix to my projector.
Can a Projector Do Vertical and Horizontal Keystone at the Same Time?
Yes. Many short-throw projectors designed for golf simulators now support both vertical and horizontal keystone correction simultaneously. Some even offer 4-point or corner correction, letting you adjust each corner of the image independently for a perfect rectangle. These tools are helpful if your projector must be offset both vertically (high on the ceiling or low on the floor) and horizontally (to the side of the hitting zone).
Does Keystone Correction Reduce Image Quality?
Yes—and this is the key trade-off. Keystone correction is a digital process: the projector rescales and compresses pixels to straighten the image. This can lead to:
- Lower effective resolution – for example, a 1080p projector may look closer to 720p with aggressive keystone applied.
- Reduced brightness – stretching pixels spreads light unevenly, dimming parts of the image.
- Loss of clarity – fine details and sharp edges become softer.
- Potential input lag – the extra processing can add a slight delay (rarely an issue for golf sims, but more noticeable for gaming).
What’s the Practical Impact?
Always try to physically align first, then use keystone for fine-tuning only.
For golf-only use, small amounts of keystone usually deliver an image that looks “good enough,” even if technically less sharp.
For movies, gaming, or 4K playback, keystone compromises are much more visible—you’ll get the best results with a centered, perpendicular projector.
Do All Projectors Offer the Same Amount of Keystone Correction?
No. Each projector has a specified correction range—usually listed in degrees (e.g. ±30° vertical, ±20° horizontal). The greater the offset between your projector and screen, the more correction you’ll need. If you want to be precise, you can calculate whether the projector’s range will cover your planned mount position, but for most setups, it’s easier to use a projector calculator tool or test in the room.
Keystone Correction vs. Zoom
- Keystone correction digitally skews the image up, down, or sideways to make a trapezoid look rectangular.
- Zoom (optical or digital) changes the image size independently of throw ratio.
⚠️ Caution: On cheaper projectors, heavy use of digital zoom can reduce both brightness and sharpness—similar to overusing keystone. Optical zoom is preferable where available.
What About Lens Shift?
Lens shift is different again: it physically moves the lens inside the projector to reposition the image without digital warping. The benefits:
- Maintains full resolution and brightness.
- Great for fine-tuning small vertical or horizontal offsets.
Limitations:
- Most short-throw projectors (common in golf simulators) offer little or no lens shift.
- Large offsets (very high, low, or side-mounted positions) usually still require some keystone correction.
Keystone Correction vs. Lens Shift vs. Zoom
| Feature | Keystone Correction | Lens Shift | Zoom |
|---|---|---|---|
| How it works | Digital warping of the image to make a trapezoid look rectangular | Physically moves the lens inside the projector to reposition the image | Changes image size (optical = with glass, digital = with scaling) |
| Image quality impact | ✅ Quick fix, but ❌ reduces resolution, brightness, and sharpness | ✅ Maintains full resolution and brightness | Optical zoom: ✅ no loss. Digital zoom: ❌ reduces clarity and brightness |
| Typical range | ±20–40° vertical, ±15–30° horizontal (varies by model) | Limited – often only vertical on short-throw projectors | Optical: ~1.1x–1.3x on short-throw models |
| Best use case | Small corrections when projector can’t be centered | Fine adjustments to align perfectly with the screen | Adjusting image size to fit the screen without moving the projector |
| Availability on short-throw projectors | Common | Rare or very limited | Common (but limited zoom range) |
Best practice: Use mechanical alignment and lens shift first, then apply minimal keystone correction only if necessary. This preserves image clarity while keeping your projector safely out of the swing path.
✅ Quick Tips for Projector Alignment in Golf Simulators
- Align physically first – mount your projector as square and centered as possible.
- Use lens shift if available – it preserves resolution and brightness.
- Apply minimal keystone correction – only fine-tune with digital correction.
- Avoid heavy digital zoom – use optical zoom instead to keep the image sharp.
- Plan placement early – calculate throw distance and offsets before buying.
What You Should Know Now About Keystone Correction
By now, you should have a clear understanding of what keystone correction is, how it works, and when to use it in a golf simulator setup.
- Keystone correction can square your image when the projector isn’t perfectly aligned, but it comes at the cost of resolution, brightness, and clarity.
- Physical alignment and lens shift (if available) should always be your first choices.
- Minimal digital correction is fine for golf-only setups, but for movies and gaming, a properly centered and perpendicular projector will deliver the sharpest results.
How Has This Topic Changed Over Recent Years?
The role of keystone correction in golf simulator setups has shifted as projector technology has advanced:
- From Lamps to Laser/LED: Older lamp-based short-throw projectors often relied heavily on digital keystone to make them usable in tight spaces. Today’s laser and LED models offer more consistent brightness and better optics, reducing the need for aggressive correction.
- Improved Keystone Tools: Basic vertical keystone used to be standard. Now, many projectors feature horizontal + vertical correction, 4-point adjustment, and even grid-based warping, giving users more flexibility when offsetting placement.
- Auto-Keystone & Smart Alignment: Modern projectors increasingly include auto-keystone, auto-focus, and camera-based alignment tools, which simplify setup and reduce the risk of user error.
- Lens Shift Availability: While still rare on ultra-short-throw models, more short-throw projectors now include limited lens shift, letting users rely less on digital correction.
- Awareness of Trade-Offs: A few years ago, keystone was often seen as a harmless convenience. Today, with the popularity of 4K projectors, there’s much more emphasis on minimizing keystone use to preserve resolution and image sharpness.
In short: Keystone correction has become smarter and more flexible, but the advice remains the same—use it sparingly, and only after physical alignment and lens shift have done their job.
What You Should Do Next
- Plan your projector placement – Work out your throw distance, mounting position, and swing clearance before buying.
- Check the specs – Look for correction range, lens shift, and whether the projector offers auto-alignment features.
- Explore alternatives – In some rooms, a short-throw or ultra-short-throw laser projector can reduce the need for keystone entirely.
- Compare models – Visit our Golf Simulator Projector Comparison Guide to see which current projectors balance brightness, resolution, throw ratio, and keystone features best.
With the right setup, you’ll minimize distortion, maximize clarity, and enjoy a more immersive simulator experience.
- Take a look at our other golf simulator projector and room setup articles.
- Take a look at our Resources Page to find our Golf Simulator Projector Comparison Table. This will show you all our recommended projectors and which ones have vertical or horizontal keystone correction.
- Once you’ve identified a projector, check out the throw calculations on Projector Central. We have an article all about projector throw ratios here. This is one of the most important steps in your golf simulator projector choice.
- Have fun planning the rest of your simulator setup!
Keystone Correction for Golf Simulator Projectors – FAQs
❓ Do I need keystone correction for a golf simulator projector?
Not always. If your projector is perfectly centered and perpendicular to the screen, you won’t need it. Keystone correction is most useful when ceiling-mounting above the swing path or offsetting to the side to avoid shadows.
❓ Does keystone correction reduce image quality?
Yes. Keystone digitally warps the image, which can reduce effective resolution, brightness, and sharpness. The effect is minor with small adjustments but becomes obvious with heavy correction.
❓ What’s the difference between keystone correction and lens shift?
- Keystone correction is digital and alters pixels to square the image.
- Lens shift is optical, physically moving the lens to adjust alignment without losing clarity.
Lens shift always preserves image quality, but many short-throw projectors lack it.
❓ Can projectors do vertical and horizontal keystone at the same time?
Yes. Most modern projectors support both directions, and many include 4-point or corner correction for more flexible adjustment.
❓ How much keystone correction does a projector allow?
It varies. Check the specs—ranges are usually listed in degrees (e.g. ±30° vertical, ±20° horizontal). Always verify that the projector’s correction range matches your planned mount position.
❓ Is keystone correction okay for 4K projectors?
It works, but it’s not ideal. Even small digital adjustments can make a 4K projector look closer to 1080p. For true 4K clarity, aim for perfect alignment or use lens shift instead.
❓ Should I use keystone or just tilt the projector?
A small tilt is often better than heavy digital keystone, especially if you can adjust focus to sharpen the image. Use physical alignment first, then keystone only for fine-tuning.
Mevo Gen 2 Space Requirements
Gray Impact Screens – Pros and Cons
ABOUT THE AUTHOR
Hello! My name is Alex and it is my mission to bring you all the information you need to build your own home golf simulator! I hope mygolfsimulator.com helps you on your journey to better golf at home!
LEGAL INFORMATION
On this site, you'll find articles on all aspects of building a golf simulator. I will also link to other sites where you can buy some of the simulator components. Some of these links may be affiliate links, which means if you click them I gain a small commission at no extra cost to you. This really helps out me and my site so thank you in advance! mygolfsimulator.com and all related social media accounts are property of Awonline LTD.
