Floor Mounted Golf Simulator Projectors – Tips, Tricks & Buying Guide
Posted in Projectors, Room Setup
In 2025, floor mounting has become a mainstream solution for golfers who can’t ceiling-mount due to low headroom, rental property restrictions, or simply because they want an easier installation. With today’s short-throw laser projectors, golf-specific color modes, and robust enclosures, a floor-mounted setup can deliver a bright, immersive image while keeping your projector safe.
The key is matching your projector’s throw ratio (ideally 0.4–0.8) to your screen size, and protecting it with a dedicated floor box / enclosure to prevent ball strikes. Modern models like the BenQ AH700ST or Optoma ZK608TST now include auto screen fit tools and smart alignment features that make floor setups far more practical than even a few years ago.
Why Floor Mount Your Golf Simulator Projector?
Floor mounting has become a popular choice in 2025, especially for golfers with low ceilings, rental spaces, or simply those who prefer an easier installation. By keeping the projector on the ground, you remove the risk of hitting it with your swing and eliminate distracting shadows on the impact screen.
Many golfers also like the aesthetic of turf-backed enclosures, which blend seamlessly into the simulator flooring and make the setup look professional. With today’s purpose-built protective cases, floor mounting is not just practical but also safe for your projector investment.
What Features Must a Projector Have to Be Floor Mounted?
Auto Screen Fit & Keystone Correction
- Auto Screen Fit (standard in newer models like the BenQ AH700ST) uses built-in sensors to automatically square and align the image to your impact screen in seconds. This has largely replaced the need to rely heavily on manual keystone correction.
- If your projector doesn’t have auto-fit, then vertical keystone correction is essential when projecting upwards from the floor. Horizontal keystone correction may also be required if you need to offset the projector slightly to the side. Keep in mind that heavy digital correction can reduce image clarity, so optical lens shift (where available) is a better option.
Short Throw Ratio
Choose a projector with a throw ratio between 0.4 and 0.8. This allows you to project a large, sharp image from a short distance without the projector interfering with your swing or view. Ultra-short throw (UST) projectors can also work but must be enclosed very carefully to avoid ball strikes.
Brightness and Resolution
- Aim for at least 3,000–4,000 lumens for clear images in rooms with some ambient light.
- 1080p resolution is the entry point today, with 4K UHD laser projectors becoming increasingly affordable and delivering the best detail for golf simulation software.
Protective Enclosure
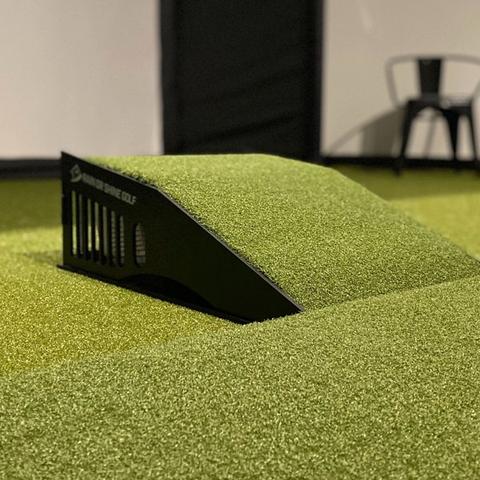
Never floor-mount without an enclosure. Modern enclosures are designed specifically for golf simulators, offering ventilation, turf integration, and impact protection to keep your projector safe from wayward shots.
Central vs Off-Centre Floor Mounting Positions
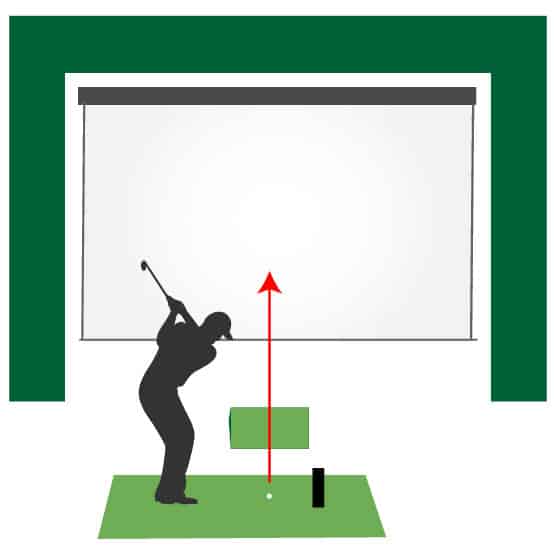
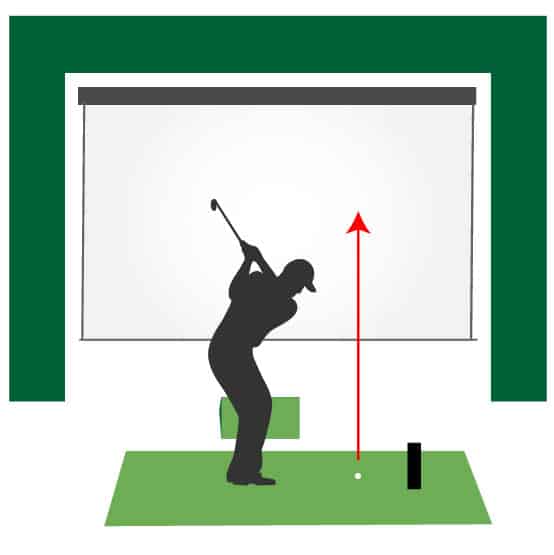
Central Hitting Position, Central Floor Projector
A central floor mounted projector may look great but you want to still be able to hit the ball at the impact screen without rebounding upwards off the projector enclosure. Low lofted clubs like 2 iron may not clear the projector as they travel from your mat to the screen.
This holds true especially for those with rooms wide enough to allow a central hitting position.
Off Centre Hitting Position, Central Floor Projector
Those with narrow rooms may need to set up and hit from off centre, towards the side wall. Your room dimensions may allow no other option. If this is the case then a centrally placed floor projector can be a good option.
You can still benefit from the central projector position and it won’t be directly in the way of your target line.
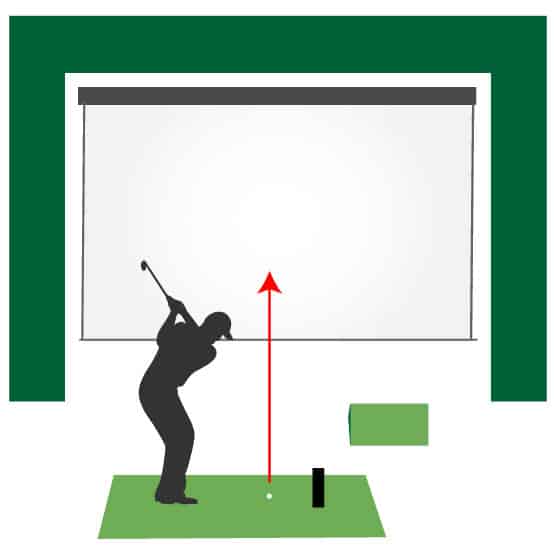
Central Hitting Position, Off Centre Floor Projector
Golfers with narrower rooms might have to set up towards the side of the room, centrally mounted floor projectors will work okay in these setups.
In this case you may wish to choose for an off centre projector, relying on horizontal Keystone correction to optimise your image. This will allow a centred aim and a floor mounted projector that doesn’t get in the way!
My Recommended Golf Simulator Projectors for Floor Mounting
The following projectors are excellent choices for floor mounting, with the right combination of short throw ratios, high brightness, and correction features to make setup easier and safer. All are available through trusted golf simulator retailers like Carl’s Place and Shop Indoor Golf.
🎯BenQ AK700ST
- Resolution: 4K UHD (3840×2160)
- Brightness: 4,000 lumens
- Throw Ratio: 0.69–0.83 (short throw)
- Correction: 3D keystone (H/V ±30° + rotation)
- Light Source: Laser
- 👉 Buy at Carl’s Place!
✅ Premium choice – 4K laser with flexible placement and strong correction features, ideal for floor mounting.
🔹 Optoma ZH450ST
- Resolution: 1080p (1920×1080)
- Brightness: 4,200 lumens
- Throw Ratio: 0.496 (short throw)
- Correction: H/V ±30° keystone
- Light Source: Laser
👉 Buy at Carl’s Place
✅ Strong all-rounder – excellent short throw ratio, good brightness, and affordable laser option.
🔹 BenQ AH500ST
- Resolution: 1080p (1920×1080)
- Brightness: 4,000 lumens
- Throw Ratio: 0.499 (short throw)
- Correction: H/V ±30° keystone
- Light Source: Laser
👉 Buy at Carl’s Place!
✅ Solid value choice – reliable laser short throw with good brightness for home simulator rooms.
Essential Accessories for Floor Mounting a Projector
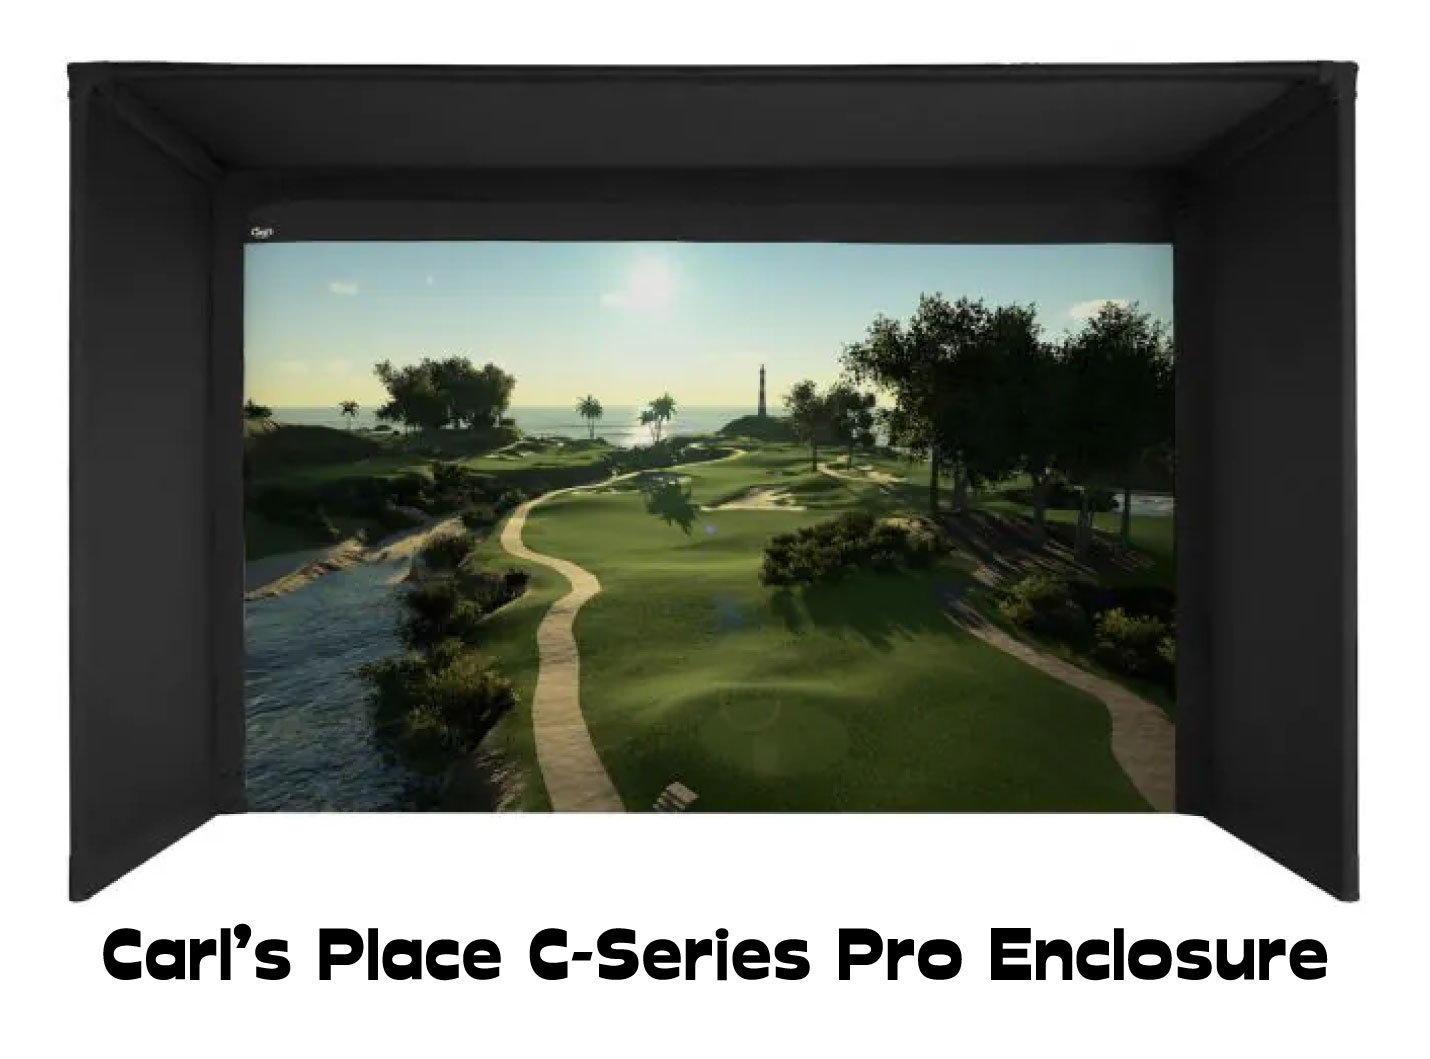
An absolutely essential accessory for a floor mounted projector is a protective box in which it can sit. This will usually have artificial grass on the top side for added protection and aesthetics.
Protecting your Floor Mounted Projector
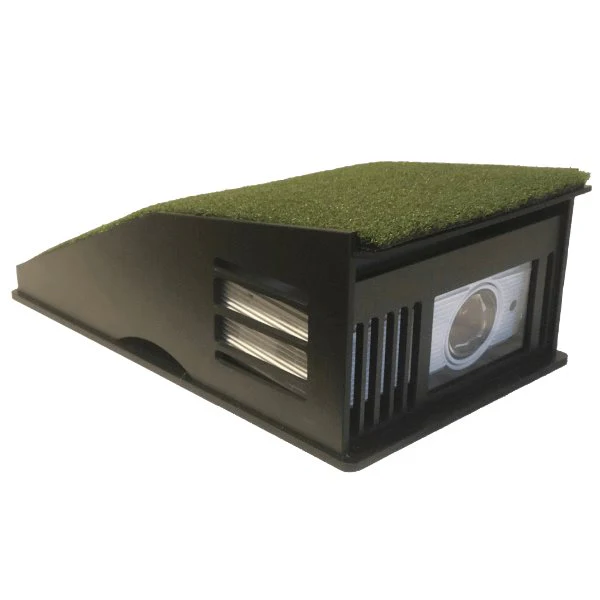
Some golfers who are skilled at DIY will build an enclosure like this themselves. However if you want a sturdy, well ventilated enclosure that looks the part, check out Shop Indoor Golf!
What Other Projector Features Are Important to Understand?
Throw Ratio
The throw ratio of a projector determines how large an image it will produce on your impact screen from a given distance. This is a property of the lens inside the projector.
Key terms to know:
- Throw Distance: The distance from your projector to your impact screen.
- Horizontal Image Width: The width of the projected image across the screen.
For golf simulators, you’ll usually need a short throw projector with a ratio between 0.4 and 1.1. This allows you to fill your screen from a short distance while avoiding shadows or collisions with your swing.
To plan your setup properly:
- Decide your screen size – measure or choose your impact screen’s horizontal width.
- Mark your hitting position – place your mat and tee position first; everything else should be built around this anchor point.
- Calculate throw distance – match your projector’s throw ratio to your screen width using tools like the Projector Central Calculator.
💡 Tip: Many modern projectors include a small amount of zoom (typically 10–20%) to give you flexibility if your throw distance doesn’t line up perfectly.
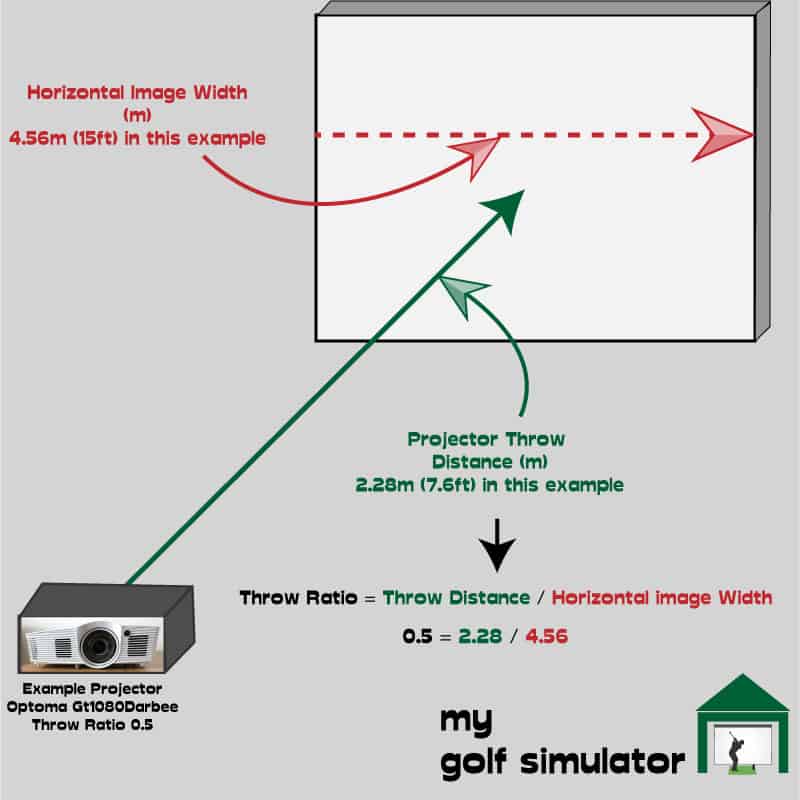
I have a dedicated post all about projector throw ratios here. Please check it out!
Resolution, Lumens, and Contrast Ratio
When comparing golf simulator projectors, it’s tempting to chase the highest numbers—but not all specs matter equally.
- Resolution: Aim for at least 1080p (Full HD). If your budget allows, 4K UHD projectors provide sharper detail and are now much more affordable, especially for simulators running modern software like GSPro.
- Lumens (Brightness): Brightness is critical. A projector with 3,000–5,000 lumens is ideal for golf simulators, depending on your room’s lighting. If you have ambient light in your space, lean toward the higher end of that range.
- Contrast Ratio: While higher contrast ratios (e.g., 1,000,000:1) look impressive on spec sheets, their real-world impact in a golf simulator is limited because ambient light and impact screens reduce perceived contrast. A solid 10,000:1 or higher is more than enough (or lower!).
👉 Bottom line: Don’t let resolution or contrast ratios distract you from the specs that can make or break your setup—throw ratio and keystone/lens shift features. Get those right first, then choose the highest resolution and brightness that fits your budget.
Aspect Ratio
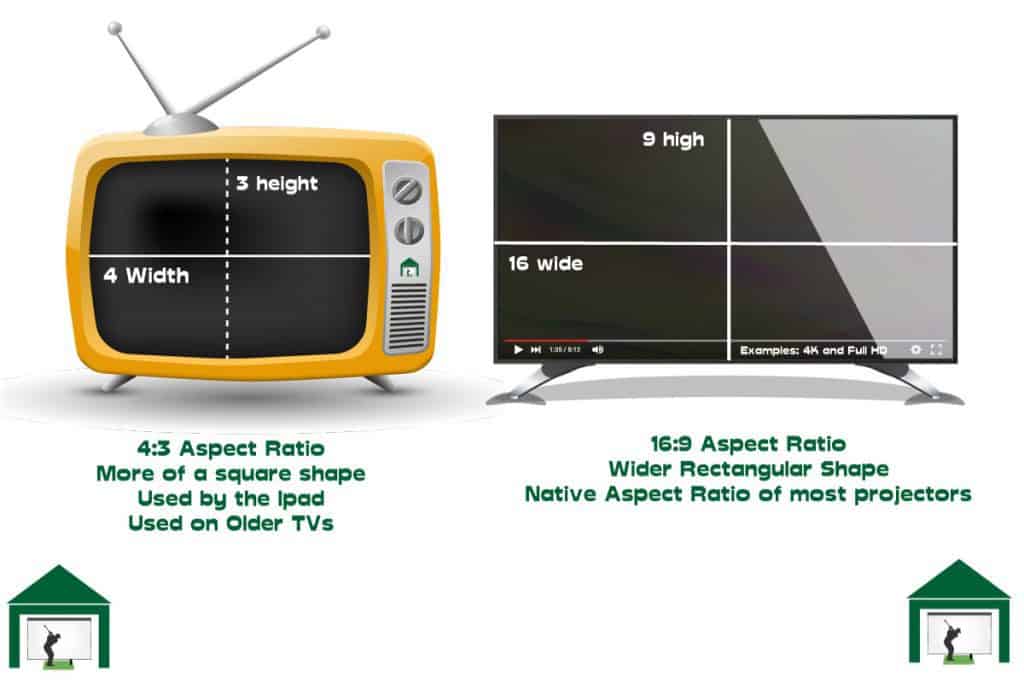
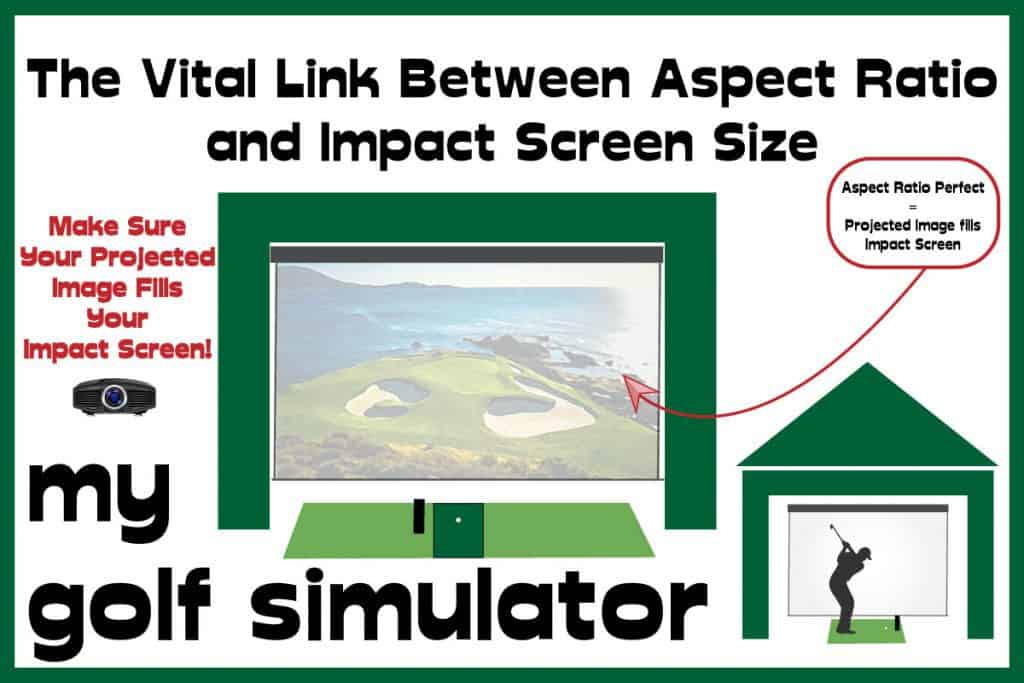
Aspect ratio is the proportion of width to height in your projected image. Most projectors and computers can output different aspect ratios, so you can match the image to your screen setup.
- 16:9 (Widescreen): This is the standard for TVs, cinema, and gaming. It gives a wide, cinematic look but can feel too stretched if your room is narrow.
- 4:3 (Square-ish): A taller, more traditional format that works very well for golf simulators in compact or narrow spaces. It ensures you don’t end up with an image that looks short and “letterboxed” from top to bottom.
- Other Flexible Options (2025+): Many modern golf-specific projectors now include “Screen Fill” or auto-aspect tools, letting you quickly switch between ratios with a remote—useful if you want 16:9 for movies/games and 4:3 for golf simulation.
👉 Tip: Choose your impact screen dimensions first, then match the projector’s aspect ratio to avoid wasted space or distorted images.
5 Mounting Locations to Consider for your Golf Simulator Projector
Above and Central
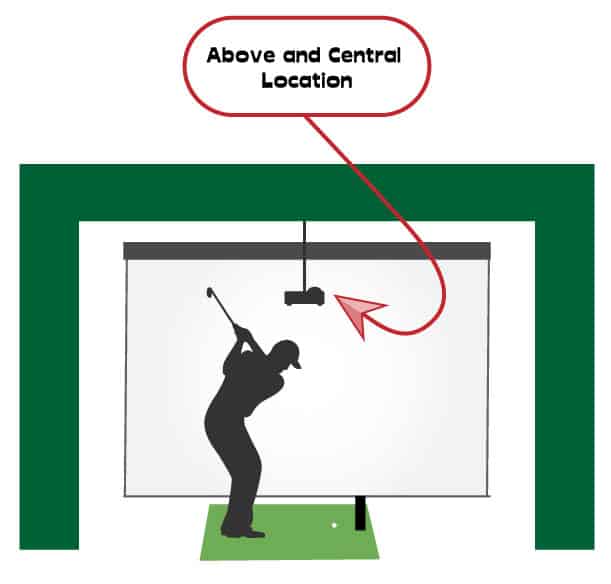
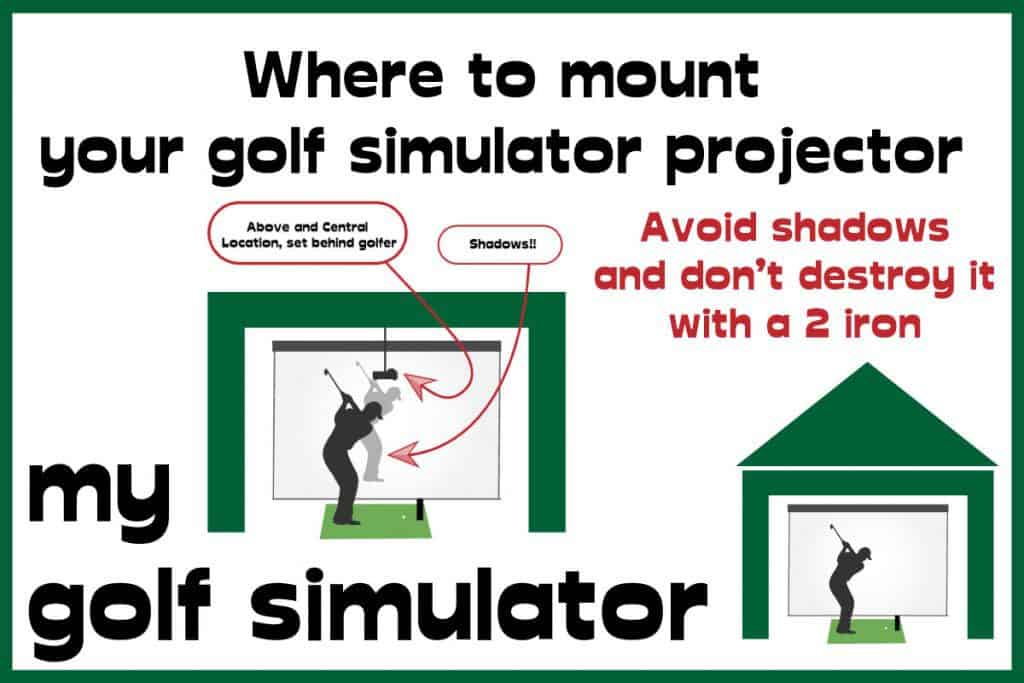
The ideal position to mount your golf simulator projector is above the golfer and in line with the centre of the impact screen. This means you don’t have to rely on any keystone correction and you’ll have a beautiful centred image with optimal resolution.
However, depending on the height of you and your room, you may be struggling to find a position in an above and central location that doesn’t get in the way of your swing. Mounting the projector too far back will also cause your own shadow to be casted onto the screen.
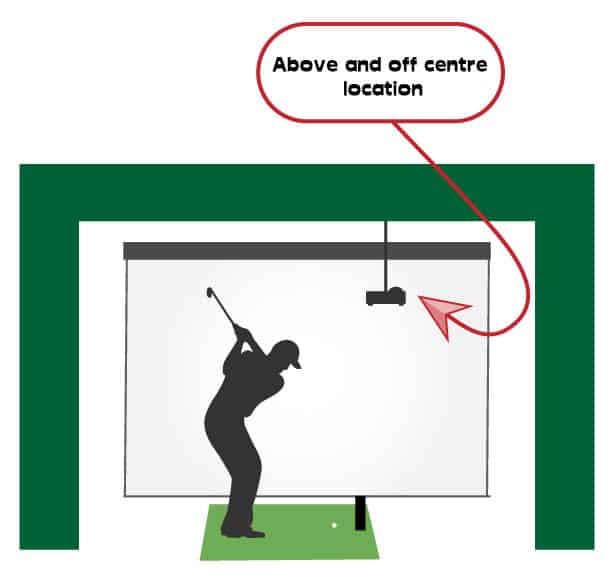
Above and Off Centre
‘Above and off centre’ is the next best mounting location after ‘above and central’. You will have a projector that is still at an optimal vertical height and you won’t have to worry about the ball striking it on it’s way towards the impact screen.
However, you will need to either tilt the projector (causing an imperfect rectangular screen) or rely on horizontal keystone correction to achieve a perfect image. Remember, not all projectors come equipped with horizontal keystone correction.
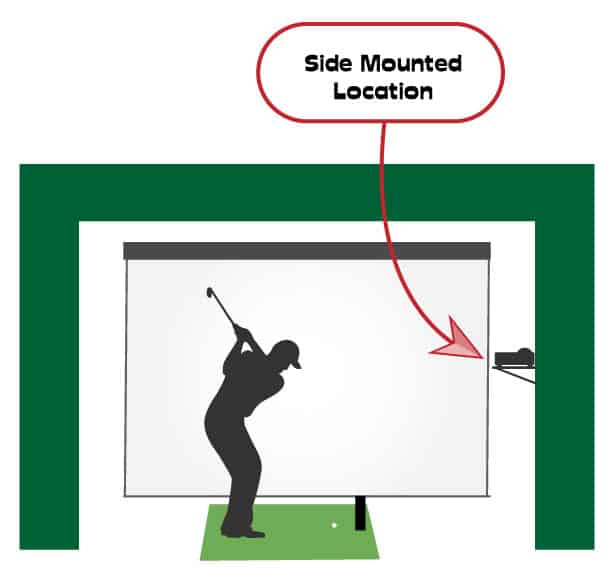
Side Mounted
Side mounting a projector is a different sort of setup to most. Just like floor mounted simulator projectors, you won’t need to worry about striking the projector with your swing. It’ll be out of the way to the side and also at a convenient height to match the centre of your impact screen.
However you’ll have to rely fully on horizontal keystone correction which is a feature of more premium projectors. This may slightly reduce the crispness of the image.
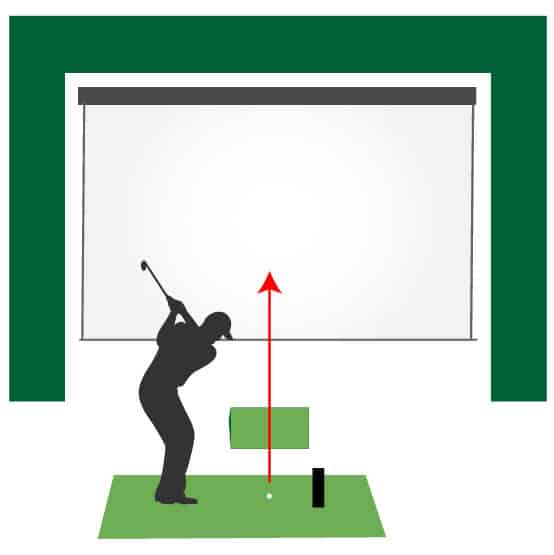
Floor Mounted Central
A centrally located floor mounted projector will be well placed to produce a nice rectangular image on the screen, relying on vertical keystone correction to skew the image back to normal.
There is a risk that the projector will be in the way of your target line and the shots you hit on a low trajectory. This problem will vanish if your room is narrow and you have to line up with your target line towards the side of your room (see above).
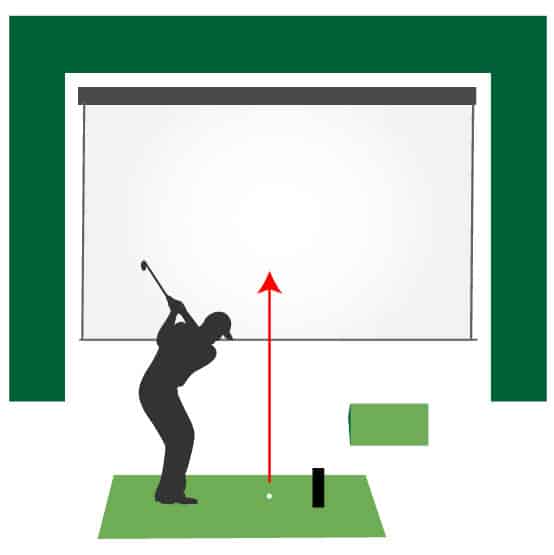
Floor Mounted Off Centre
This is a great projector position. You’ll enjoy the benefits of a floor mounted projector whilst having a clear path from your central hitting position to screen. You will have to tilt the projector towards the centre of the screen or rely on horizontal as well as vertical keystone correction.
I have a dedicated post all about positioning your golf simulator projector within your simulator room. It’s one of my most popular posts. Check it out here! 😀
Conclusion
Floor mounting is an excellent option if your golf simulator room has limited height or if ceiling installation isn’t practical. With the right projector and a sturdy floor enclosure, you can protect your investment and enjoy a clean, shadow-free playing experience.
When choosing a floor-mounted setup, remember:
- Vertical keystone correction is essential.
- Horizontal keystone correction is highly recommended if you plan to offset the projector from the center.
- A short throw ratio (0.4–0.8) ensures you can fill your screen without placing the projector too far into your hitting zone.
Recommended Models for Floor Mounting (2025)
- BenQ AK700ST – 4K UHD, 4,000 lumens, short throw with advanced 3D keystone. A premium, future-proof option.
- Optoma ZH450ST – 1080p, 4,200 lumens, laser-powered short throw with H/V keystone correction. Great balance of performance and price.
- BenQ AH500ST – 1080p, 4,000 lumens, laser short throw. A reliable and affordable option for most home setups.
👉 Don’t forget to pair your projector with a purpose-built floor enclosure to protect it from ball strikes and keep your setup looking professional.
Floor-Mounted Projector FAQs
Q: Why would I floor mount instead of ceiling mount?
A: Floor mounting is ideal for low-ceiling rooms, garages, or basements where ceiling height or structure makes ceiling mounting impractical. It also avoids complicated ceiling installs and can look neat with a turf-backed enclosure.
Q: Do I need vertical keystone correction?
A: Yes. Any floor-mounted projector will need vertical keystone (or lens shift) to square up the image. Modern models like the BenQ AK700ST use auto screen-fit tools to make this process fast and minimize image-quality loss.
Q: What about horizontal keystone correction?
A: If your projector is not centered on the screen (e.g., offset to one side), horizontal keystone correction is critical. Premium projectors usually offer both vertical and horizontal correction, or hybrid lens shift for even better clarity.
Q: How do I protect a floor-mounted projector from ball strikes?
A: Always use a protective enclosure designed for golf simulators. These enclosures have angled tops, turf coverings, and cooling vents to absorb impact and keep your projector safe.
Q: Will a floor-mounted projector cause shadows?
A: Not if placed correctly. Use a short throw (0.4–0.8 throw ratio) and position the projector just behind and slightly to the side of the hitting zone. Ultra-short-throw models can reduce shadows further, but they need very sturdy enclosures.
Q: Is brightness (lumens) more important for floor setups?
A: Yes. Because floor-mounted projectors are usually closer to the hitting area and may compete with ambient light, you’ll want at least 3,500–5,000 lumens for a bright, clear image.
Q: Can I use a budget projector for a floor mount?
A: Budget short-throw projectors can work if you control room lighting and don’t mind some compromises in image sharpness. For serious golfers, purpose-built models like the BenQ AH500ST or Optoma ZH450ST are safer long-term choices.
Q: Do I lose clarity with keystone correction?
A: Digital keystone does reduce clarity, but newer 2025 models use hybrid optical/digital correction or auto-fit sensors that preserve most of the resolution. Lens shift is even better if your projector has it.
Q: Where exactly should I place a floor-mounted projector?
A: Ideally just behind the hitting mat and slightly off to the side, at a distance that matches your projector’s throw ratio. Use tools like the ProjectorCentral calculator to check exact placement.
Mevo Gen 2 Space Requirements
Gray Impact Screens – Pros and Cons
ABOUT THE AUTHOR
Hello! My name is Alex and it is my mission to bring you all the information you need to build your own home golf simulator! I hope mygolfsimulator.com helps you on your journey to better golf at home!
LEGAL INFORMATION
On this site, you'll find articles on all aspects of building a golf simulator. I will also link to other sites where you can buy some of the simulator components. Some of these links may be affiliate links, which means if you click them I gain a small commission at no extra cost to you. This really helps out me and my site so thank you in advance! mygolfsimulator.com and all related social media accounts are property of Awonline LTD.
